• Skip to primary navigation
  • Skip to content
  • Skip to primary sidebar
  • Skip to footer

Eatentions

Organic * Local * Sustainable

  • Home
  • About Us
  • Recipes
  • Culinary Socials
  • CSM – Community Sourced Meals
  • Contact
  • Nav Social Menu

    • Facebook
    • Instagram
    • Pinterest
    • RSS
    • Snapchat
    • Twitter

Meat and Poultry

Seared Duck Breast with Rosemary Cherry Sauce

October 28, 2015 by Michelle Michelotti-Martinez

Seared Duck Breast with Rosemary Cherry Sauce

Seared Duck Breast with Rosemary Cherry Sauce

OHHHH it’s finally fall…I fight the transition, I really do; not QUITE ready to let those lazy summer days go but then bounty kicks in, harvest keeps me busy and from one day to the next I am full on into it, FULL ON and then as the days get shorter and the air crisper I dream of making all those fall comfy foods that make us all happy….

Okay enough about transition because we have seared duck breasts to chat about today! Yep duck breasts. You might have thought I was leading into some more comfy type foods (I have all fall and winter to do that)…besides I have a party this weekend and I need to do some WOWING (is that a word?)

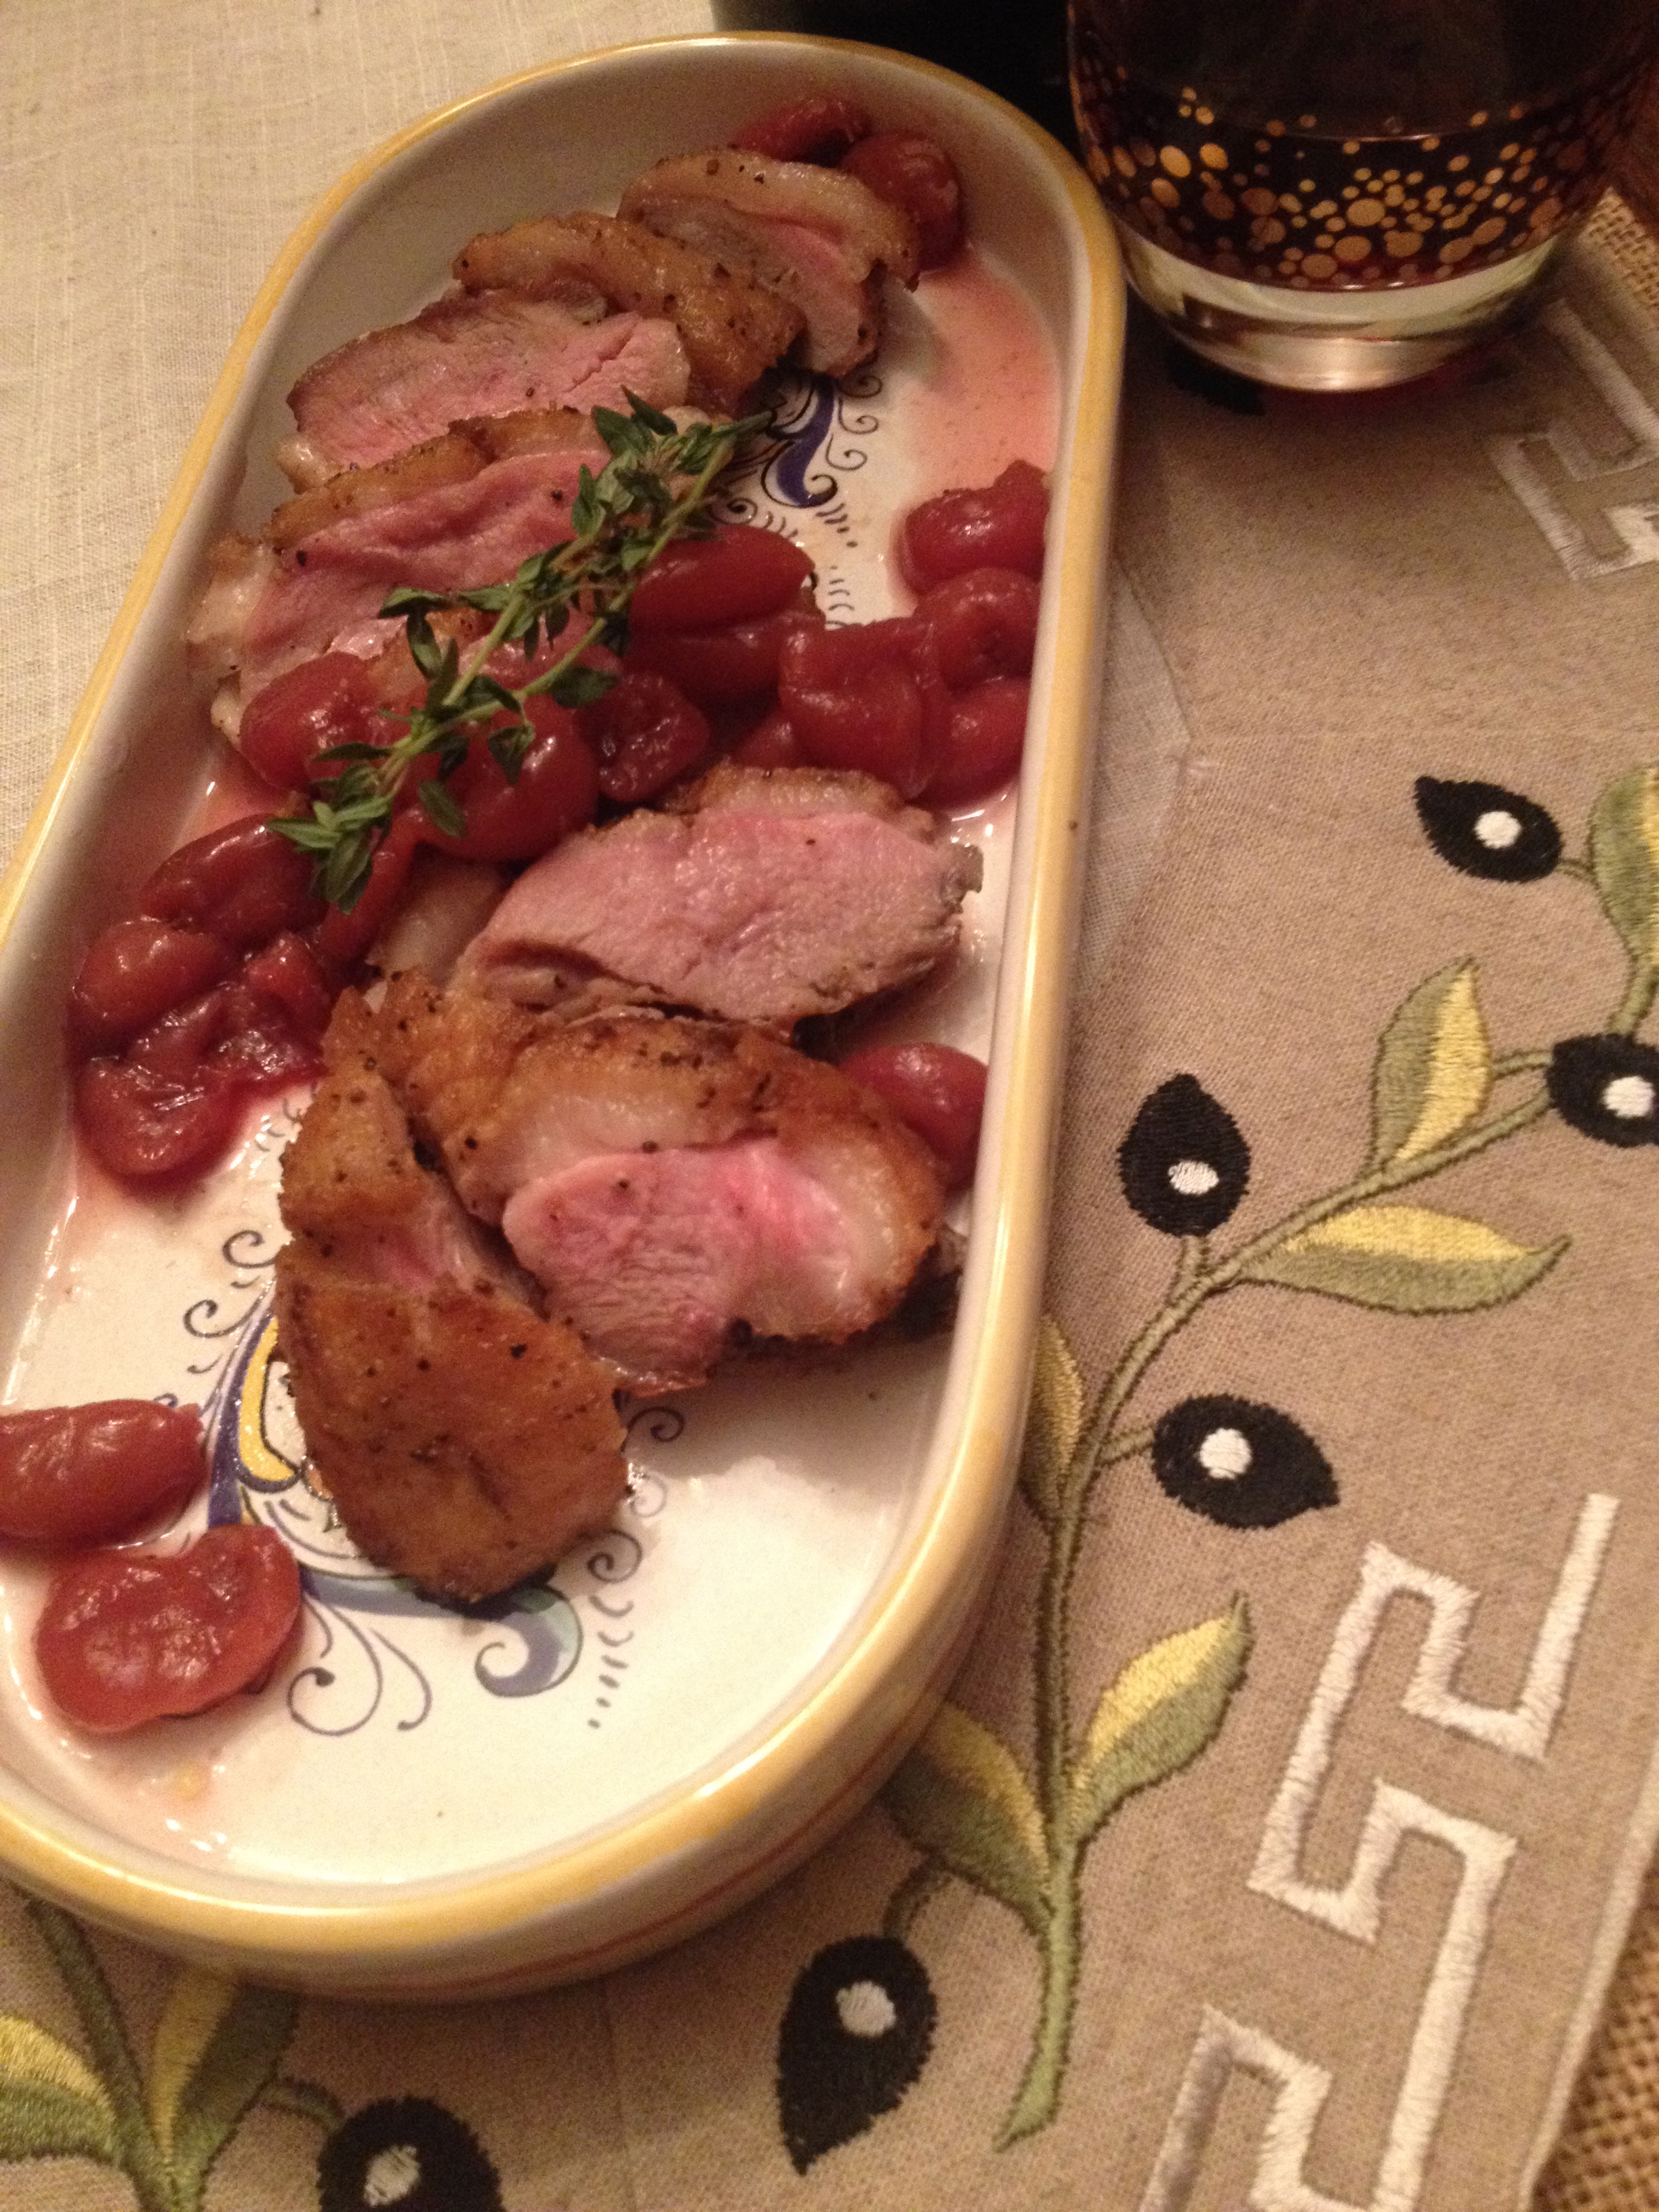
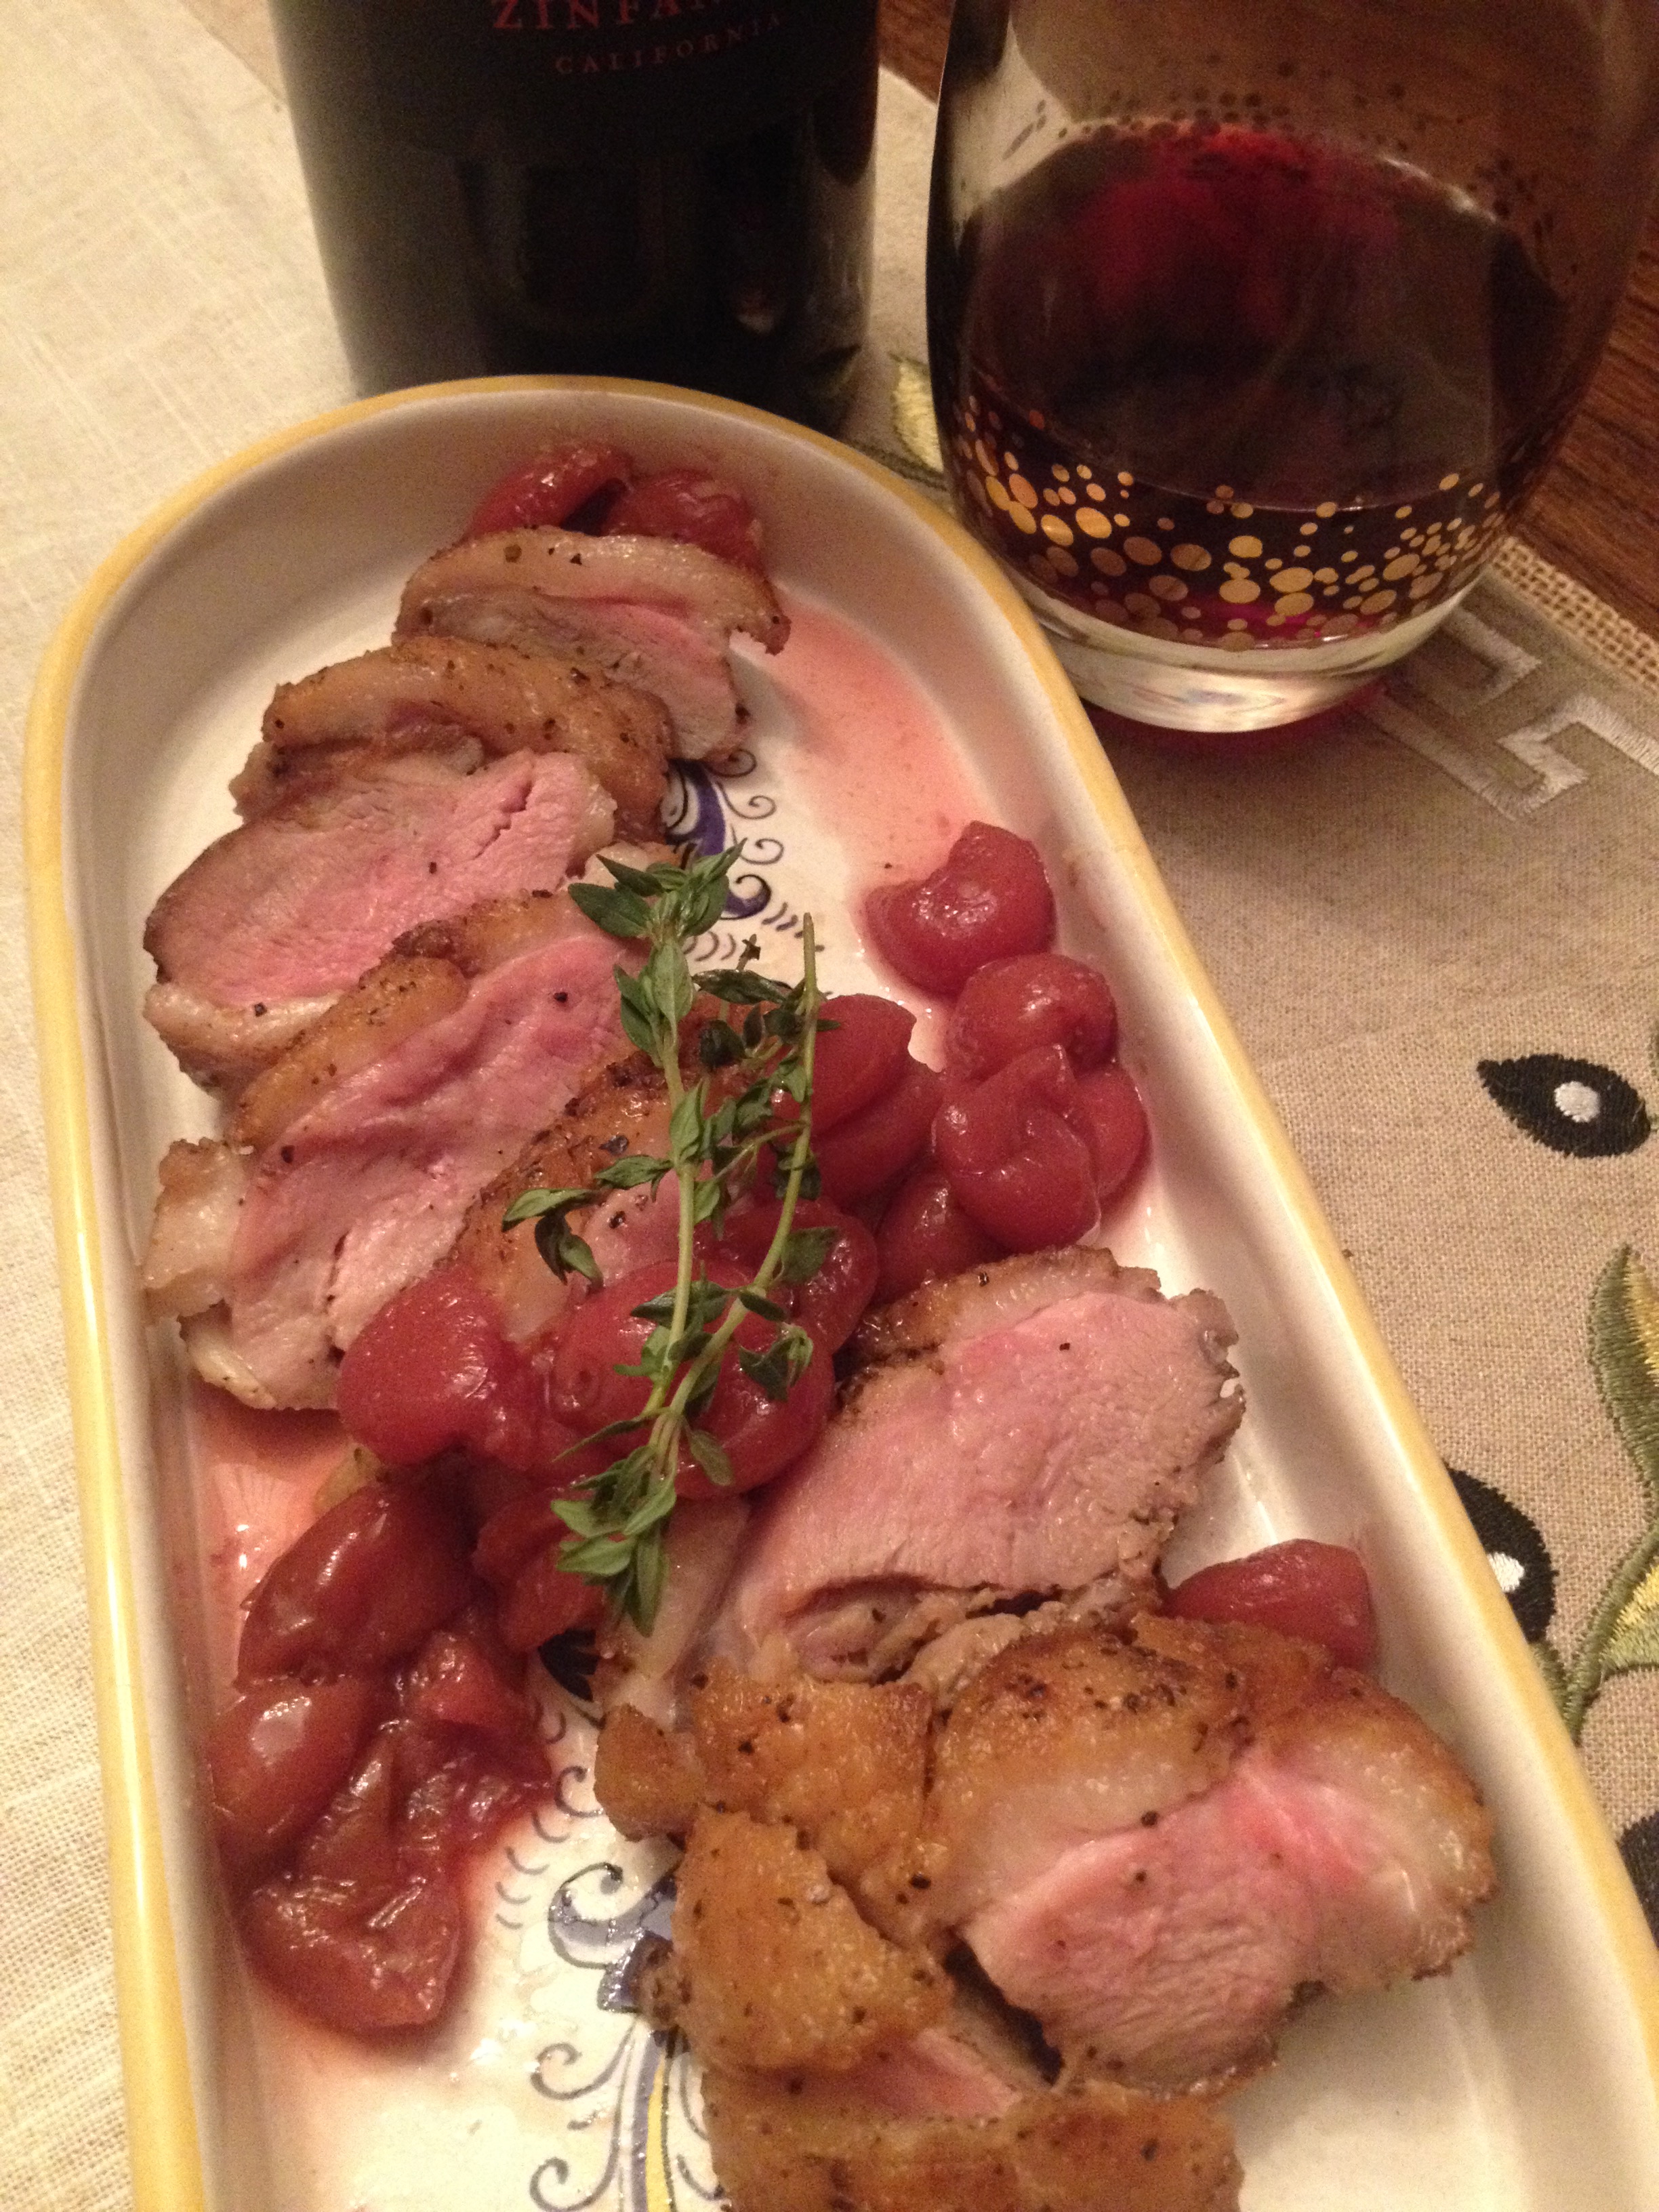
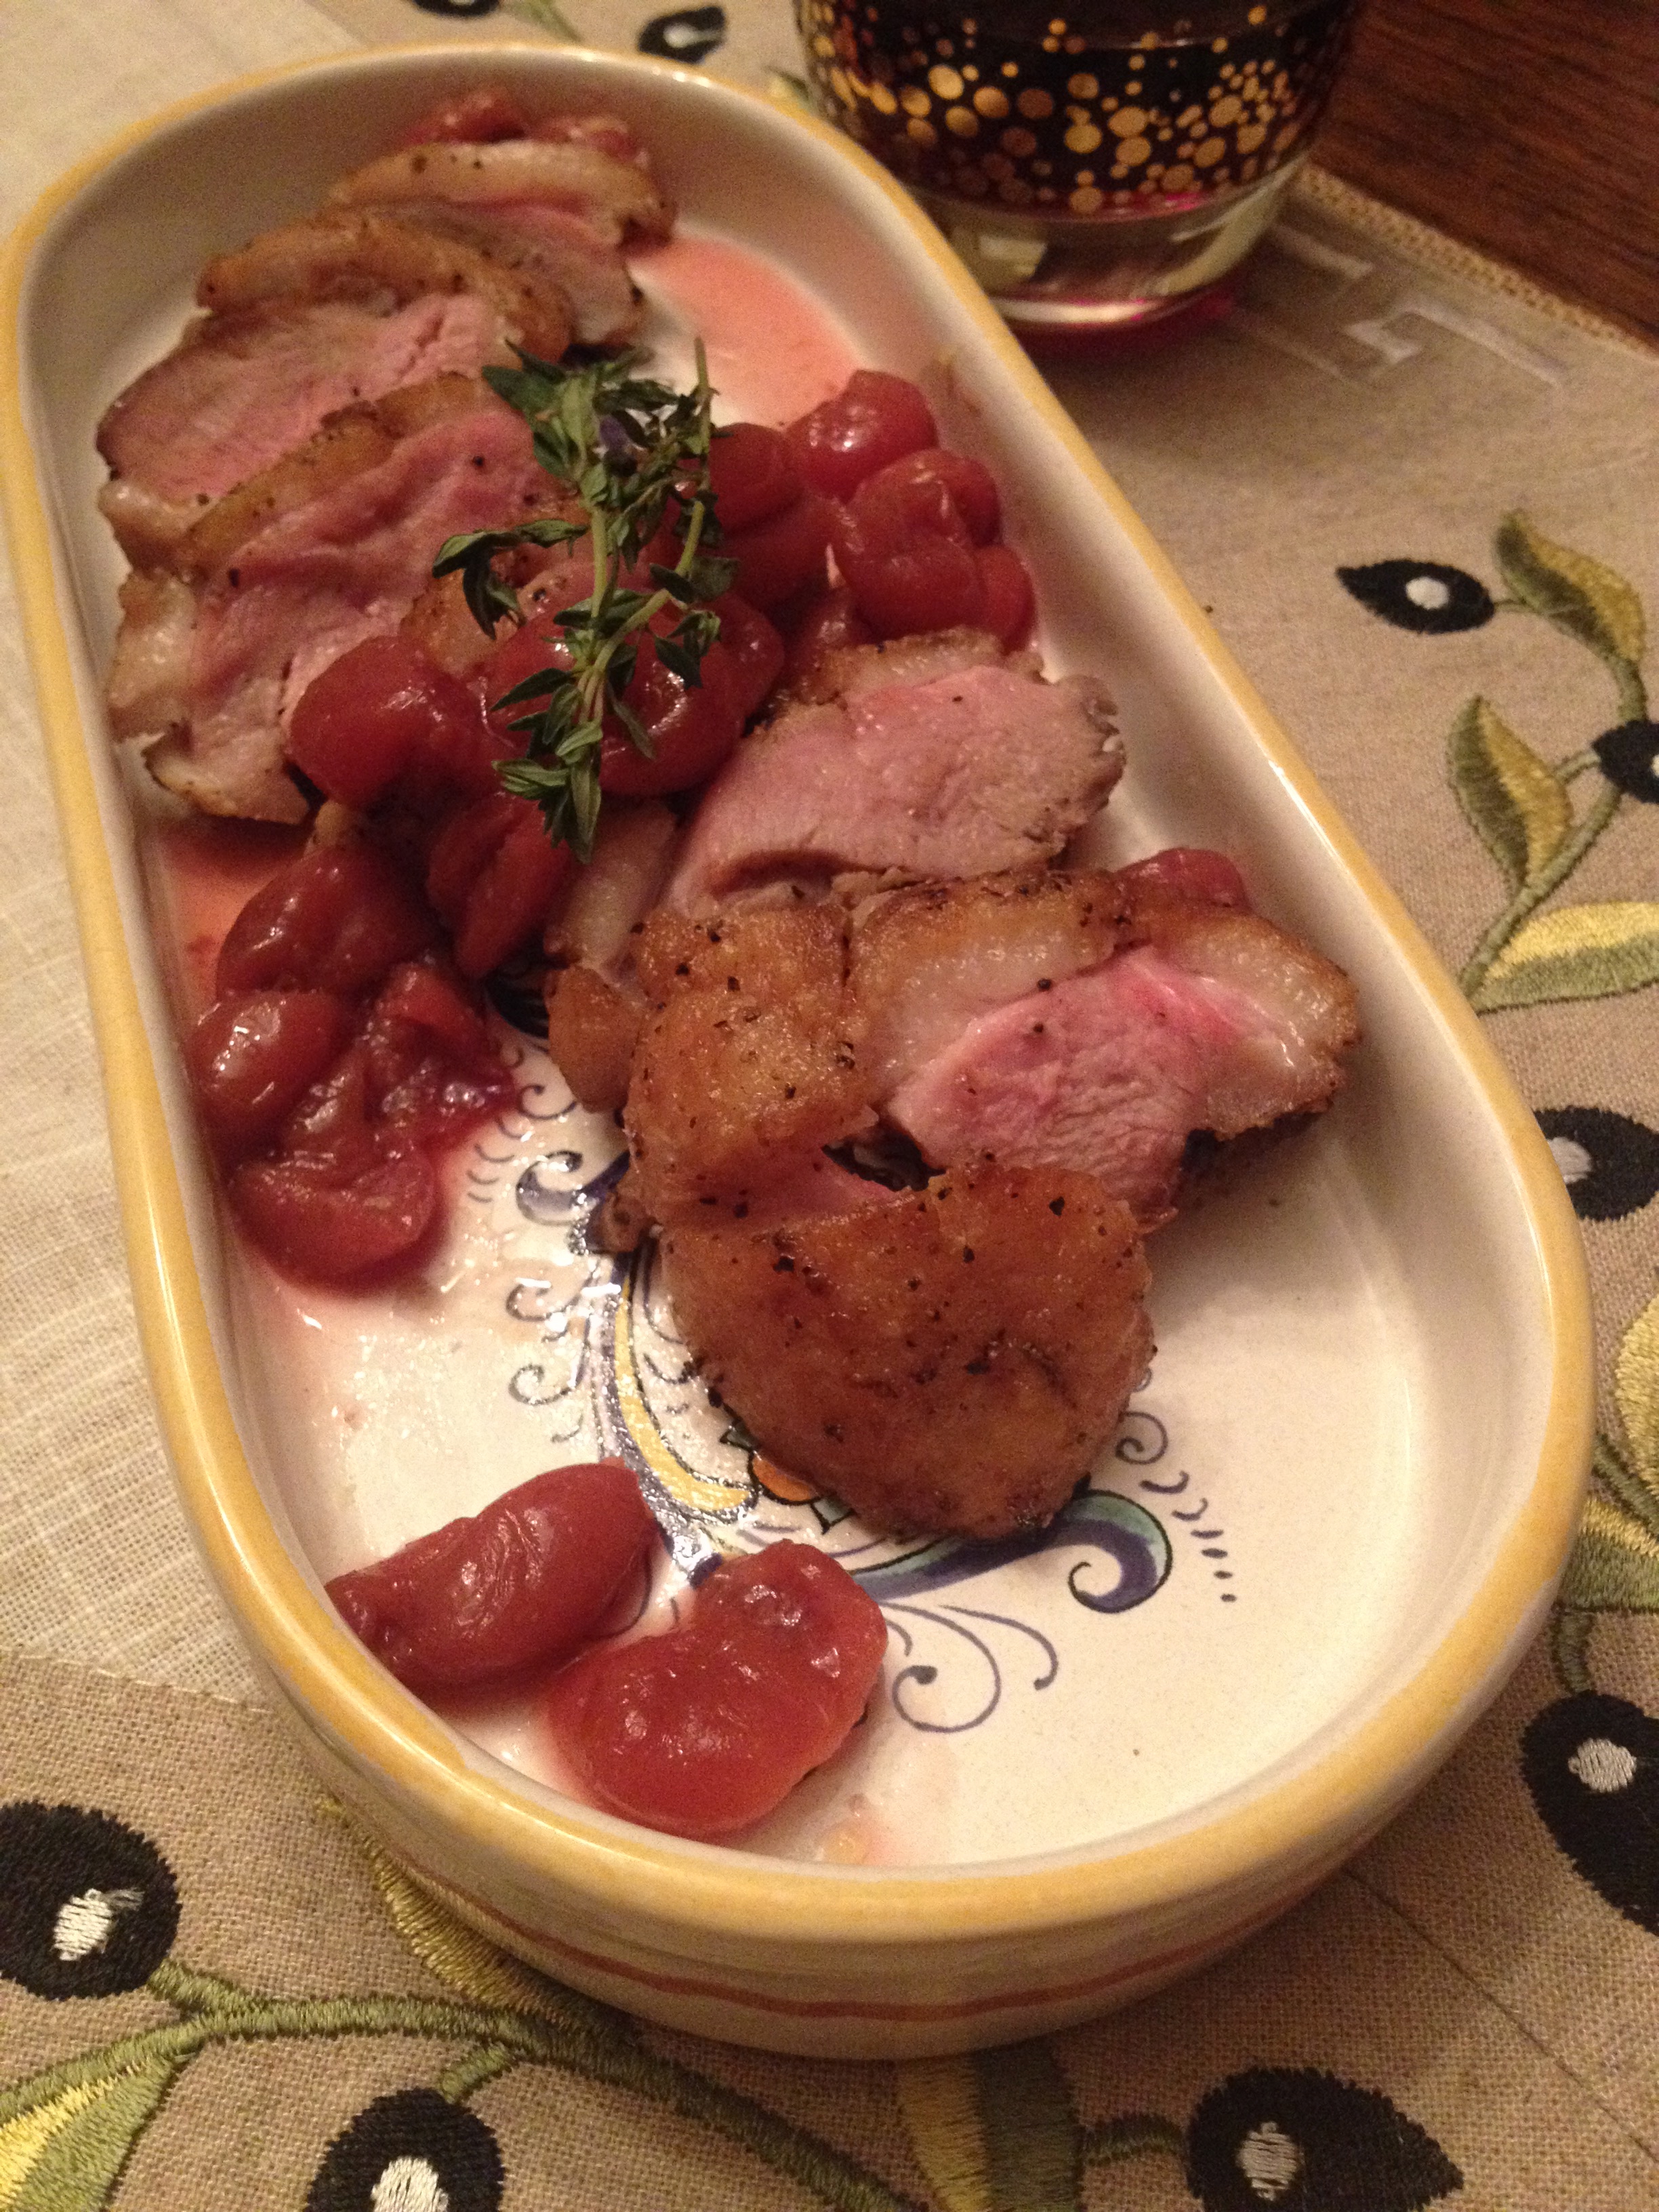
Anyway, not only does seared duck breasts sound really like a sexy and fancy main dish, I plan on serving a delicious rosemary cherry sauce to serve on top. Seriously, I think we all know that duck and cherries are like two peas in a pod, they just make each other super happy.

Seared Duck Breast with Rosemary Cherry Sauce

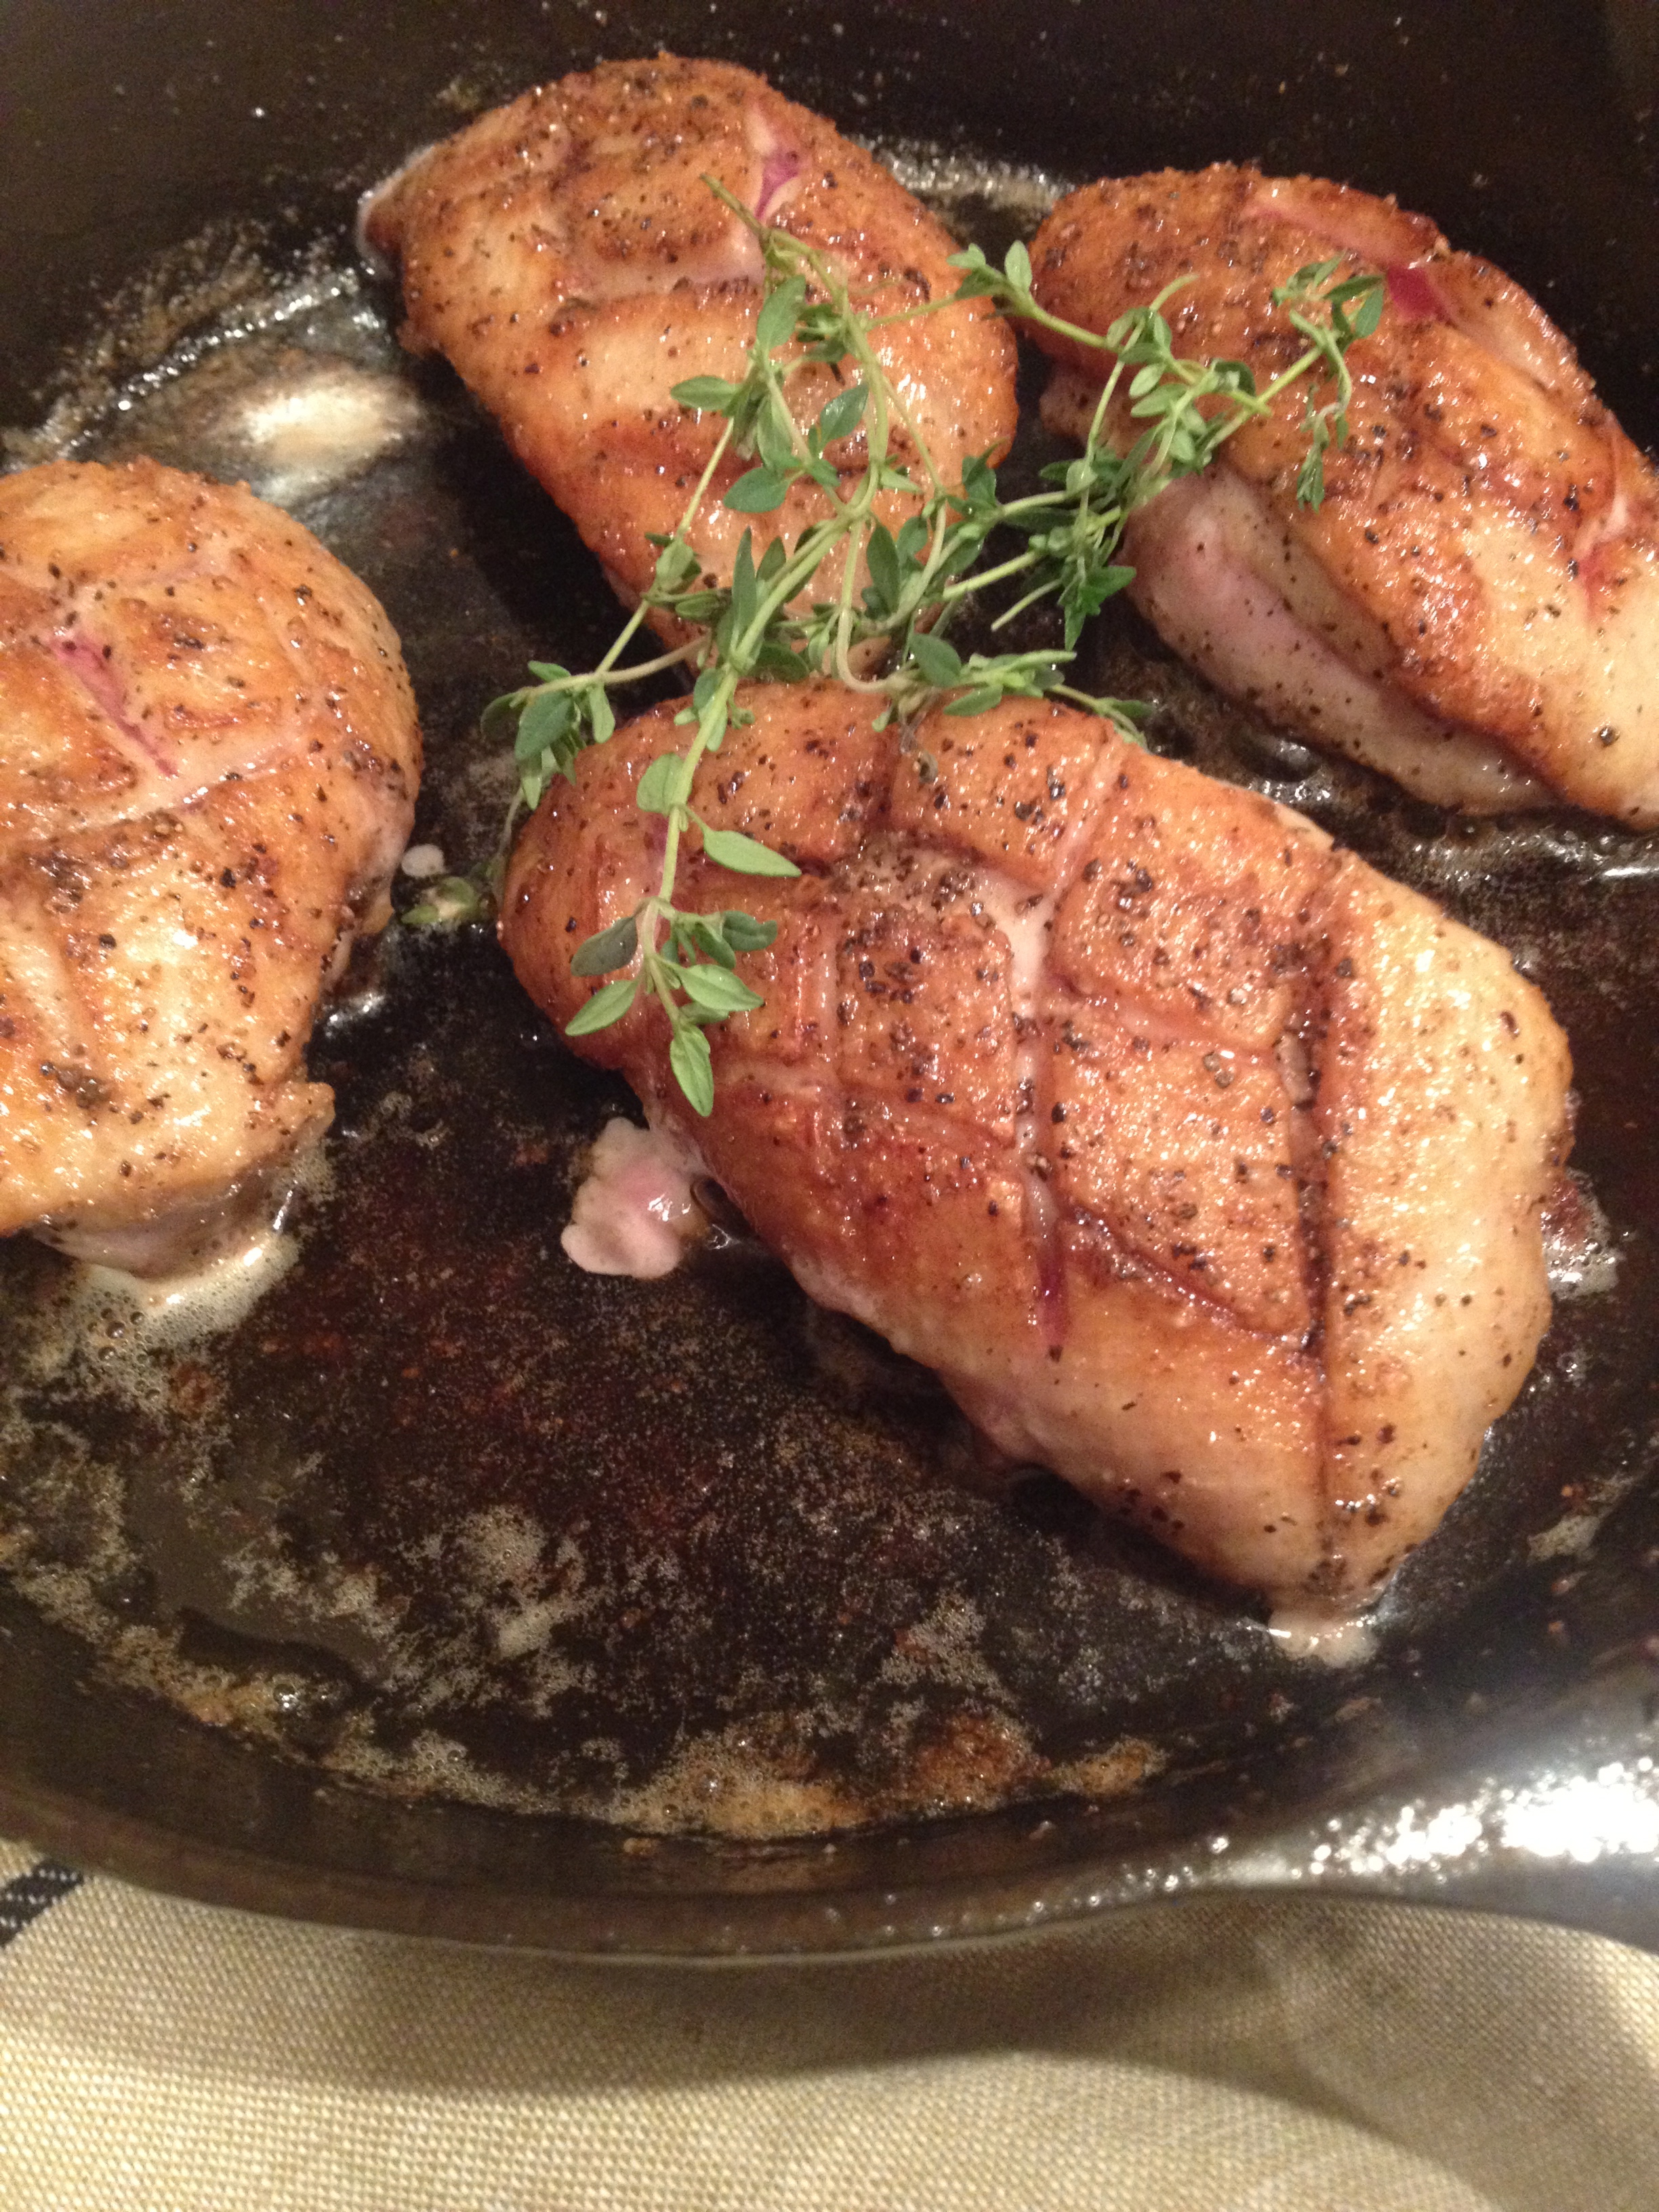
The most difficult part of this recipe is that you have to “score” the skin of the duck breast. I don’t mean rate it like in a literally score but have to cut a crisscross pattern into the skin (Please don’t cut the meat at all) so that the fat near the skin can render and become super yummy crispy!

As for the fancy cherry sauce, it is super simple too and if you don’t have access to fresh cherries (it’s sorta past season in fall unless you are a nut case like me and have some that have been canned) just use frozen, they are a super substitute.

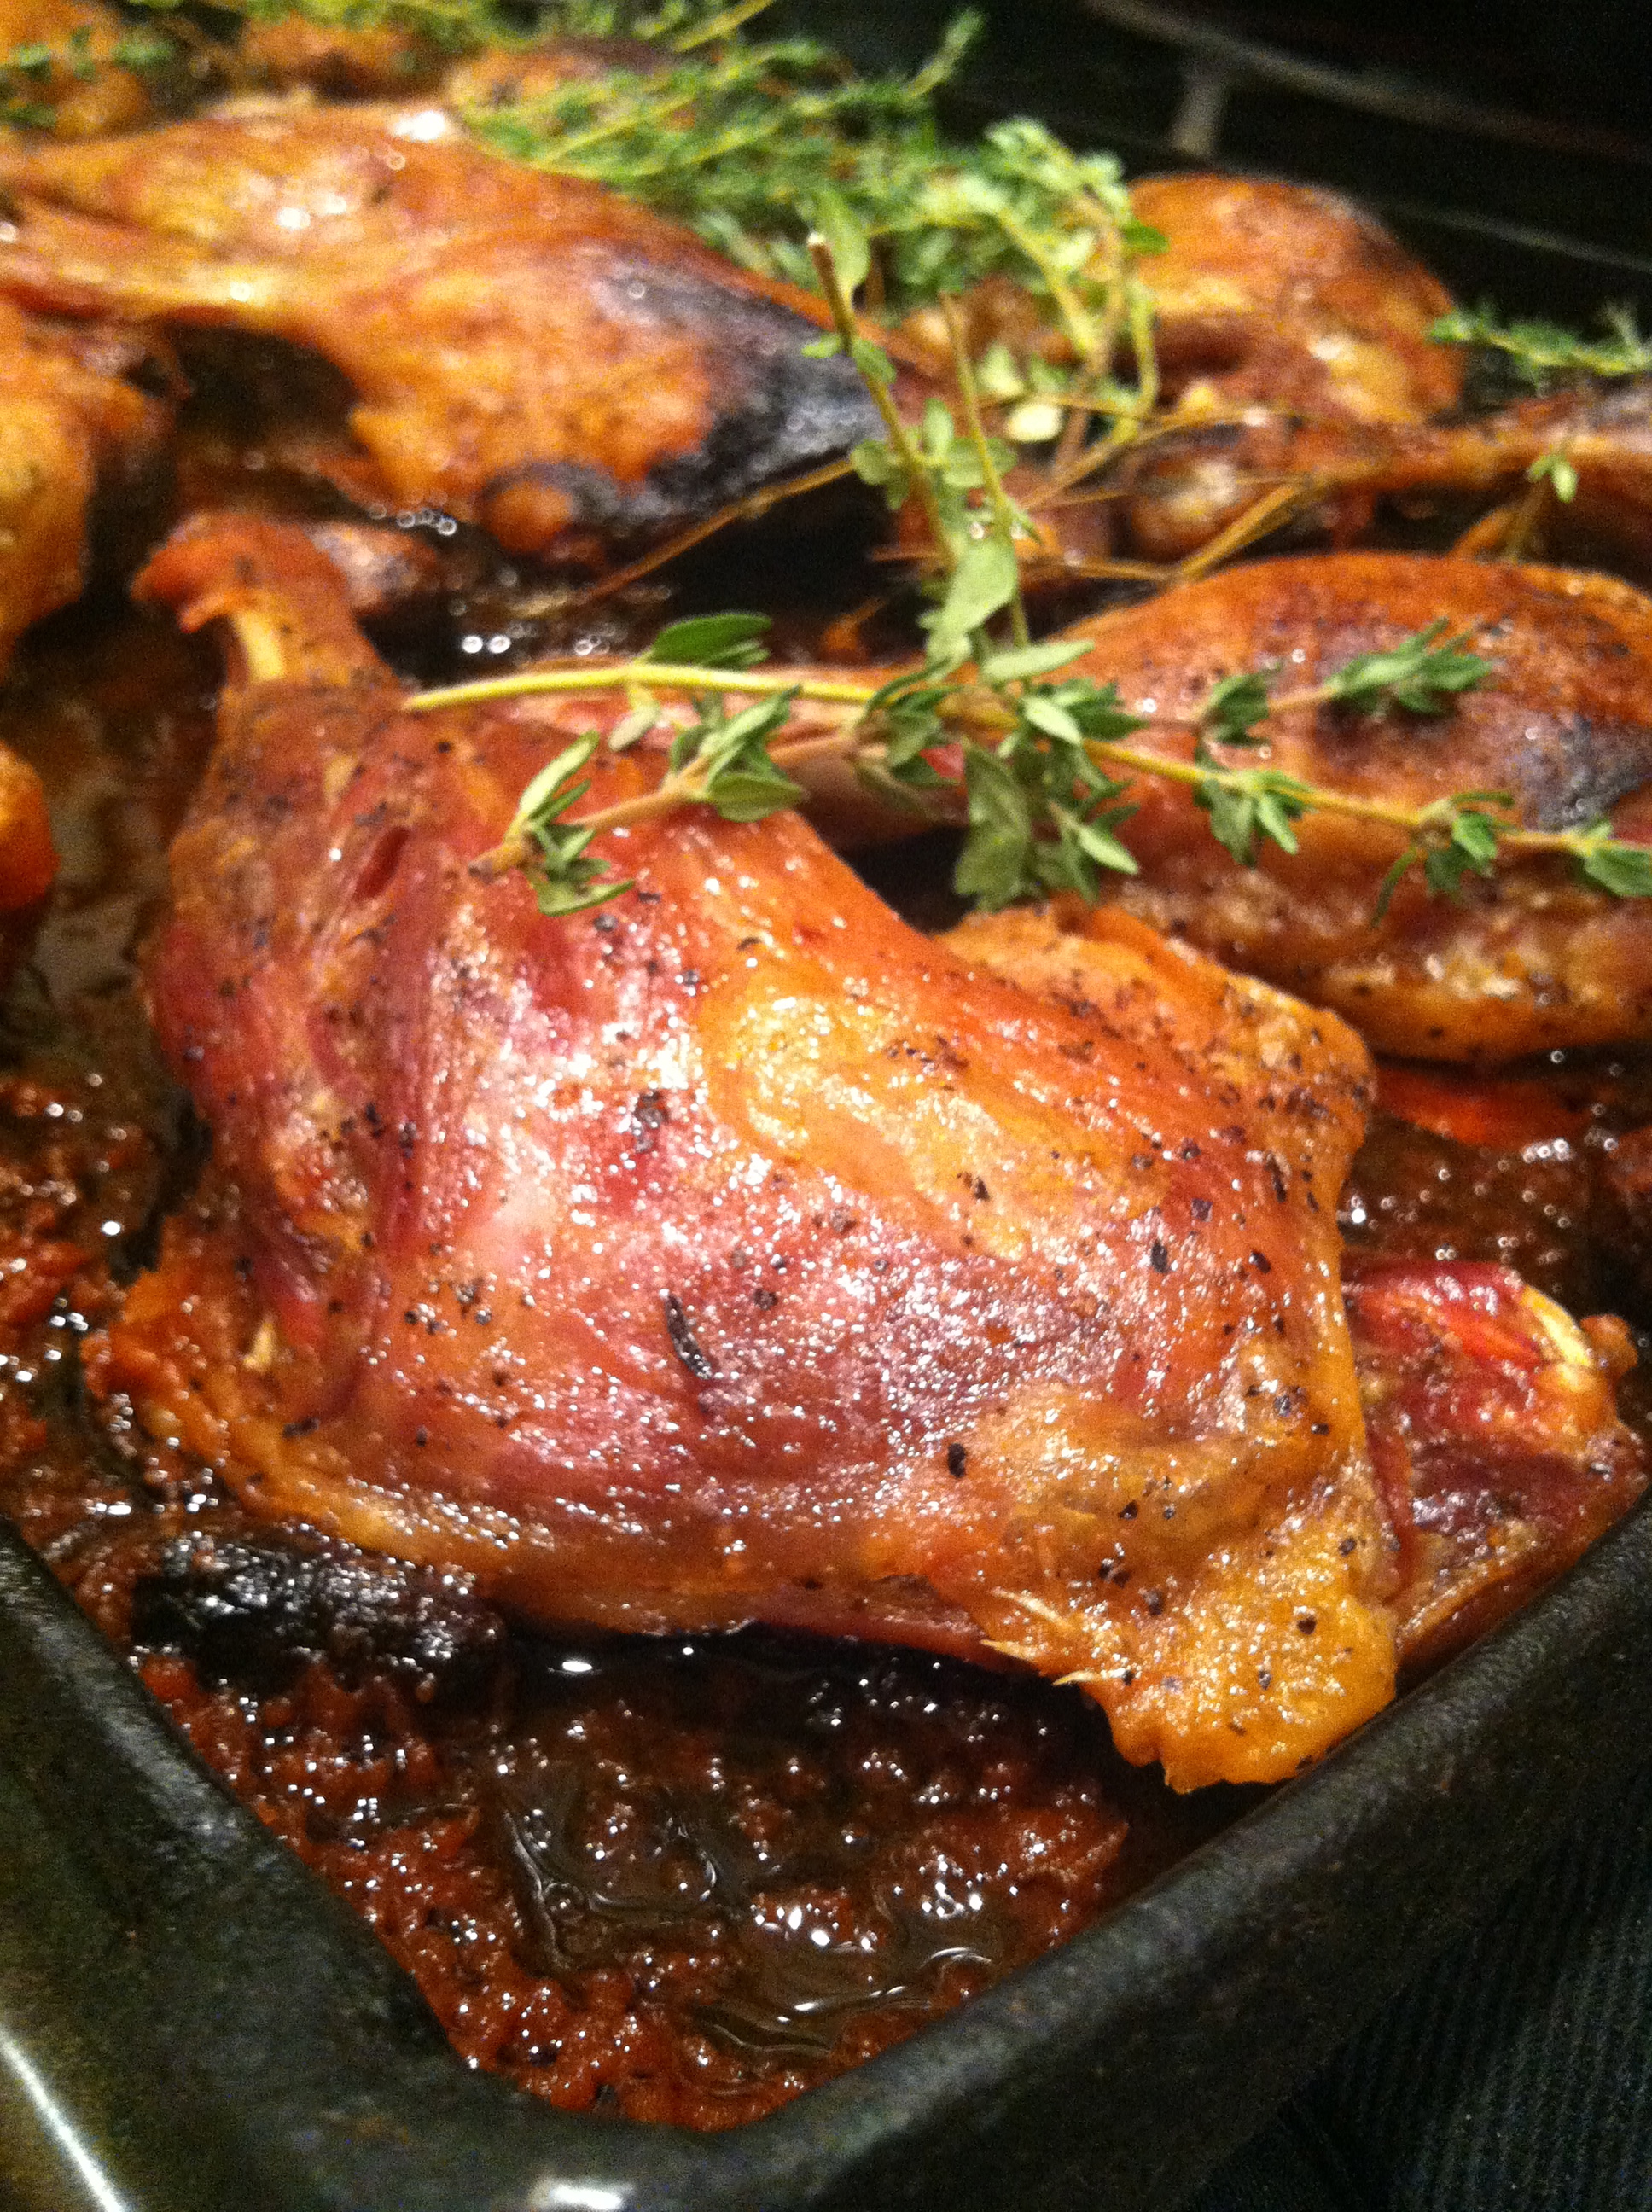
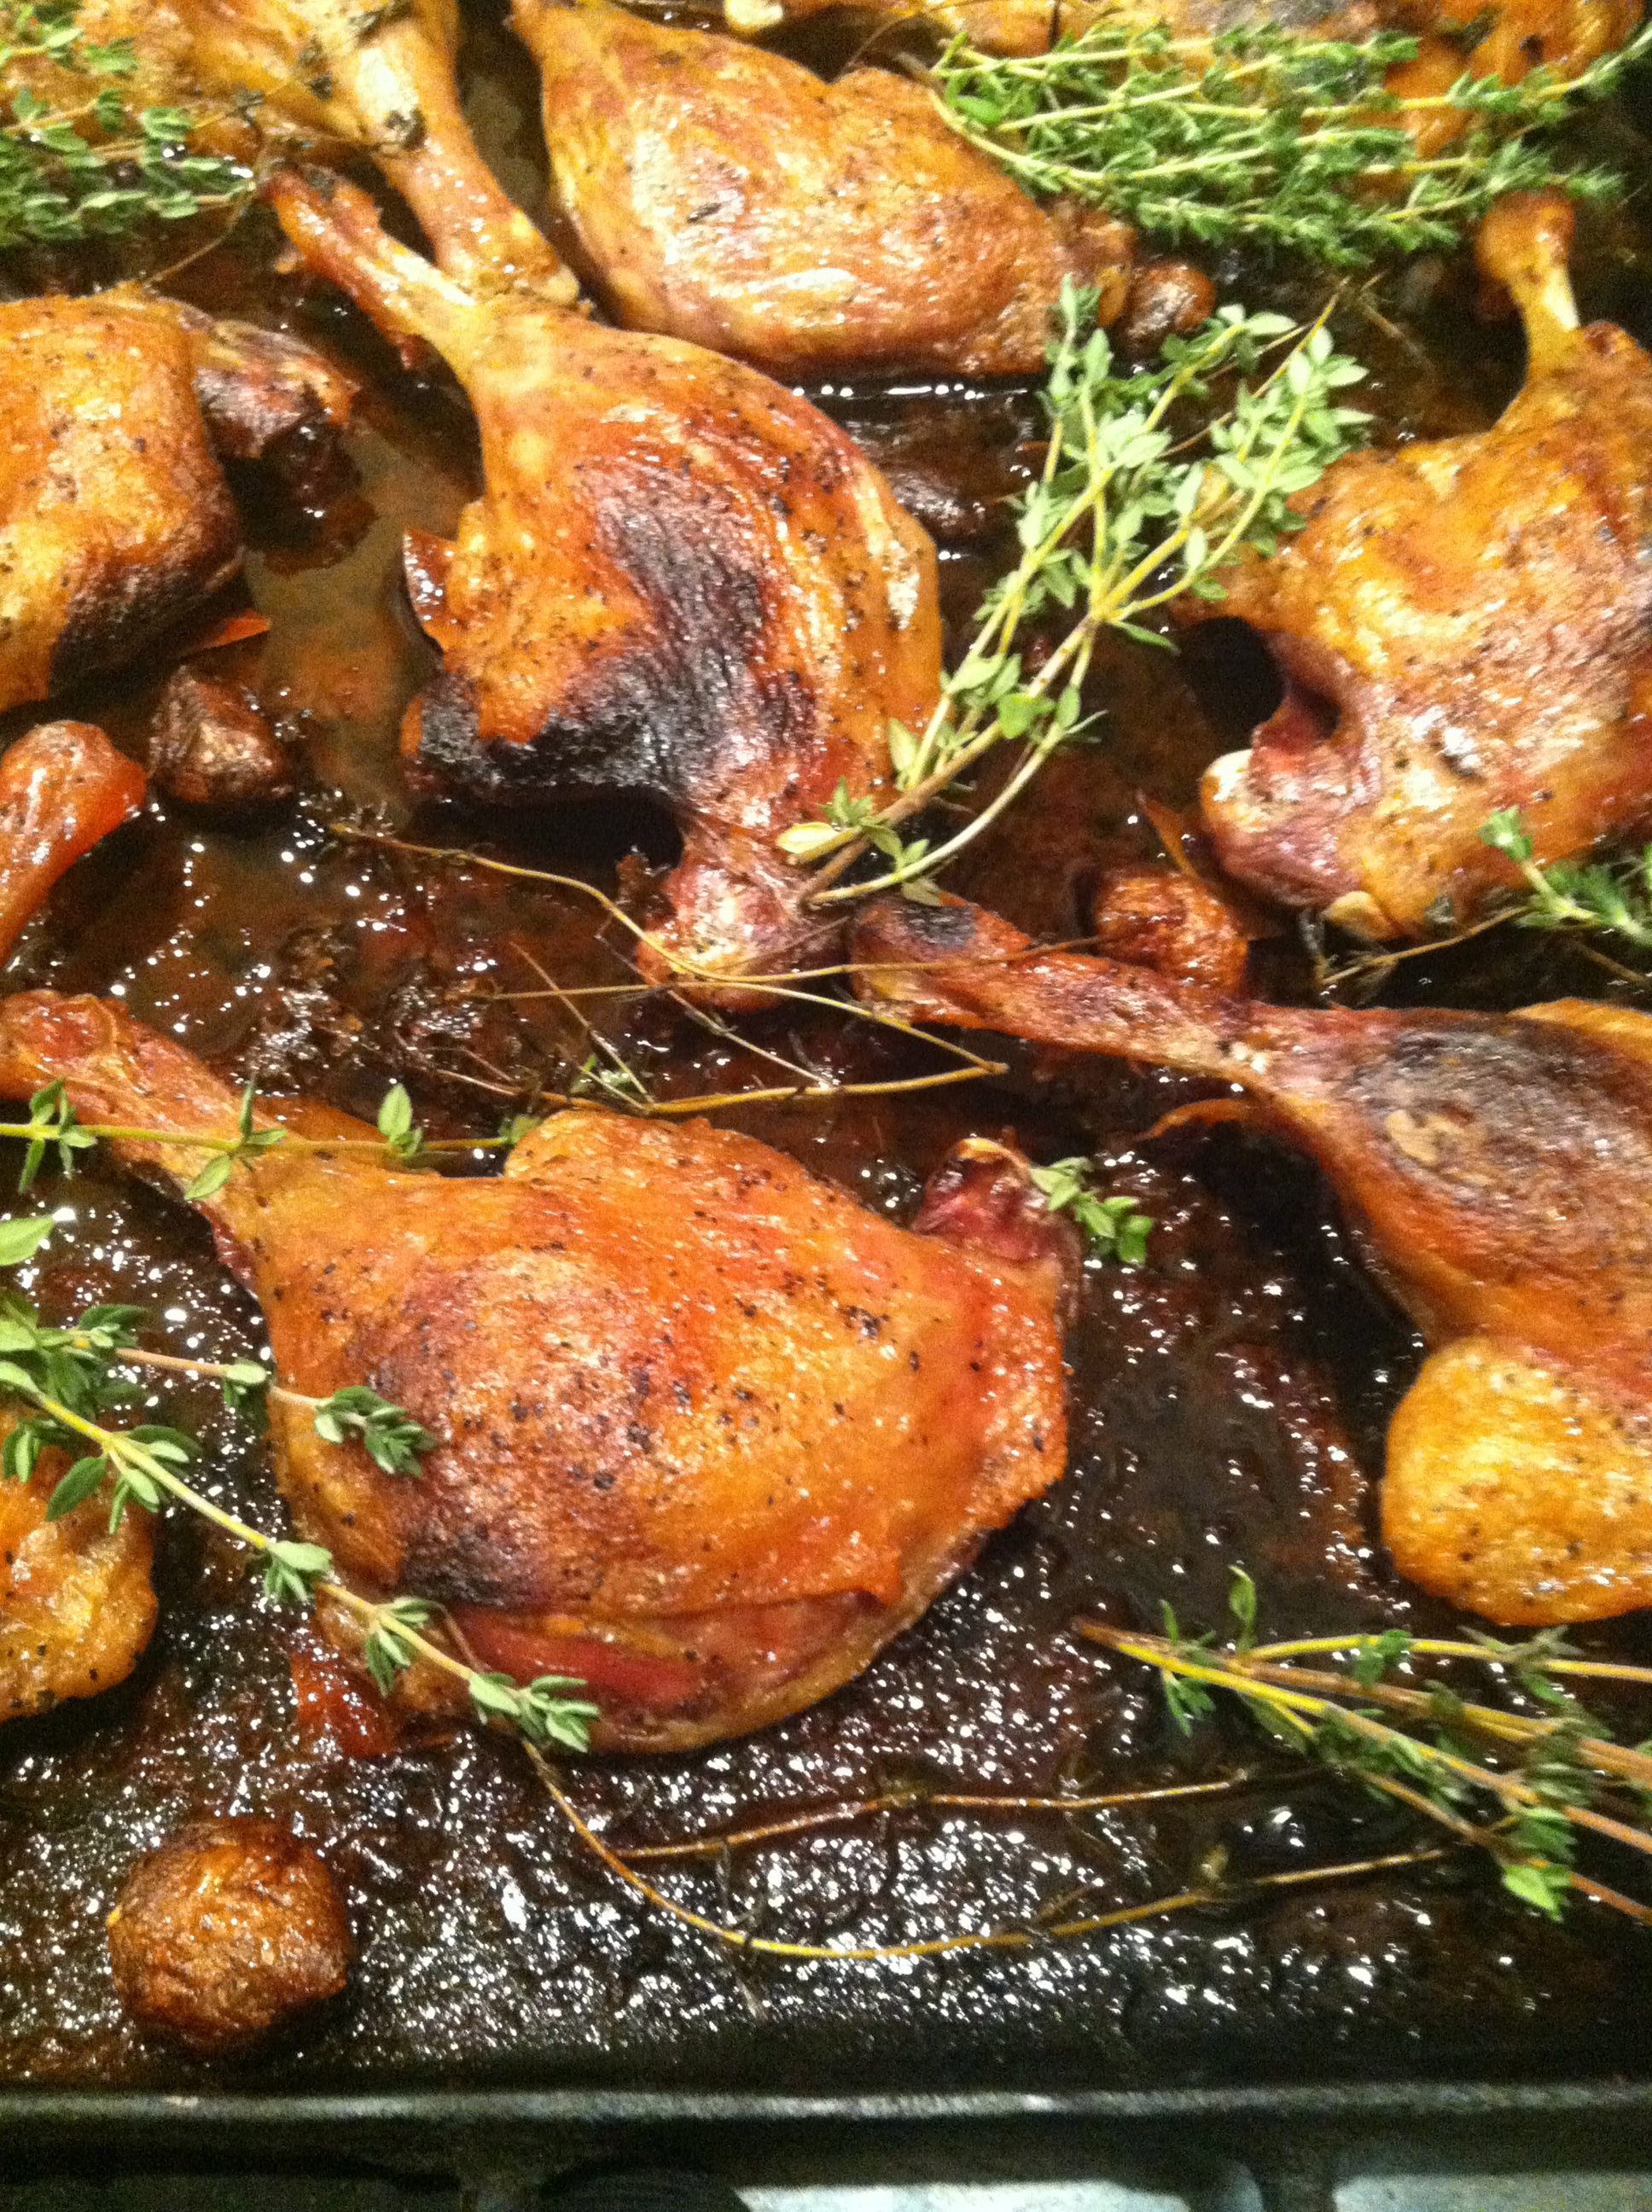
So back to the duck breasts. After you score them, season with salt and pepper and put in a nicely heated cast iron skillet (if you have one) with the butter and sear away (leave it until there is a nice browned skin and super crispy). When you turn them over, turn it down to medium and finish up.

Now the magic rosemary cherry sauce! You will use the same skillet cuz there is some yummo goodness in that pan. There are only 4 ingredients (seriously good 4 ingredients) and they all cook together, reduce, and create a tart-sweet sauce to drizzle or drench (your total preference) over the duck breast.

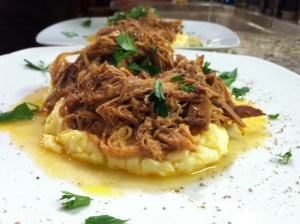
The last tidbit of info to make your guests think you are over the top awesome is to thinly slice the duck breast, fan them onto a pretty plate and put the cherry sauce over the top and whoa la…there is nothing more to say!

5.0 from 1 reviews
Seared Duck Breast with Rosemary Cherry Sauce
 
Print
Prep time
10 mins
Cook time
30 mins
Total time
40 mins
 
Author: Michelle Michelotti-Martinez
Recipe type: Main
Serves: 4-6
Ingredients
  • 4 duck breasts
  • 4 tablespoons butter, divided
  • 1 cup halved pitted sweet red cherries, fresh or frozen, thawed
  • ¼ cup good red wine
  • 4 T tablespoons honey
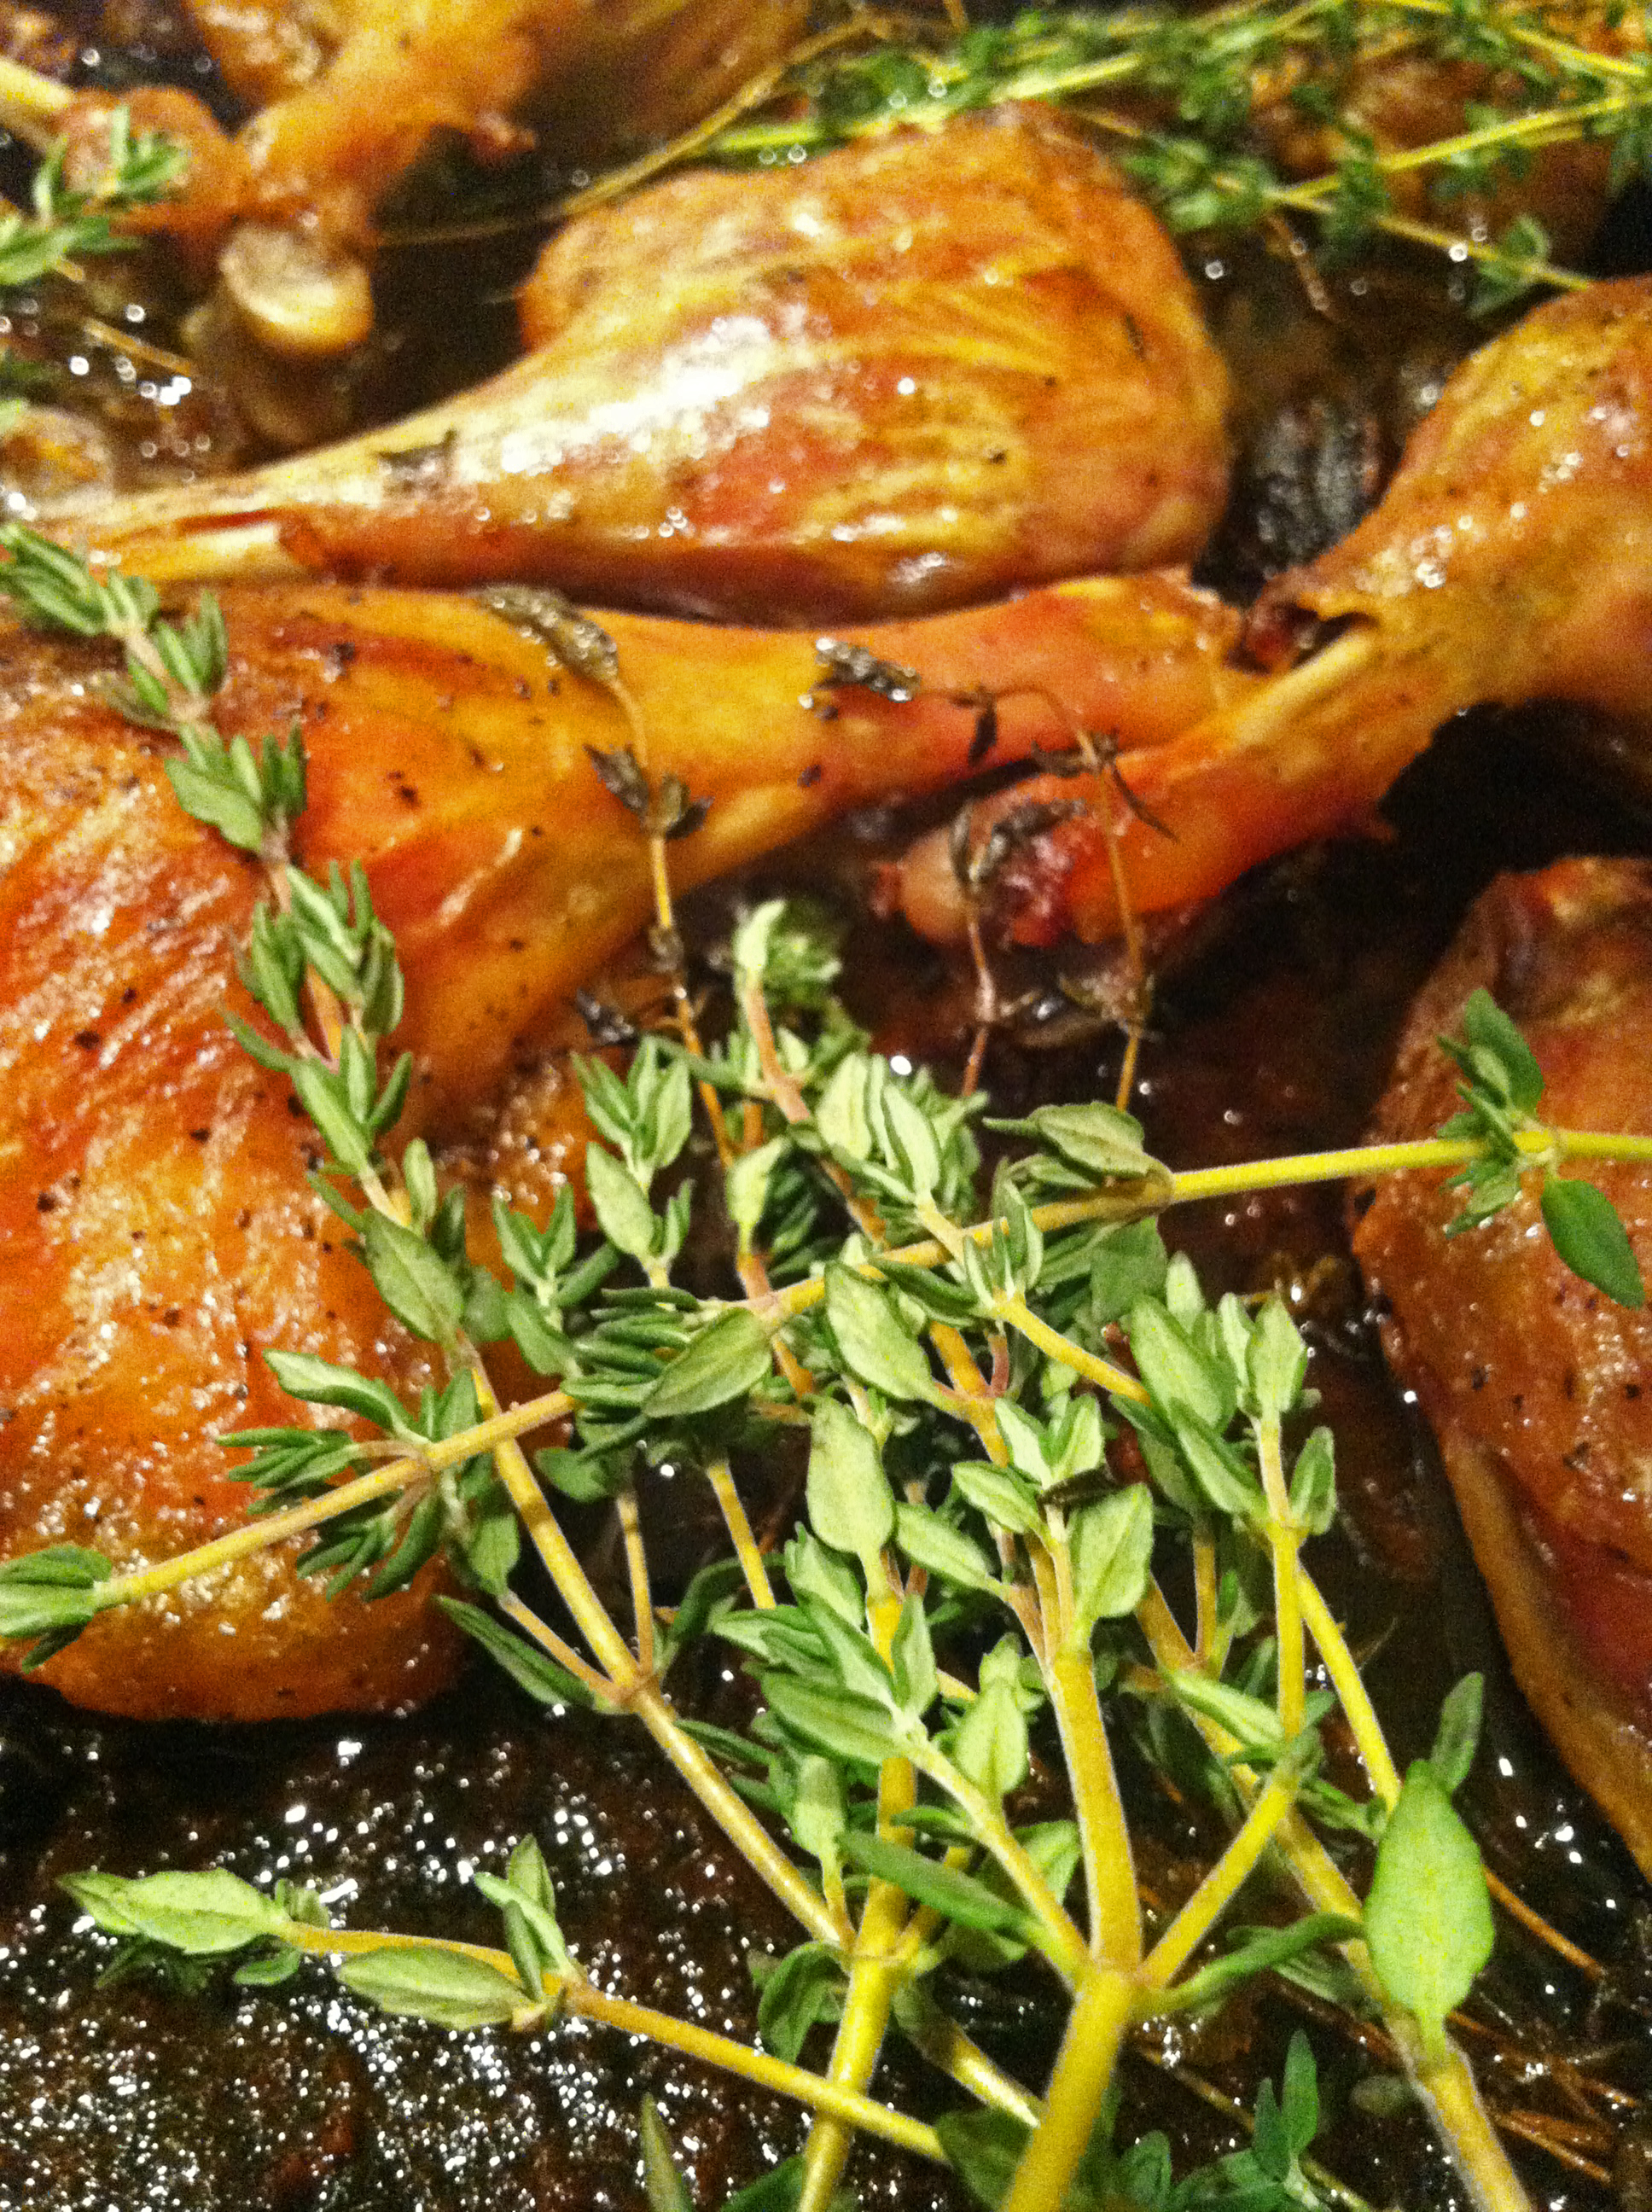
  • 2 T chopped rosemary
Instructions
  1. Take the duck breasts and using sharp knife, score skin in ¾-inch diamond pattern (do not cut into flesh).
  2. Melt 2 tablespoon butter in heavy large skillet over medium-high heat. Sprinkle duck with salt and pepper. Add duck, skin side down, to skillet and cook until skin is browned and crisp, about 5 minutes. Turn duck breasts over, reduce heat to medium, and cook until browned and cooked to desired doneness, about 4 minutes longer for small breasts and 8 minutes longer for large breast for medium-rare. Transfer to work surface, tent with foil to keep warm, and let rest 10 minutes.
  3. Meanwhile, pour off all but 2 tablespoons drippings from skillet. Add cherries, wine, rosemary and honey. Increase heat to high and boil until sauce is reduced to glaze, stirring often, about 3 minutes. Whisk in 1 tablespoon cold butter. Season sauce to taste with salt and pepper.
  4. Thinly slice duck. Fan slices out on plates. Spoon sauce over and serve.
3.4.3177

Seared Duck Breast with Rosemary Cherry Sauce


Filed Under: Meat and Poultry Tagged With: breasts, cherry, duck, sauce, seared

Grilled Iron Steak with Balsamic Soaked Raisin and Green Olive Salsa

August 28, 2015 by Michelle Michelotti-Martinez

Grilled Iron Steak with Balsamic Soaked Raisin and Green Olive Salsa

Grilled Iron Steak with Balsamic Soaked Raisin and Green Olive Salsa 1

Grilled Iron Steak with Balsamic Soaked Raisin and Green Olive Salsa 4

Who doesn’t LOVE the grilling season? I know for us, we do it 5 of the 7 nights of the week and make it a long evening of ritual and enjoyment.

While the grill heats, we usually check out the garden, talk about what is working and growing…..then we ewww and awww over the new flowers, herbs, and sprouts. I usually fill the bird feeder so we can hear the songs of chatter amongst them as they “frenzy” around the feeding tube while we peruse the backyard. We have such a lush oasis in the high desert of New Mexico and it just rocks.

Okay, now back to the food which is our evening highlight and one of our favorites is to grill iron steak marinated in a dry rub and serve it with a balsamic soaked raisin and green olive salsa, the perfect marriage of sweet, acid, and salt.

Years ago, cuts like flank, iron, or skirt were considered the cheaper cuts and not really prized for any type of gourmet experience but now in the world of culinary diversion and experimentation, chefs and home cooks from around the globe have reignited these cuts with dry or wet rubs accompanied with salsas, sauces, pesto’s, and the like….they are still fairly inexpensive and totally fill our “grill cravings”!

So if you are looking for something really easy and delish, this dish is divine! We always double the salsa recipe and put out some fresh grilled corn tortillas to munch on while we wonder the oasis…….

Grilled Iron Steak with Balsamic Soaked Raisin and Green Olive Salsa
 
Print
Prep time
15 mins
Cook time
20 mins
Total time
35 mins
 
Author: Michelle Michelotti-Martinez
Recipe type: Main
Serves: 4-6
Ingredients
  • Iron Steak Rub:
  • 1-2 tablespoons chili powder
  • 1 tablespoon dark brown sugar or coconut palm sugar
  • 1½ teaspoons ground cumin
  • 1½ teaspoon dried oregano
  • 1 teaspoon ground coriander
  • 1 teaspoon garlic powder
  • 1 teaspoon sea salt
  • 1 teaspoon fresh cracked pepper
  • 2 lbs iron steak brought to room temperature
  • 1 tablespoon olive oil
  • Balsamic Soaked Raisins and Green Olive Salsa:
  • 3 tablespoons cilantro, chopped
  • 3 tablespoons chopped white onion
  • ⅓ cup green olives, chopped
  • 2 tablespoons raisins
  • ½ cup balsamic vinegar
Instructions
  1. Iron Steak Rub:
  2. Mix all ingredients in a bowl.
  3. About 2-3 hours before grilling, sprinkle steak with spice rub on both sides, cover and put in fridge. Remove from fridge 30 minutes before grilling.
  4. Turn grill onto medium high heat. Cook steaks for about 15-20 or until medium rare. Remove from grill and let rest 10 minutes and then slice.
  5. How to Make Balsamic Soaked Raisins and Green Olive Salsa:
  6. Put raisins and balsamic vinegar in a small saucepan. Heat, then reduce to low and simmer until balsamic is reduced by at least half and raisin are plumped. Remove raisins with a slotted spoon, letting the reduced balsamic drip out, and put them in a bowl with the olives, cilantro, and chopped onion.
3.3.3077


Filed Under: Entrees, Meat and Poultry Tagged With: balsamic vinegar, green olive, iron steak, onion, raisins

Smokey Pork Ragu with Creamy Polenta

April 1, 2015 by Michelle Michelotti-Martinez

Smokey Pork Polenta

I can still remember the first time I REALLY had GOOD polenta; I mean AWESOME polenta. Maybe it was the fact we were in Italy, high in the mountains, at our original family hometown in a restaurant operated by a close relative and 8 courses of the most MAGNIFICENT food I had ever tasted or maybe I just developed a certain affiliation for the “staple food” my family was raised on, I don’t know. Honestly, I believe it was the former……that quaint, rustic, family restaurant up in the mountains where all of our cares were left behind……in fact I know it was there.

During one of those 8 courses, my mother had asked to try polenta. She hadn’t really “loved” the dish and since we were not only in polenta “country” but also with our family, she decided it was time to retry the beloved dish.

When it came time for the polenta course, out came a large, copper pot, well used and piping hot; the pot itself was a masterpiece as I can’t imagine how old it was and the stories it could tell but inside was the beautiful yellow creamy polenta bubbling with local cheeses melted on top and a layer of a smoky pork ragu. The smell itself could have filled me but I wasn’t in a million years going to pass on a huge helping of this especially after I learned the “polenta process” of both time and ingredients. It isn’t a dish that can be prepared in a 20 minute meal, at least if it’s done right, that is for sure.

The chef filled our bowls with the deliciousness and while doing so explained his venture on finding the special cheeses that morning along with the local pork meat. He was inspired to create the ragu as it was not quite cold enough for the hearty Bolognese sauce of winter but just brisk enough to want something of a similar comfort. This was the most intriguing sauce I had ever eaten because while it sounded so rich, I actually found it balanced so perfectly and the “smoky” flavor from the wood oven infiltrated the meat with such a beautiful flavor. Between this and the nuisances of the cheeses, my palate was bursting with the sexiest of food profiles and each layer brought a new sensation.

This memory still lingers along with the other 7 courses we ate that memorable evening and upon returning home, I decided I had to attempt to recreate the polenta and pork dish. This wasn’t an easy task especially because the ingredients aren’t an exact equal but the wonderful choices we have allowed the food profile to take on its own characteristics which didn’t disappoint….so here is my take on the “perfect polenta comfort dish”, I hope you enjoy it as much as I do!

Recently, we decided to have a table polenta party and served 3 different sauces for guests to choose from; we poured the polenta down the middle of a covered table and served the sauces along side. It was a total blast and the ragu was one of the choices to top off the polenta…..if you haven’t hosted a table polenta party, I highly recommend it, your guests and you will have the time of your lives and maybe you will transport for awhile to that restaurant up in the mountains of our Italian hometown….

5.0 from 1 reviews
Smokey Pork Ragu
 
Print
Prep time
15 mins
Cook time
3 hours 30 mins
Total time
3 hours 45 mins
 
Author: Michelle Michelotti-Martinez
Recipe type: Main
Cuisine: Italian
Serves: 10-12
Ingredients
  • For Smokey Pork Ragu:
  • One 4-pound piece of boneless pork shoulder
  • Smoked sea salt
  • 2 tablespoons olive oil
  • 1 Granny Smith apple, cut into 1-inch dice
  • 1 medium onion, cut into 1-inch dice
  • 1 carrot, cut into 1-inch dice
  • 1 celery rib, cut into 1-inch dice
  • 2 garlic cloves, crushed
  • 3 thyme sprigs
  • ½ cup tomato paste
  • 1 cup dry white wine
  • 4 cups chicken stock or low-sodium broth
  • ⅓ cup Champagne vinegar
  • 3 tablespoons honey
  • 3 tablespoons mascarpone cheese
  • Freshly ground pepper
  • 1 tablespoon chopped flat-leaf parsley
  • Extra-virgin olive oil, for drizzling
  • For Creamy Polenta:
  • Ingredients
  • 6 cups chicken stock
  • 2 cups whole milk
  • ¾ teaspoon salt
  • Pinch ground white pepper
  • 2 cups polenta
  • ½ cup freshly grated Fontina or Telme
  • ½ cup freshly grated Parmesan, plus extra for dusting
Instructions
  1. For Smokey Pork Ragu:
  2. Preheat the oven to 300°. Season the pork with 1½ tablespoons of smoked salt. In a medium, enameled cast-iron casserole, heat the canola oil until shimmering. Add the pork and cook over moderately high heat, turning, until browned on all sides, 15 minutes. Transfer the pork to a plate.
  3. Add the apple, onion, carrot, celery, garlic and thyme to the casserole and cook over moderate heat until beginning to brown, about 6 minutes. Add the tomato paste and cook, stirring, until it deepens in color, about 2 minutes. Add the wine and bring to a boil. Add the chicken stock, vinegar and honey and bring to a simmer. Add the pork, cover and transfer the casserole to the oven. Braise the pork for about 3 hours, turning once halfway through, until very tender.
  4. Transfer the pork to a plate. Strain the sauce into a large bowl, gently pressing on the solids. Pour the sauce back into the pot. Using 2 forks, shred the pork; discard any large pieces of fat. Transfer the shredded pork to the sauce and stir in the mascarpone. Season the sauce with smoked salt and pepper. Cover and keep warm.
  5. For Creamy Polenta:
  6. In a heavy saucepan, combine the stock and milk, and bring to a boil. Add the salt. Whisk in the polenta and cook over low heat for about 30 minutes, stirring often, until the grains are soft. Fold in the cheeses. Serve immediately or reserve.
  7. To encourage polenta to come cleanly out of the pan, cook over medium heat. Run a spatula or wooden spoon around the sides of the pan to clean off the polenta. Do not stir, but wait and watch for a few seconds until a large bubble begins to form and pushes the polenta upward. Pour immediately into a warm dish.
  8. The polenta can be made ahead and reheated: add ¼ to ½ cupstock, cover the dish, and reheat over low heat. Whisk well before serving. Grate a dusting of Parmesan over the top just before serving.
3.3.3074


Filed Under: Meat and Poultry Tagged With: polenta, pork, pork shoulder, ragu, smokey

Crispy “Duck Confit” Legs

March 20, 2015 by Michelle Michelotti-Martinez

Duck-Confit

Duck-Confit

I know I have written about duck confit and my tales of where my obsession began but this version has a slight “twist”, which I believe fills a completely different side of my culinary craze…

So, why mess with perfection? Why, Why, Why…..well, because that’s what I love to do……PERFECT PERFECTION…..don’t we all? Probably not sooooo, just call me crazy….

Anyway, Enrique LOVES duck legs, I mean he loves them and one weekend upon a request I decided to venture off, not to be defiant but because I was really was craving something a little more “crunchy and crispy” and my “go to” tender duck confit just wasn’t what the palate was ordering, so I began researching to be inspired by a new idea.

During my perusing, I came across a lot of roasted duck recipes but that wasn’t what I was yearning for BUT I did LOVE the idea of the crispy skin and moist and tender meat. Then, I remembered a restaurant we frequented in Santa Fe which seasonally offered crispy duck legs. OMG this was going to be my new creation, crispy “duck confit” legs….perfect!

Off I went to grab my duck legs and the simple curing ingredients and put them up for 24-hours. The next day I took out my favorite cast-iron skillet and seared the fat side of the duck until a gorgeous golden brown crust appeared, I then added some of my trusted, reserved duck fat to the pan, to help create a little “poaching” during first hour of cooking, covered them, and put them in the oven.

Nothing goes better than potatoes with duck and I still had some of the precious liquid so, I “smashed” some little red potatoes and added them to a pan and fried away until golden on each side, what a beautiful site! All they needed was a little salt, pepper, and fresh parsley. This was going to be delicious!

Off came the foil for the last 45 minutes of my crispy “duck confit” leg adventure and the smell that infiltrated the kitchen was heaven! I was so excited for Enrique to sample my latest adventure, I could hardly wait those last minutes.

I finished the plate off with some fresh green beans, quickly fried with sliced garlic. (Sounds like duck fat is the main course here but I promise it is simply for flavor and a little technique).

I didn’t even have to create a fancy plate, the colors and smells were enough to compensate for any amature styling. We dove into the duck legs first and didn’t speak for what seemed like eternity and then we looked up and over at each other and smiled with our lips glistening with the glorious liquid gold….

Duck-Confit

5.0 from 1 reviews
Crispy "Duck Confit" Legs
 
Print
Prep time
24 hours 30 mins
Cook time
1 hour 45 mins
Total time
26 hours 15 mins
 
This NOT a traditional duck confit so, I won't call it that and instead I will call it crispy duck confit legs! These can be done, anyway of the week and are simply delicious!
Author: Michelle Michelotti-Martinez adapted from Melissa Clark
Recipe type: Main
Serves: 6-8
Ingredients
  • ½ teaspoons kosher salt
  • 1 teaspoon freshly ground black pepper
  • ½ teaspoon dried thyme
  • 1 bay leaf, crumbled
  • 8 moulard duck legs (about 4 pounds total), rinsed and patted dry but not trimmed
Instructions
  1. In a small bowl, combine salt, pepper, thyme and bay leaf pieces. Sprinkle duck generously with mixture. Place duck legs in a pan in one layer. Cover tightly with plastic wrap and refrigerate for 24 hours. Note: Moulard duck legs can vary in size -- if yours are closer to 1 lb. each, instead of ½ lb., add an extra 6-12 hours to the curing time if possible, and increase the spice mix proportionally by weight. The next day, heat oven to 325 degrees. Place duck legs, fat side down, in a large ovenproof skillet, with legs fitting snugly in a single layer (you may have to use two skillets or cook them in batches). Heat duck legs over medium heat until fat starts to render. When there is about ¼ inch of rendered fat in pan, about 20 minutes, flip duck legs, add some olive oil to pan OR duck fat, if you have, cover pan with foil, and place it in oven. If you have used two pans, transfer duck and fat to a roasting pan, cover with foil and place in oven. Roast legs for 1 hours, then remove foil and continue roasting until duck is golden brown, about 40-45 minutes more. Remove duck from fat; reserve fat for other uses. Serve duck hot or warm, over roasted potatoes
3.2.2929


Filed Under: Meat and Poultry Tagged With: confit, crispy, duck, duck fat, fat

  • « Previous Page
  • Page 1
  • Page 2
  • Page 3
  • Page 4
  • Next Page »

Primary Sidebar

Meet Michelle and Enrique

Eatentions is a way of being with our food experience. It is a thought-filled process starting with connection to source all the way through the finished creation. We like to call it "from root to experience". Its the entire thing, its that conscious. Thank you for popping by and welcome to our life.

Let’s Connect!

Archives

Categories


My Favorites

Arancini|Eatentions

Arancini

Torta Caprese

Torta Caprese

Lemon Pasta with Broiled Salmon and Charred Lemon|eatentions

Lemon Pasta with Broiled Salmon and Charred Lemon

Footer

Instagram

Instagram has returned invalid data.

Follow Me!

Connect With Us

  • Email
  • Facebook
  • Instagram
  • Pinterest
  • RSS
  • Twitter

We believe in celebrating amazing people, delicious food, great conversation, sustainability and experience. For us,our lives have always been about love, family, friends and sharing all things together. Connecting with people through food, sharing stories and supporting one another to live our dreams and our purpose is what inspires us daily.

My Favorites

Arancini|Eatentions
Torta Caprese

Copyright © 2026 · Foodie Pro & The Genesis Framework