• Skip to primary navigation
  • Skip to content
  • Skip to primary sidebar
  • Skip to footer

Eatentions

Organic * Local * Sustainable

  • Home
  • About Us
  • Recipes
  • Culinary Socials
  • CSM – Community Sourced Meals
  • Contact
  • Nav Social Menu

    • Facebook
    • Instagram
    • Pinterest
    • RSS
    • Snapchat
    • Twitter

Meat and Poultry

Osso Buco

February 15, 2017 by Michelle Michelotti-Martinez

Osso Buco

To ALL my Osso Buco Lovers out there, this one’s for YOU!

I have rarely heard the comment, “I don’t like Osso Buco”. In fact, I have NEVER heard it and I will safely assume it is because Osso Buco can be made with ANY meat that needs to be slow cooked in a delicious array of vegetables, herbs, wine, and broth…hence my conclusion.

The first time I had this mouth-watering dish was with my Italian family in the mountains of Piedmont. Autumn was coming quickly and the air was changing from the warm summer days and nights to the crisp, cool, and, damper days of fall.

I can remember the excursion like it was yesterday….we had gone to see the original house of my relatives high in the mountains of Northern Italy. Most of the day had been spent trekking through tough terrain and rainy spells but the magic of standing in the stone house with 2 rooms and a root cellar and knowing where my ancestors had grown up made every challenge worth it.

After we wandered around the home and heard the stories from the elders who could remember the history and family memories, we were invited to the neighbor’s home for an evening of dinner and hopefully many more conversations of by gone days, at least, I hoped.

When we arrived, the aroma in the air of braised meat in the wood oven for hours, took over my senses and I was intoxicated. It was something I had never experienced and obviously something I will never forget.

As we visited and shared an aperitif, I just savored the enjoyment of the perfume in the air and the suspense of the surprise was heightening the fun of the evening as we talked more about my relatives and the history of the valley.

Finally, the dining moment arrived and we sat down on a beautiful, rustic table set with a mixture of family heirlooms, each one with its own story. I watched through the door to the kitchen as the host assembled the dish that had my senses so entranced.

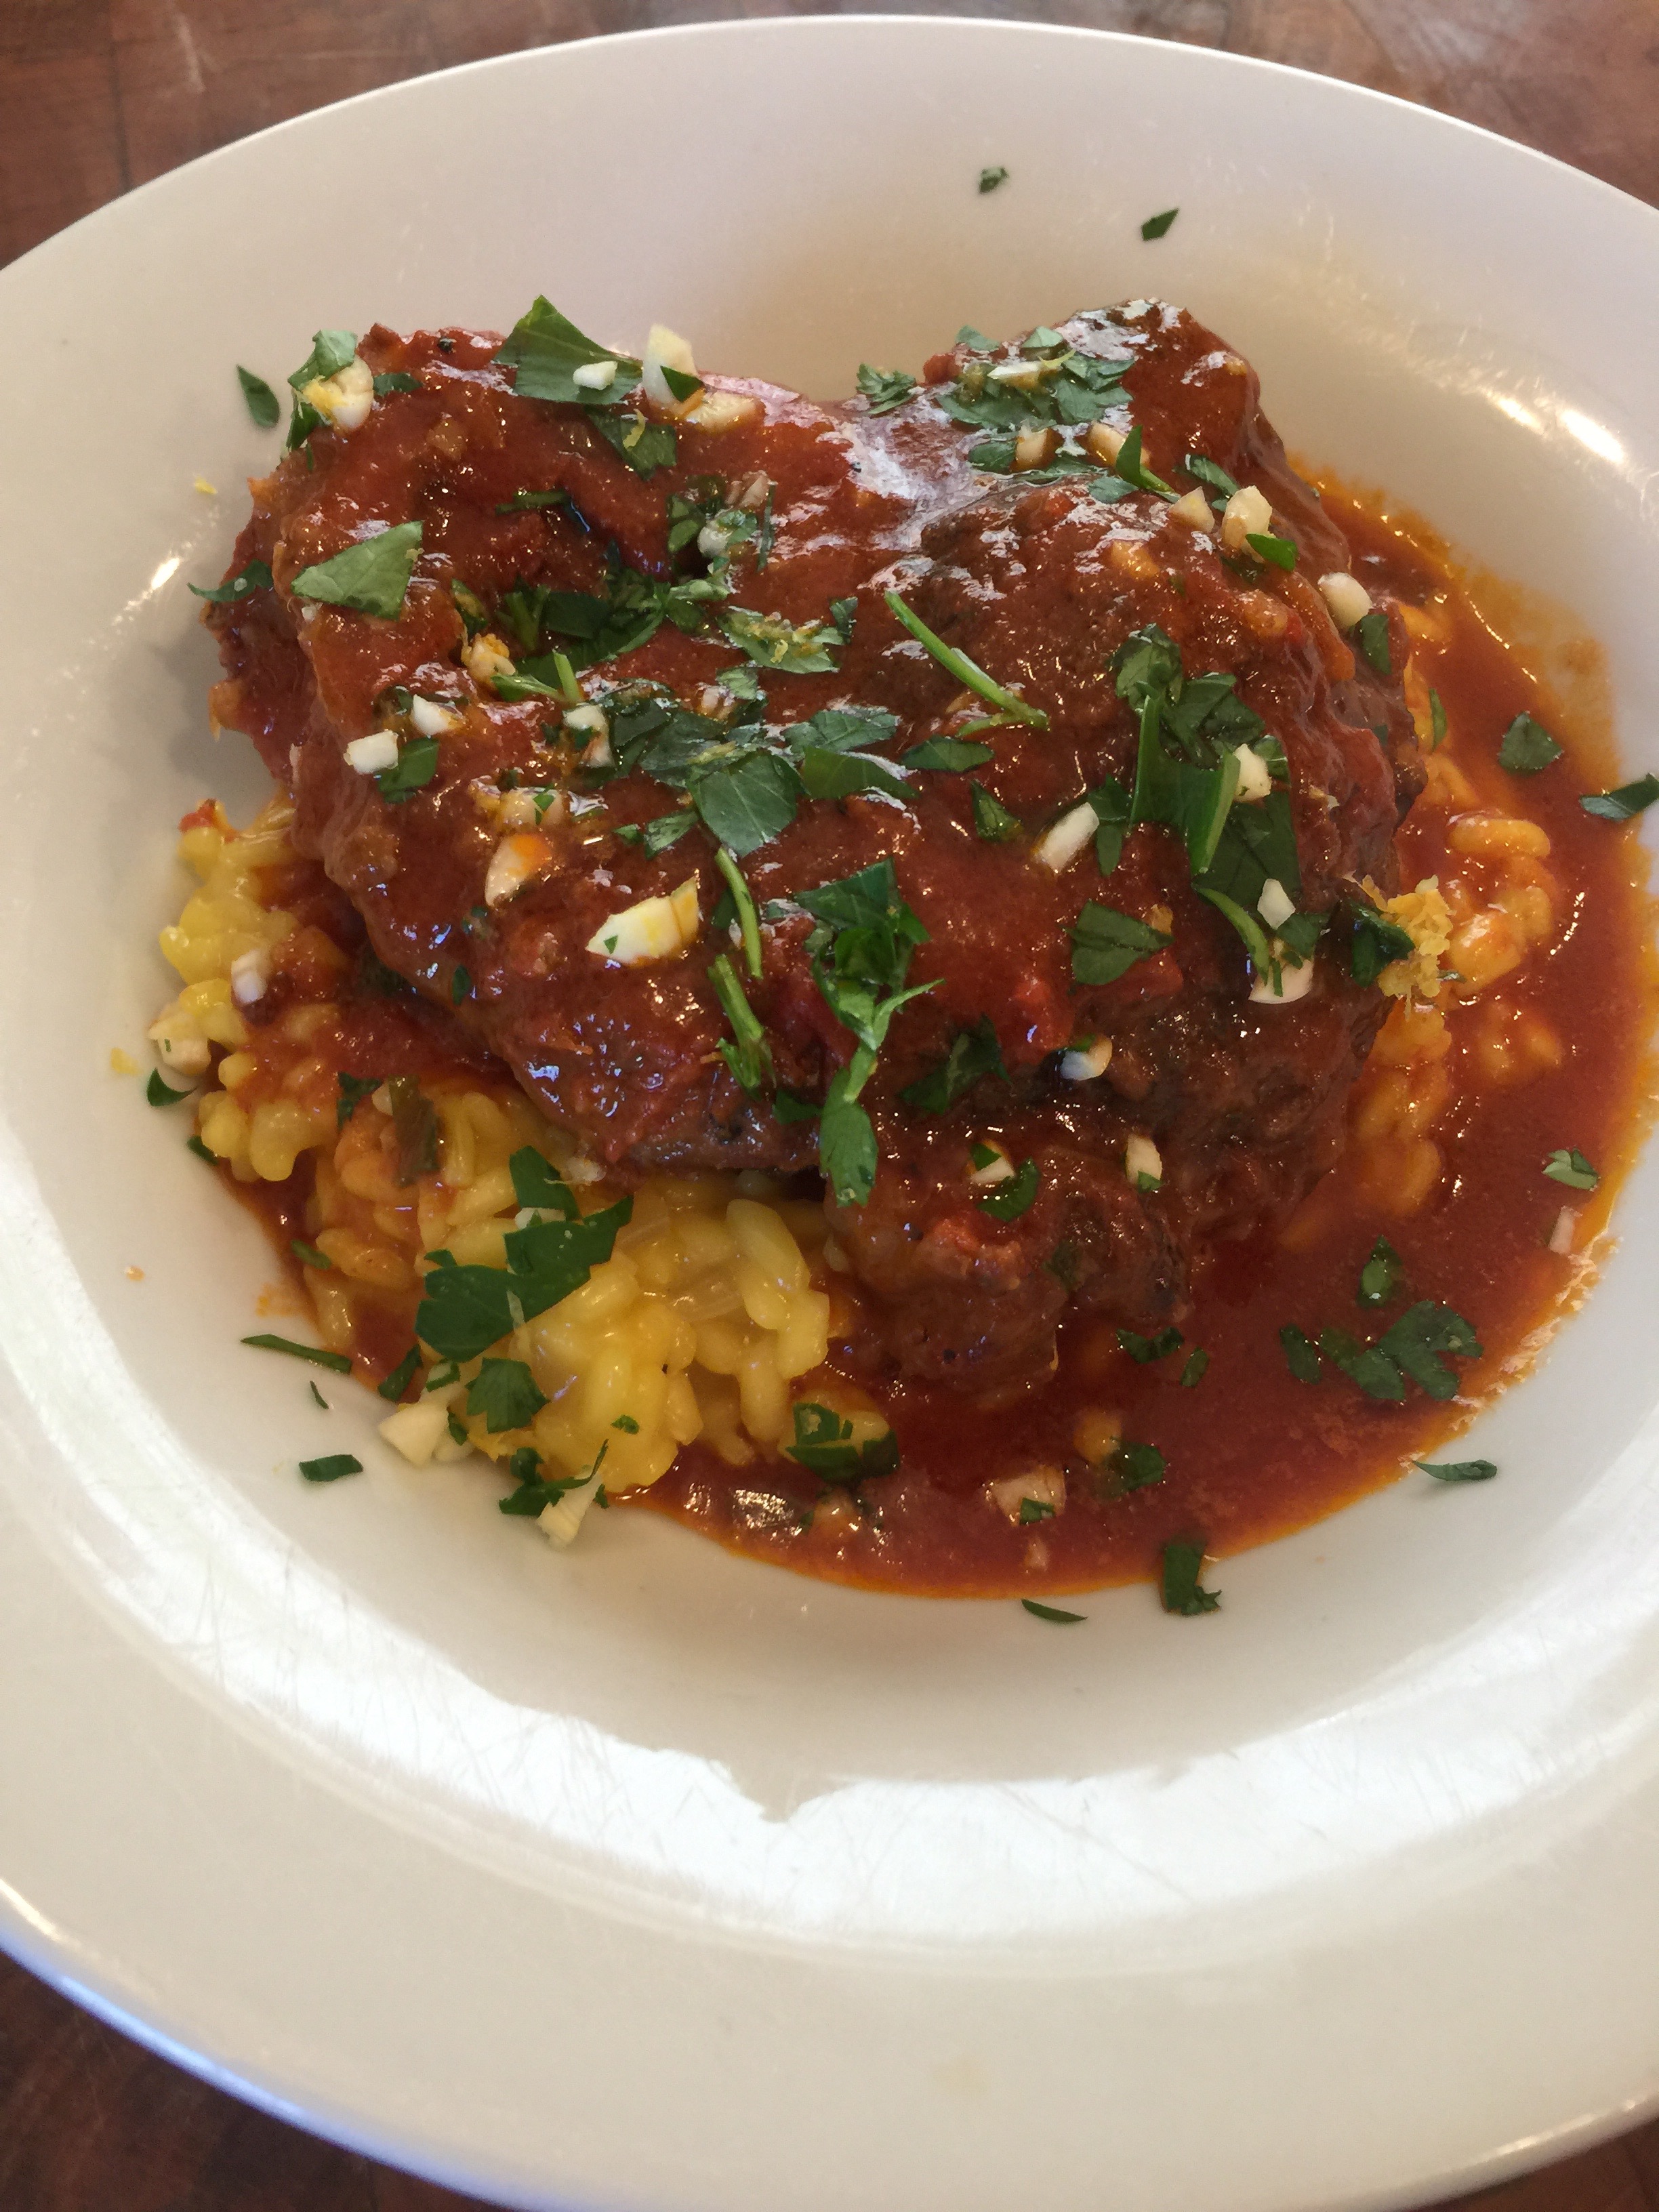
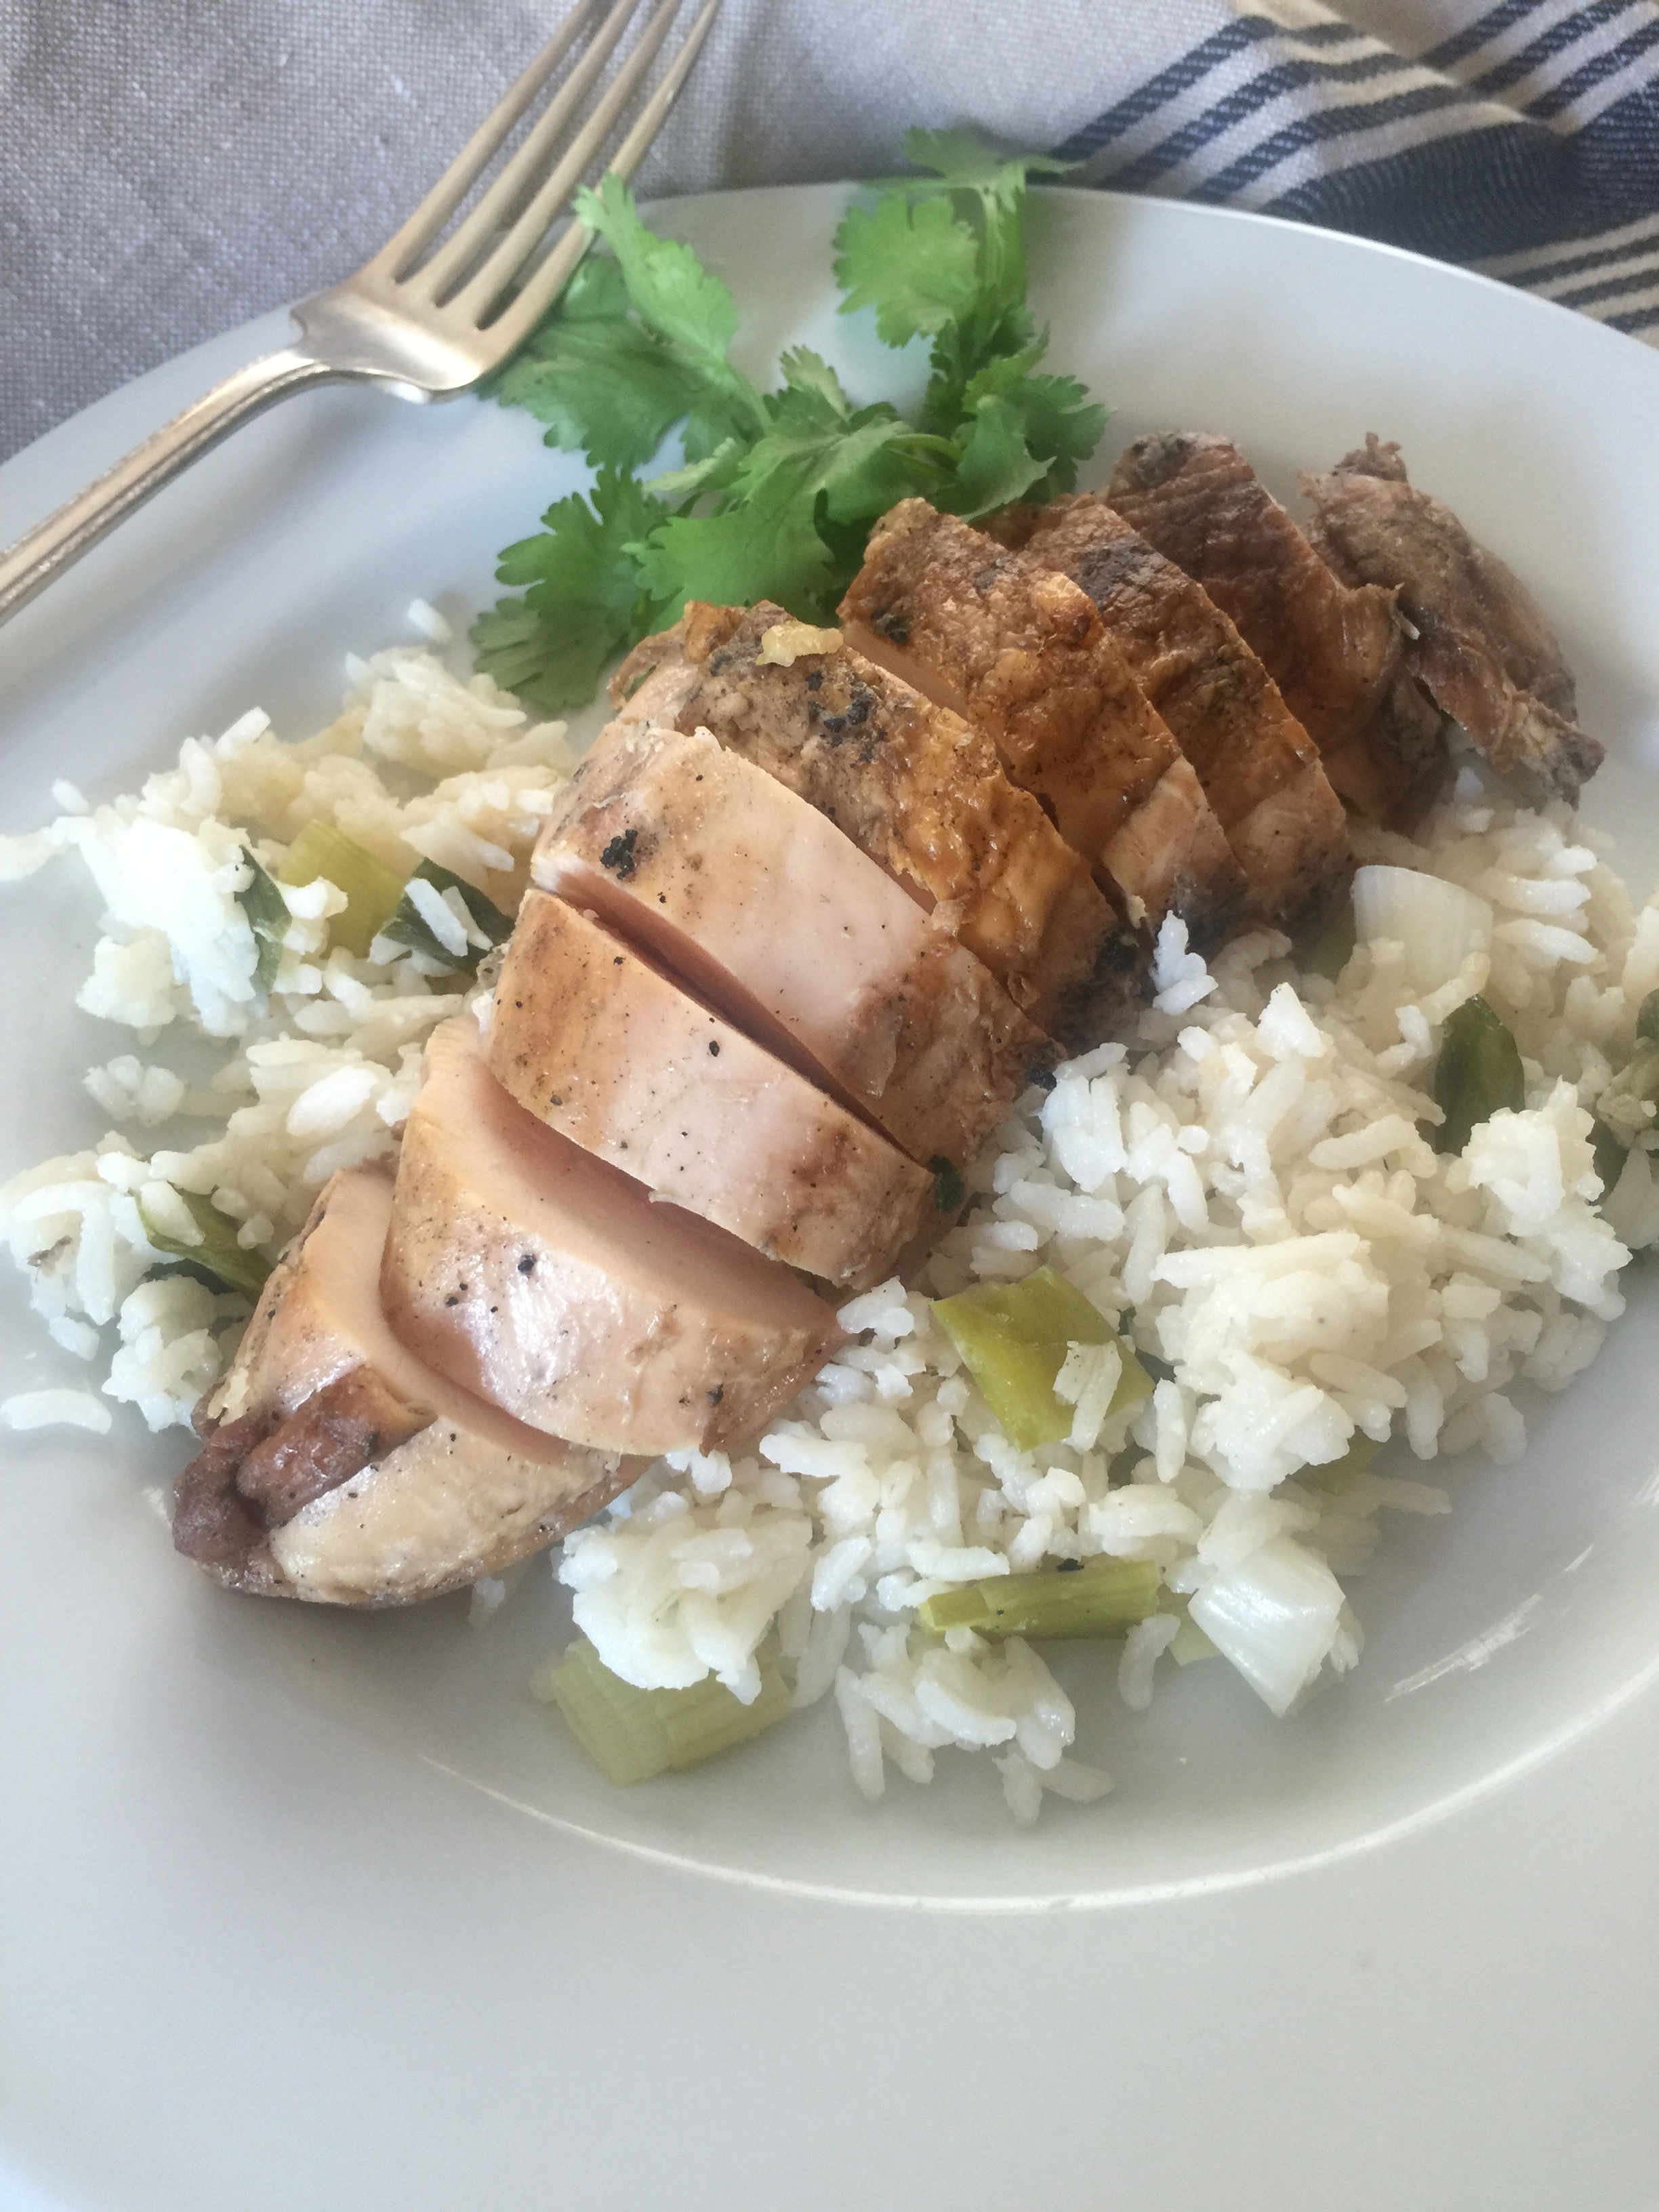
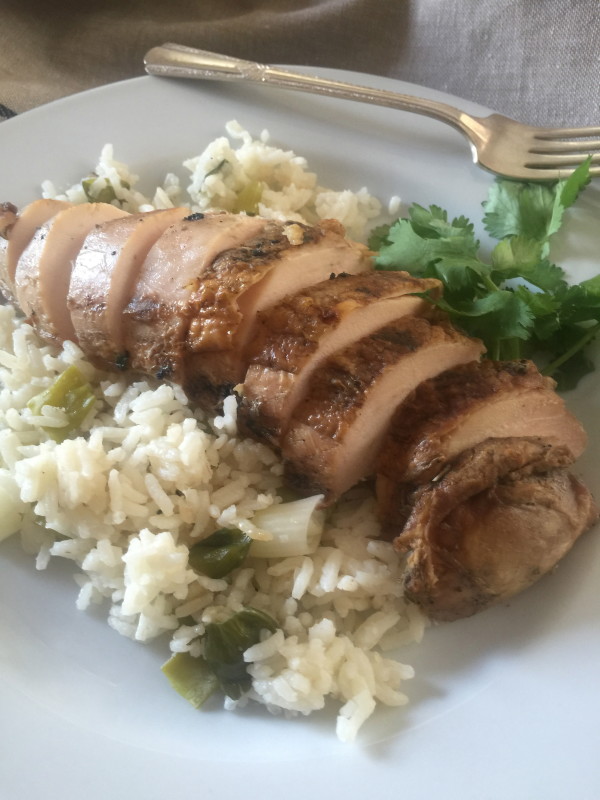
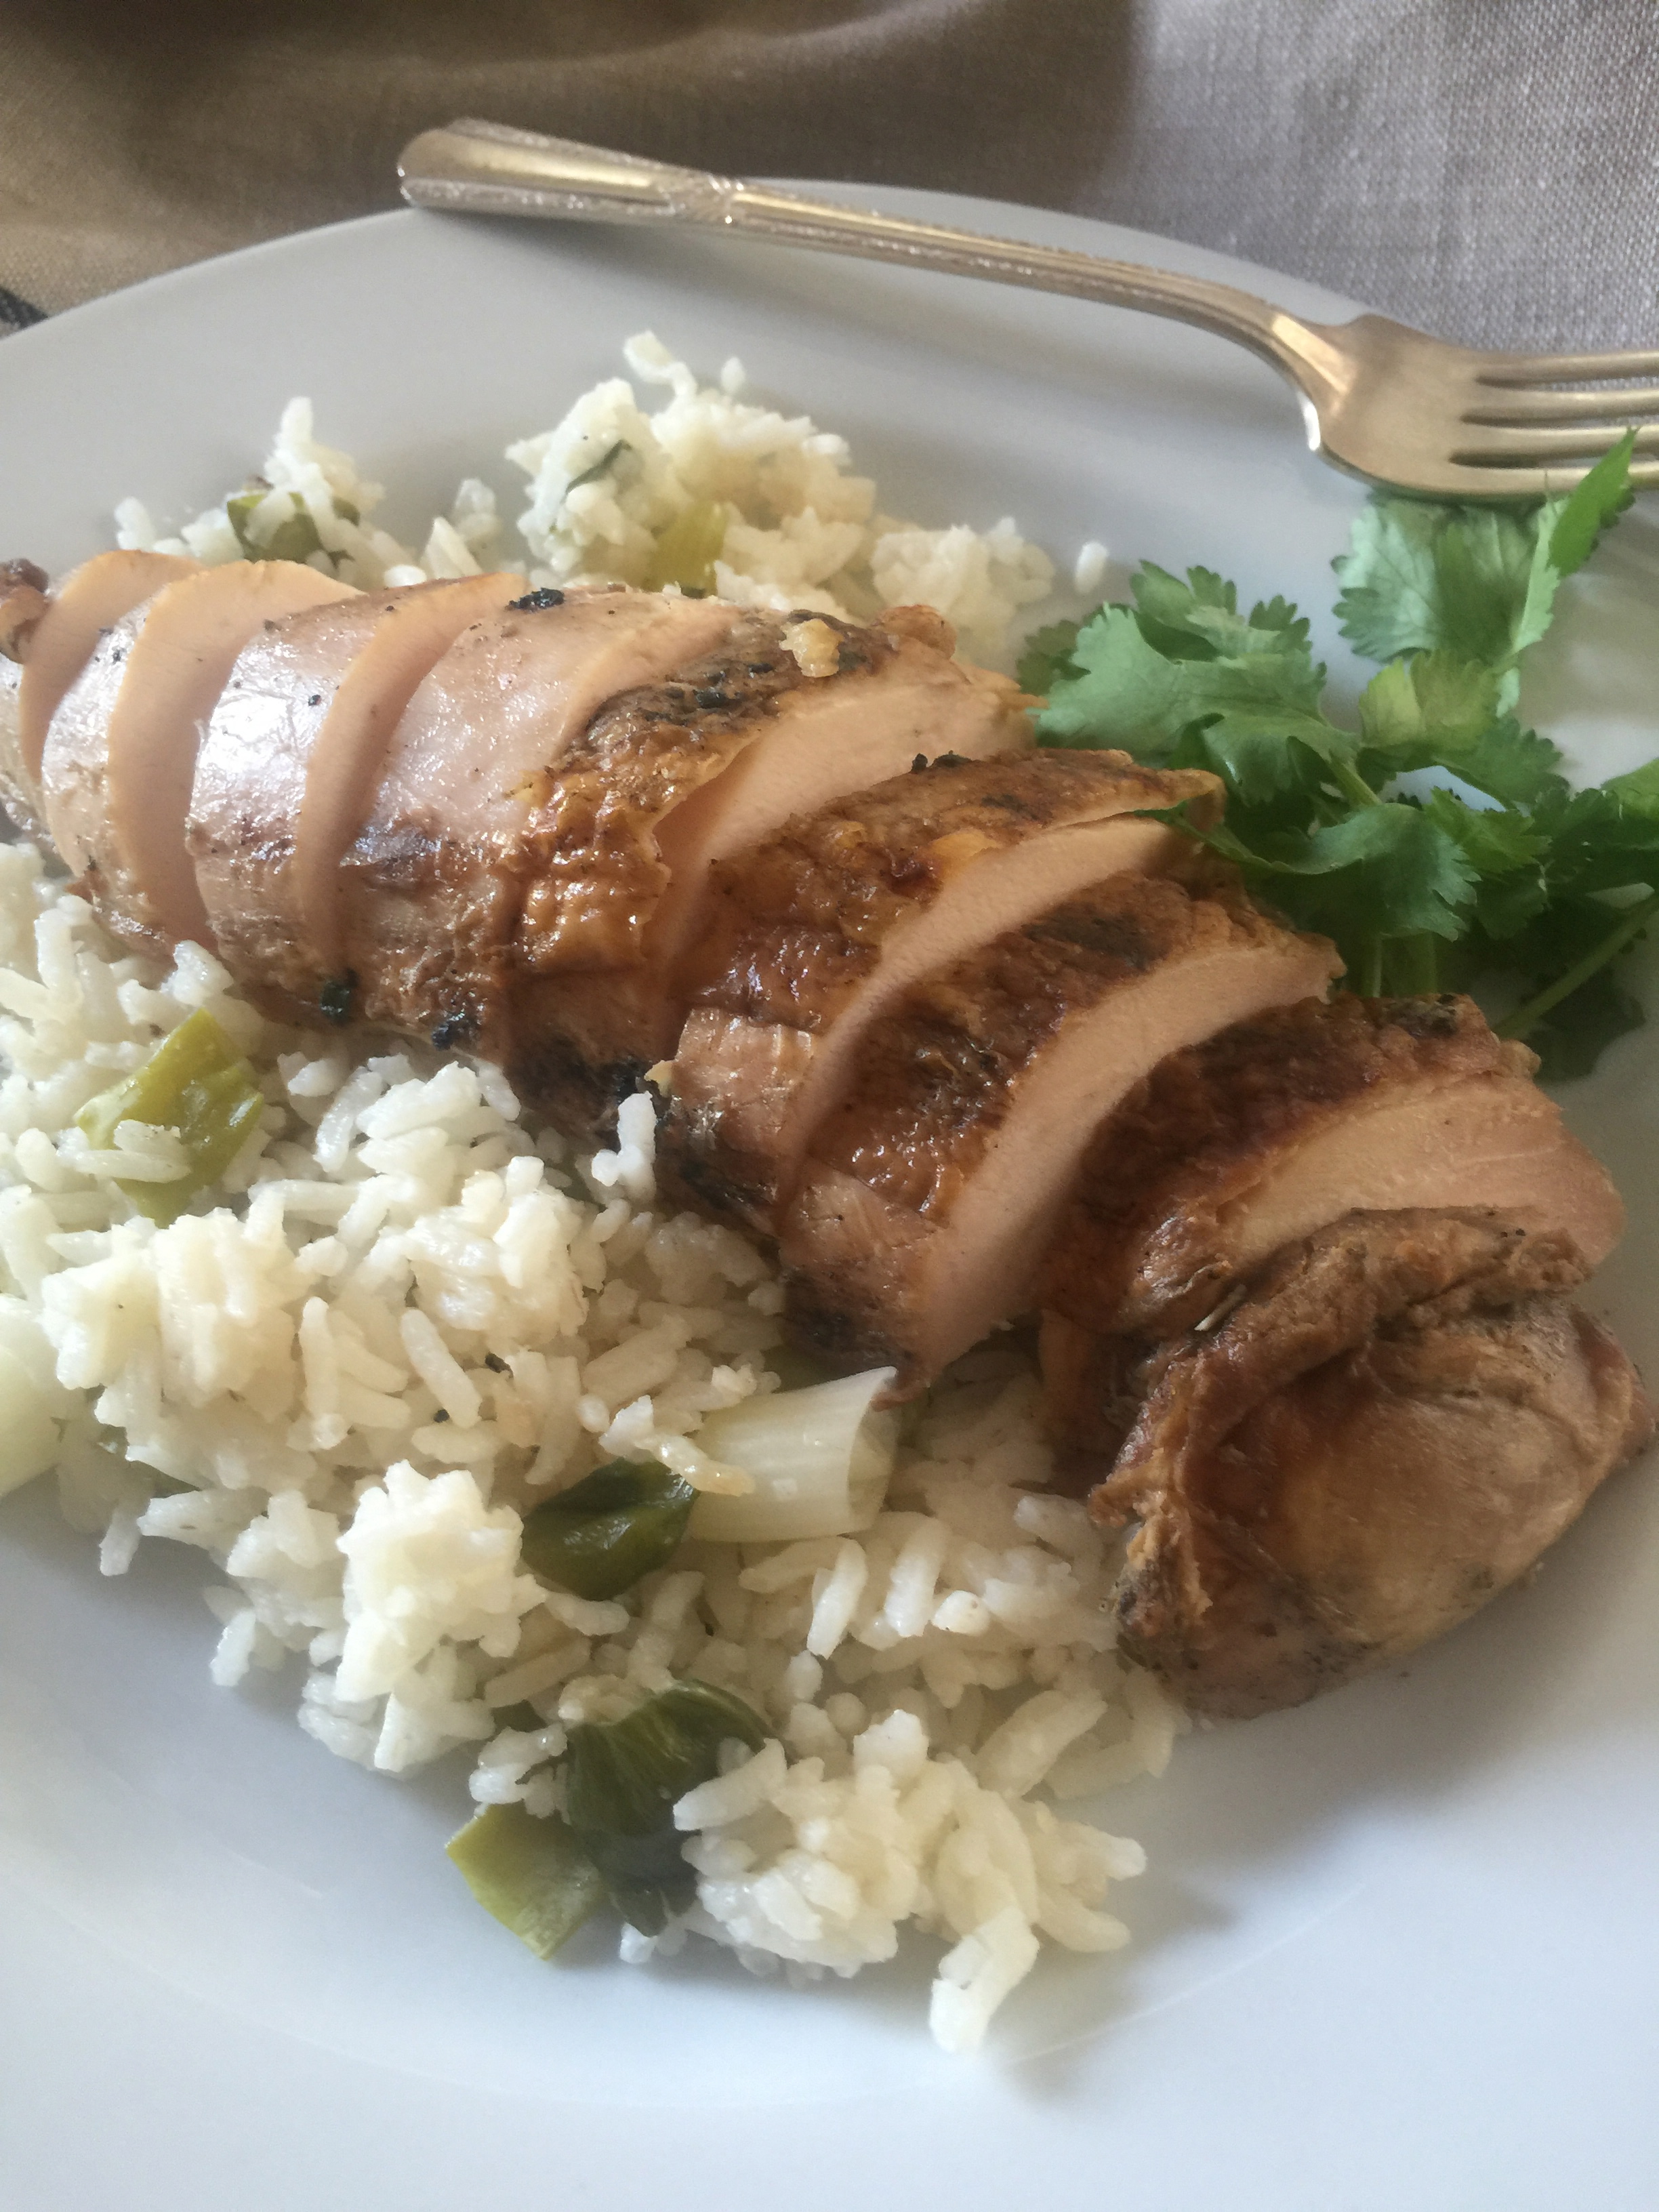
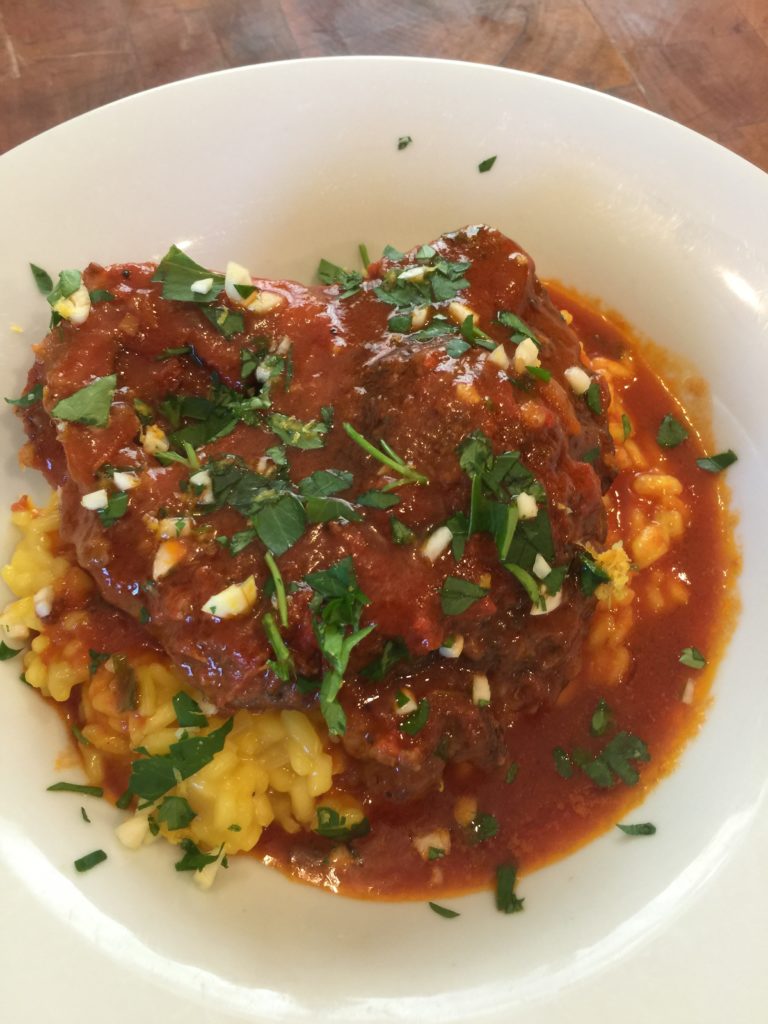
First she ladled a beautiful mound of risotto Milanese, so golden in color it almost didn’t look real, and resting beautifully on top was a thick, oval piece of deeply braised meat covered in a shimmering dark red sauce. My mouth was watering as I watched the final touch of fresh parsley, lemon zest, and garlic flutter over the top. I had just witnessed the ensemble of my first Osso Buco.

And so there it was, a beautiful medley of perfection being served on a family heirloom plate with many stories and memories of the valley of my ancestors……

Osso Buco
 
Print
Prep time
40 mins
Cook time
3 hours 30 mins
Total time
4 hours 10 mins
 
Author: Michelle Michelotti-Martinez
Cuisine: Italian
Serves: 6
Ingredients
  • For Osso Buco;
  • 6 - 1-1/4 inch-thick beef or veal shanks
  • kosher salt and freshly ground black pepper
  • ½ cup all-purpose flour for dredging
  • ¼ cup extra-virgin olive oil
  • 1 Tbs. unsalted butter
  • 1 sweet onion, diced
  • 3 stalks celery, diced
  • 3 carrots, peeled and diced
  • 3 cloves garlic, diced
  • 1 tsp. dried oregano
  • ¾ cup dry white wine
  • 2 Tbs. tomato paste
  • 1 28-oz. can Italian plum tomatoes, drained and chopped, juices reserved
  • 1 cup low-salt chicken broth, more if needed
  • 1 large sprig thyme
  • 1 bay leaf
  • For Gremolata:
  • ¼ cup finely chopped fresh flat-leaf parsley
  • 4 large cloves garlic, minced
  • finely grated lemon zest of 2 lemons
  • For Risotto Milanese:
  • extra-virgin olive oil
  • 1 large onion, cut into ¼-inch dice
  • kosher salt
  • 2 cups Carnaroli or Arborio rice
  • 2 large pinches saffron
  • 4 cups chicken stock, kept HOT
  • 1 to 1½ cups dry white wine
  • 2 tablespoons butter
  • ¾ cup grated Parmigiano-Reggiano
  • pinch of turmeric, put in rice
Instructions
  1. For Osso Buco:
  2. Heat the oven to 350°F.
  3. Tie the shanks around the middle with kitchen string (if they’re not tied already) and season them with salt and pepper. Put the flour in a dish. Dredge the shanks very lightly in flour, thoroughly shaking off the excess.
  4. Have ready a dutch oven or baking dish large enough to hold the shanks in a single layer (9x13-inch works well). In a large heavy skillet, heat 3 Tbs. of the oil over medium-high heat. Put three shanks in the pan and sear until nicely browned on both sides, 2 to 3 minutes per side. Move the shanks to the roasting pan. Repeat with the remaining three shanks.
  5. Carefully pour off the fat in the pan and wipe it out with paper towels (it’s fine if the browned bits remain in the pan bottom; just wipe away the used oil). Return the pan to medium heat and add the butter and remaining 1 Tbs. of oil. When the butter is melted, add the onion, celery, carrot, garlic, oregano, and 1 tsp. salt. Cook the vegetables, stirring occasionally, until soft and lightly browned, 15 to 20 minutes.
  6. Increase the heat to medium-high, add the wine, and cook, scraping up any brown bits with a wooden spoon, until the wine is reduced to about ¼ cup, about 3 minutes
  7. Stir in the tomato paste. Add the tomatoes with their juices, the broth, thyme, bay leaf, ½ tsp. salt, and a few grinds of pepper. Bring to a boil, and pour the contents of the pan over the shanks. Cover tightly with heavy-duty aluminum foil. (If using dutch oven, keep in same pan)
  8. Braise the veal in the oven until fork-tender, 1-1/2 hours, checking the liquid occasionally. If it has cooked down, add enough broth to keep the level about halfway up the shanks. To check for doneness, pierce a shank with a fork. The meat should pull apart easily. Taste a morsel—it should feel soft and tender. Do not overcook, or the shanks will fall apart.
  9. Gently brush most of the vegetable bits off the shanks. With a wide, flat metal spatula, carefully transfer the veal shanks to a dish. Strain the pan juices through a medium-mesh sieve into a saucepan, pressing hard on the solids with a spatula to extract as much sauce as you can. Bring the sauce to a simmer
  10. Just before finishing the sauce and serving, combine the parsley, garlic, and lemon zest. Add two Tbs. of the gremolata to the sauce. Remove the strings from the shanks. Serve the osso buco over risotto milanese and topped with the sauce and a small sprinkling of the remaining gremolata
  11. For Risotto Milanese:
  12. Coat a large saucepan generously with olive oil over medium heat. Add the onions and salt and sweat them until translucent, about 5 minutes. Bring the pan to a medium-high heat. Add the rice and cook for 3 to 4 minutes, letting the rice slightly stick to the bottom of the pan and scraping it off. It should also sound crackly.
  13. Add the saffron to the hot chicken stock; the stock should turn bright yellow.
  14. Add the wine to the pan until it covers the surface of the rice. Season with salt and cook over a medium-high heat, stirring continuously until the wine has absorbed into the rice. Add the saffron chicken stock, 1cup at a time, to the pan. Cook over a medium-high heat, stirring continuously until the stock has absorbed into the rice. Repeat this process with the hot saffron chicken stock.
  15. When the third addition of the stock has absorbed and the rice is very creamy, bite a couple grains of rice to be sure it is cooked perfectly. If it is still a little crunchy, add a little more stock and cook the rice for another couple of minutes. When the rice is cooked perfectly, remove it from the heat. (Want it al-dente)
  16. Toss in the butter and Parmigiano-Reggiano and "whip it”. The rice should be creamy but still flow and hold its own shape.
3.5.3226

Osso Buco


Filed Under: Meat and Poultry Tagged With: beef, braised, gremolata, osso buco, risotto milanese, veal

Lemon Chicken with Leek-Pea Sauce

May 4, 2016 by Michelle Michelotti-Martinez

You know those weekdays when it just seems daunting to THINK about cooking a meal much less actually doing it? Yep, I thought so…..

Lemon Chicken with Leek-Pea Sauce

We cook a whole chicken almost weekly but it takes a while and some nights we aren’t home until late but I still find myself craving that roasted chicken….it’s such a great comfort food and is super delicious with ANY veggie that is in season. Change up the herbs, grill it, roast it, BBQ it…..the possibilities are endless.

So my solution on those late weeknights and cravings….lemon chicken with leek-pea sauce. Chicken thighs are my favorite part of the chicken because of the flavor and ANY time of year they sound delicious. They cook relatively quickly, stay moist, and if I just have time for a salad to accompany, that works out but if I can, I like to roast some baby potatoes along side……the cool thing about chicken is you can pair almost anything for a side that sounds yummy so get those creative juices flowing!

Now for the sauce, I mean seriously, it is SO good!  I use it on my fresh pasta and almost any of my pork recipes and WHENEVER I serve it at a dinner party, my guests think I am just amazing, thats how good it is….

There really isn’t any trick to this recipe EXCEPT make sure and crisp up those chicken thighs, it makes ALL the difference and I personally use a cast iron skillet because I love how hot it gets and how beautifully it sears the chicken. If you don’t have one, any pan will do but just remember it will splatter so, be careful!

My hope is  this recipe works for you on those weekdays when you feel daunted or even when you don’t, I promise, it’s delish!

Lemon Chicken with Leek-Pea Sauce

Lemon Chicken with Leek-Pea Sauce
 
Print
Prep time
10 mins
Cook time
30 mins
Total time
40 mins
 
Serves: 6
Ingredients
  • For the Chicken Thighs:
  • 8 bone-in, skin-on chicken thighs
  • Kosher salt and freshly ground pepper, to taste
  • Fresh parsley
  • 2 tablespoons butter
  • 2 tablespoons olive oil
  • 1 lemon, cut into 8 rounds
  • For the Leek-Pea Sauce:
  • 3 large leeks, halved lengthwise and cut into 1-inch piece
  • 2 tablespoons olive oil
  • 1 cup low-sodium chicken broth
  • ¼ cup white balsamic vinegar
  • One 10-ounce package frozen baby peas, thawed
  • 2 tablespoons chopped parsley
  • ½ cup crème fraîche
Instructions
  1. For the Chicken Thighs:
  2. Position a rack in the lower third of an oven and preheat to 400°F
  3. Season the chicken thighs on both sides with salt and pepper. Tuck a few leaves of parsley and a sliver of butter under the chicken skin.
  4. Heat the butter and olive oil in a large ovenproof skillet or fry pan over medium-high heat. Add the chicken, skin side down, and cook until the fat has rendered and the skin is crisp and golden brown, about 10 minutes. Transfer, skin side up, to a plate.
  5. Pour off the excess fat from the pan. Return the chicken, skin side up, to the pan and scatter the lemon slices on top. Transfer to the oven and roast until an instant-read thermometer inserted into the thickest part of a thigh, away from the bone, registers 170°F (77°C), 25-30 minutes.
  6. Scatter an additional 2-3 tablespoons of fresh herbs on top. Let rest for 5 minutes before serving. Serve with leek-pea sauce underneath or on the side.
  7. For Leek-Pea Sauce:
  8. In the other skillet, heat olive oil and cook the leeks over high heat until just beginning to soften, about 2 minutes. Add the broth and vinegar and bring to a boil and then reduce to a simmer.
  9. While chicken is resting, add the peas, parsley and crème fraîche and simmer until the sauce is hot and slightly thickened, about 2 minutes.
3.5.3208

Lemon Chicken with Leek-Pea Sauce


Filed Under: Meat and Poultry Tagged With: baked, chicken, chicken thighs, crispy, leek, lemon, pea, sauce

Grilled Vietnamese Chicken over Scallion Rice

April 7, 2016 by Michelle Michelotti-Martinez


Isn’t grilling just one of the 7 wonders of life?

Grilled Vietnamese Chicken over Scallon Rice 6

The smell of the food, the sounds of the sizzle on the grill, the taste only outdoor cooking can give, and most of all the time of year, SUMMER!!! Couple grilling with the longer days, the warmer nights and ahhhh can I really handle the constant pleasure of this time of year? I think so, it makes me feel like a kid in a candy store; free, indulgent, and full of excitement…what a wonderous experience!

I know it technically isn’t summer but the weather is being a major tease and running havoc on my“itch” to be outside breaking in the grill for the season and putting in our garden.

Last Sunday was a BEAUTIFUL 75 degrees and there was just NO WAY I was going to let the opportunity slip away to indulge ourselves to our favorite flavors and satisfying our taste buds; which BTW, were screaming for some grilled Vietnamese chicken along with scallion white rice. (Oh AND we snuck in a fantastic rose to kick the season off but we can talk about that in another post otherwise I’ll get sidetracked and not finish getting this recipe out to you….seriously).

Grilled Vietnamese Chicken over Scallon Rice 8

Thank God I had looked at the forecast and prepped the chicken 24 hours ahead in a delicious marinade because that is the secret to this simple but super flavorful dish. You REALLY need to marinate it for 24 hours, the flavors develop so intensely while breaking down the protein in the chicken and this leaves it sooo moist and yummy….you absolutely CAN’T skip this step…

Now, since I had done MY job, I figured I could kick back (with that rose, did I mention that?) and cheer Enrique on while he cleaned up the grill from the winter slumber (aren’t I just the most supportive wife?). It was needing some attention as it rode through some tough weather days and frigid nights but nothing a little TLC couldn’t fix…..honestly, it really didn’t take too long to get it ready and besides we were so happy outdoors, it didn’t matter if it had.

The old grill started up like a champ and the chicken was ready so the time had come to test out the flame and kick back with a cigar. Ohhh, the first smell of the grill and the first sound of the sizzle for the season is probably my favorite and I just wanted to be there all the while the chicken cooked away.

I set the table outside, put candle in the middle and a bouquet of fresh flowers. We kicked back and chatted, giggled, indulged, and reminded ourselves that we were just at the beginning of the this magical summer season…

5.0 from 2 reviews
Grilled Vietnamese Chicken over Scallion Rice
 
Print
Prep time
24 hours
Cook time
40 mins
Total time
24 hours 40 mins
 
Author: Michelle Michelotti-Martinez
Recipe type: Main
Cuisine: Vietnamese
Serves: 4
Ingredients
  • 6 Chicken Breast, Bone-In
  • 2 Bunch of Scallions, Sliced
  • 1 Small Piece of Ginger, Minced
  • 4 Cloves of Garlic, Minced
  • 2 Stalks of Lemongrass, Sliced
  • 1 Small Bunch of Cilantro, Roughly Chopped
  • 1½ C of Soy Sauce (I use Braggs)
  • ¼ C Olive Oil
  • 2 T Sesame Oil
  • 3 T Chinese Black Vinegar
  • 2 C Jasmine Rice
  • 4 C Low Sodium Chicken Broth (Preferably Home-made)
Instructions
  1. Night Before:
  2. In a ziplock bag, combine soy sauce, vinegar, olive oil, sesame oil, garlic, ginger, lemongrass, small handful of scallions, and cilantro. Put in chicken breasts and mix around well. Set in a glass container (in case it leaks) and put in fridge for 24 hours.
  3. Day of Preparation:
  4. Remove chicken, put on tray, and discard marinade. Take off any large pieces of cilantro, lemongrass, and scallion. Leave out for 30-40 minutes to bring to room temperature.
  5. While chicken is coming to temperature, heat grill on high. Before putting chicken on, turn down to medium and brush grill with a papertowel soaked in olive oil so chicken won't stick. Start with skin side down and grill, turning frequently until done, about 30-35 minutes.
  6. While chicken is grilling, put rice to a pot on stove and add broth and a pinch of salt, stir. When broth comes to boil add scallions, stir, cover, and turn down to simmer until broth is absorbed, about 30-35 minutes (check absorption starting at 20 minutes). Once broth is absorbed, quickly open cover and put on a dishcloth, cover again, and turn off heat and leave on stove for 10 minutes.
  7. When chicken is done, let rest for 10-15 minutes. Slice into medallions slices and put over scallion rice. Serve with additional soy sauce for those that want it.
  8. *Note - Don't add salt or pepper to this recipe, marinating breaks down proteins to keep chicken moist AND adds a lot of salt.
3.5.3208

Grilled Vietnamese Chicken over Scallon Rice 3

Filed Under: Meat and Poultry Tagged With: breasts, chicken, Garlic, Ginger, grilled, Lemongrass, marinated, olive oil, rice, Scallion, Sesame Oil, Soy Sauce

Lamb With Blistered Tomatoes, Braised Eggs, and Tahini

February 5, 2016 by Michelle Michelotti-Martinez

Some like it SPICY and some like it HOT but I like it spicy hot!

Lamb With Blistered Tomatoes, Braised Eggs, and Tahini

I mean it makes me do the happy dance when ALL those delicious middle eastern spice combinations blend together and marry into a pan of ground lamb, ground beef and blistered tomatoes making your kitchen smells like a spice shop in the marketplace of downtown Istanbul! Put the icing on the cake and finish the dish with braised eggs, fresh herbs, and a cool yogurt-tahini mixture and I’m done; it’s like an opera happening right in my mouth!

I think the first time I experimented with all these complex flavors was after our trip to Rhonda, Spain. I know, I know, you are probably saying “Spain”? What? Well, because Rhonda is really close to Morocco, a lot of the flavor profile is rolled into the cuisine and OMG it is heavenly…seriously heavenly.

Lamb With Blistered Tomatoes, Braised Eggs, and Tahini

After coming home I was so inspired that I went down and purchased a TON of spices to attempt to recreate the dishes at home. Has this ever happened to you? Your on vacation in a magical destination, you are completely engulfed in the culture and experience….eating incredible food and drinking delicious wine. Then at the end of the meal, you ask to speak to the chef and have him explain the preparation (after a bottle of wine and dessert drinks #notwise and you are CONVINCED you will remember EVERY detail! After two weeks and several more meals and bottles of wine, you’re home and ready to conquer……good luck. I can’t remember yesterday much less more than that so, I had to rely on my pallet, some research, and a lot of memories of special nights tucked away in the magic of the restaurants in Rhonda.

Several, I mean several attempts at this particular dish, I was happy (or maybe just ready to be happy) either way, it tasted good…really good and at least as close as I could get to the flavor profile tucked away in my memory……fondly tucked away.Lamb With Blistered Tomatoes, Braised Eggs, and Tahini

If you decide to make this, it is SO important to make sure your spices are FRESH and that you cook it together for awhile…nothing can replace time and slow cooking to tenderize the meat and create flavor depth, nothing…..so make sure you have great ingredients and an afternoon (and a bottle of wine) and just enjoy the magic of being transported somewhere across the pond…..

Lamb With Blistered Tomatoes, Braised Eggs, and Tahini

5.0 from 1 reviews
Lamb With Blistered Tomatoes, Braised Eggs, and Tahini
 
Print
Prep time
10 mins
Cook time
1 hour
Total time
1 hour 10 mins
 
Author: Michelle Michelotti-Martinez Adapted from Yotam Ottolenghi's book Jerusalem
Recipe type: Main
Cuisine: Middle Eastern
Serves: 8
Ingredients
  • 1 tablespoon olive oil
  • 2 large onion, finely chopped
  • 1 jalapeño, chopped fine and seeds removed
  • 12 cloves garlic, thinly sliced
  • 1 lb ground lamb
  • ½ lb ground beef
  • 2 teaspoons coriander, plus extra to garnish
  • ¼ teaspoon ground cloves
  • ½ teaspoon ground cardamon
  • 1 teaspoon ground cumin
  • 1 teaspoon sugar
  • 1 cup toasted, unsalted pistachios, coarsely chopped
  • ½ cup toasted pine nuts
  • 2 teaspoons harissa powder (store-bought)
  • 1 tablespoon finely chopped preserved lemon peel (store-bought )
  • 2½ cups baby heirloom tomatoes
  • 1 cup chicken stock
  • 8large free-range eggs
  • ¼ cup cilantro leaves
  • ¼ cup parsley leaves
  • Salt and freshly ground black pepper
  • Yogurt Sauce:
  • 1 cup Greek yogurt
  • 1½ tablespoonstahini paste
  • 2 tablespoons freshly squeezed lemon juice
  • 1 tablespoon water
Instructions
  1. Turn oven to 375
  2. Heat the olive oil over medium-high heat in a medium, heavy-bottomed frying pan for which you have a tight-fitting lid. Add the onion, jalapeño, and garlic and sauté for 6 minutes to soften and color a bit. Raise the heat to high, add the lamb and beef, and brown well, 5 to 6 minutes. Season with the coriander, cumin, clove, cardamon, sugar, some salt, and some black pepper and turn to simmer, add ½ cup of chicken stock and cook for 30 minutes, covered. Turn off the heat, stir in the nuts, harissa, and preserved lemon and set aside.
  3. While the onion is cooking, heat a separate small cast-iron or other heavy pan over high heat. Once piping hot, add the cherry tomatoes and char for 4 to 6 minutes, tossing them in the pan occasionally, until slightly blackened on the outside. Set aside.
  4. Prepare the yogurt sauce by whisking together all the ingredients with a pinch of salt. It needs to be thick and rich, but you may need to add a splash of water if it is stiff.
  5. You can leave the meat, tomatoes, and sauce at this stage for up to an hour. When you are ready to serve, reheat the meat, add the rest of chicken stock, and bring to a boil. Make 8 small wells in the mix and break an egg into each well. Cover the pan and cook the eggs place in an oven at 375 degrees for 8-10 minutes. Place the tomatoes on top, avoiding the yolks
  6. Remove from the heat and dot with dollops of the yogurt sauce, sprinkle with a little coriander, and finish with the cilantro and parsley. Serve at once with warm naan bread and white rice.
3.5.3208

Lamb With Blistered Tomatoes, Braised Eggs, and Tahini

Filed Under: Meat and Poultry Tagged With: beef, hot, lamb, middle eastern, spice, tahini, Yogurt

  • Page 1
  • Page 2
  • Page 3
  • Page 4
  • Next Page »

Primary Sidebar

Meet Michelle and Enrique

Eatentions is a way of being with our food experience. It is a thought-filled process starting with connection to source all the way through the finished creation. We like to call it "from root to experience". Its the entire thing, its that conscious. Thank you for popping by and welcome to our life.

Let’s Connect!

Archives

Categories


My Favorites

Arancini|Eatentions

Arancini

Torta Caprese

Torta Caprese

Lemon Pasta with Broiled Salmon and Charred Lemon|eatentions

Lemon Pasta with Broiled Salmon and Charred Lemon

Footer

Instagram

Instagram has returned invalid data.

Follow Me!

Connect With Us

  • Email
  • Facebook
  • Instagram
  • Pinterest
  • RSS
  • Twitter

We believe in celebrating amazing people, delicious food, great conversation, sustainability and experience. For us,our lives have always been about love, family, friends and sharing all things together. Connecting with people through food, sharing stories and supporting one another to live our dreams and our purpose is what inspires us daily.

My Favorites

Arancini|Eatentions
Torta Caprese

Copyright © 2026 · Foodie Pro & The Genesis Framework