• Skip to primary navigation
  • Skip to content
  • Skip to primary sidebar
  • Skip to footer

Eatentions

Organic * Local * Sustainable

  • Home
  • About Us
  • Recipes
  • Culinary Socials
  • CSM – Community Sourced Meals
  • Contact
  • Nav Social Menu

    • Facebook
    • Instagram
    • Pinterest
    • RSS
    • Snapchat
    • Twitter

Michelle Michelotti-Martinez

Crispy “Duck Confit” Legs

March 20, 2015 by Michelle Michelotti-Martinez

Duck-Confit

Duck-Confit

I know I have written about duck confit and my tales of where my obsession began but this version has a slight “twist”, which I believe fills a completely different side of my culinary craze…

So, why mess with perfection? Why, Why, Why…..well, because that’s what I love to do……PERFECT PERFECTION…..don’t we all? Probably not sooooo, just call me crazy….

Anyway, Enrique LOVES duck legs, I mean he loves them and one weekend upon a request I decided to venture off, not to be defiant but because I was really was craving something a little more “crunchy and crispy” and my “go to” tender duck confit just wasn’t what the palate was ordering, so I began researching to be inspired by a new idea.

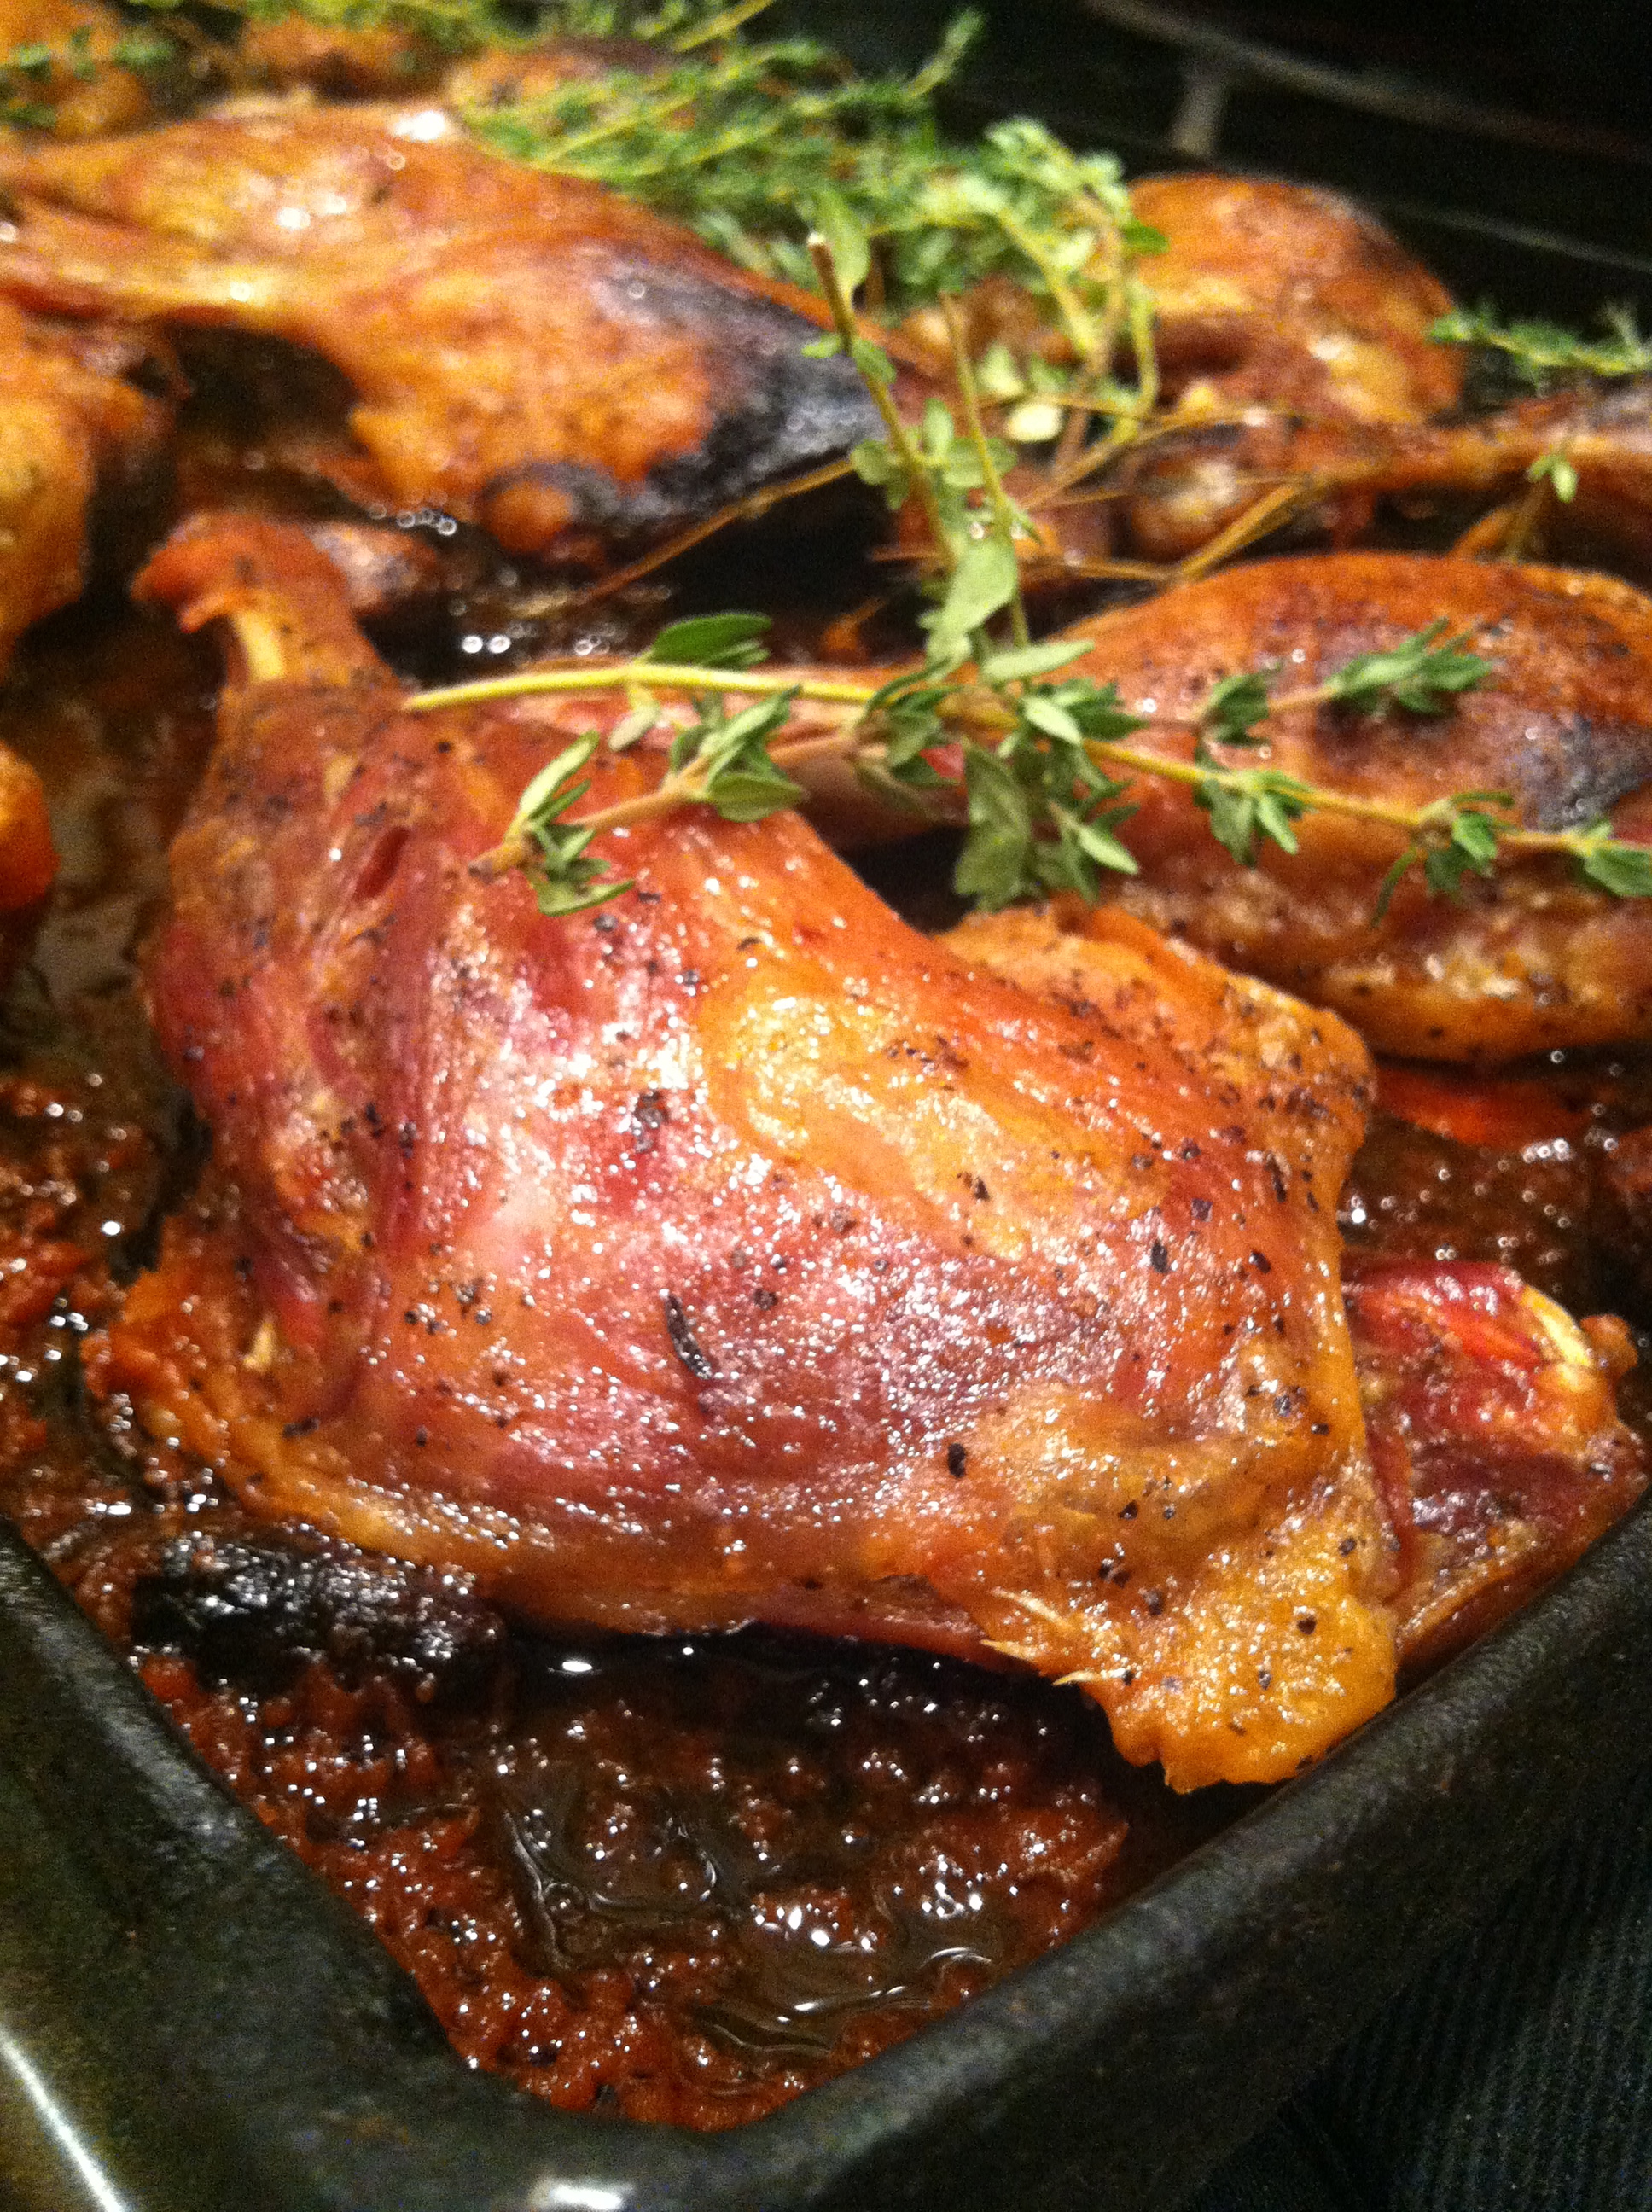
During my perusing, I came across a lot of roasted duck recipes but that wasn’t what I was yearning for BUT I did LOVE the idea of the crispy skin and moist and tender meat. Then, I remembered a restaurant we frequented in Santa Fe which seasonally offered crispy duck legs. OMG this was going to be my new creation, crispy “duck confit” legs….perfect!

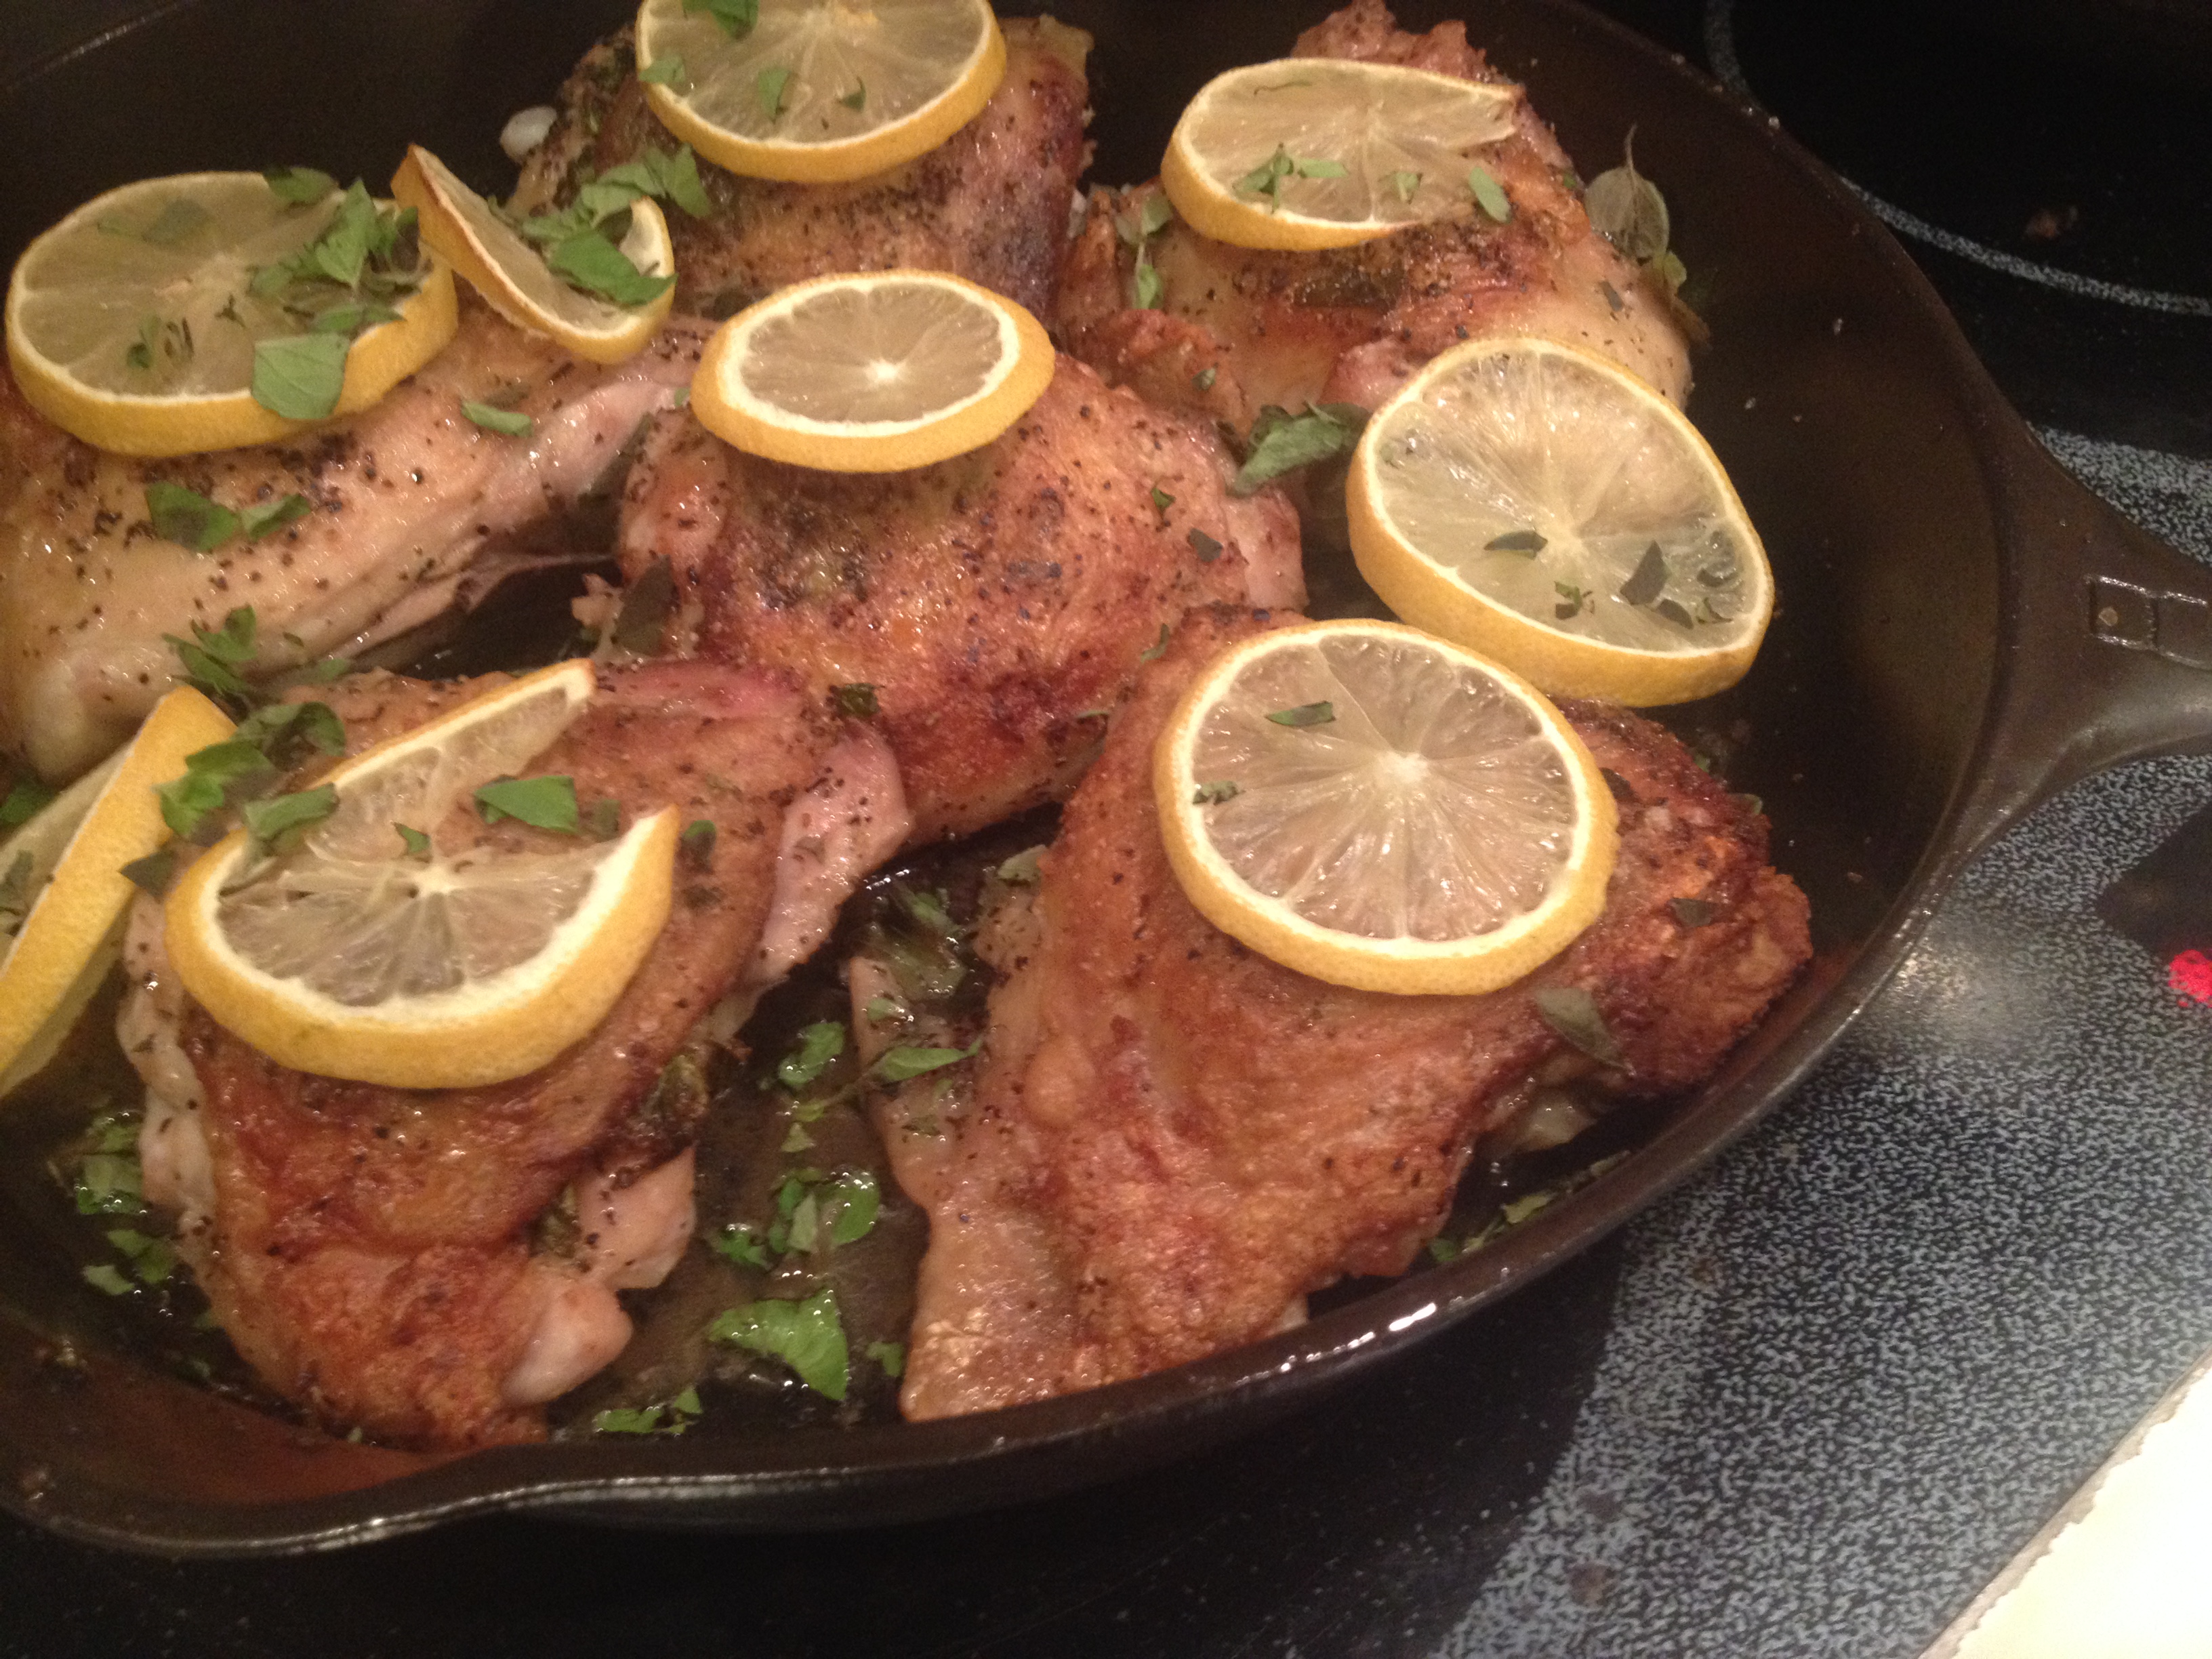
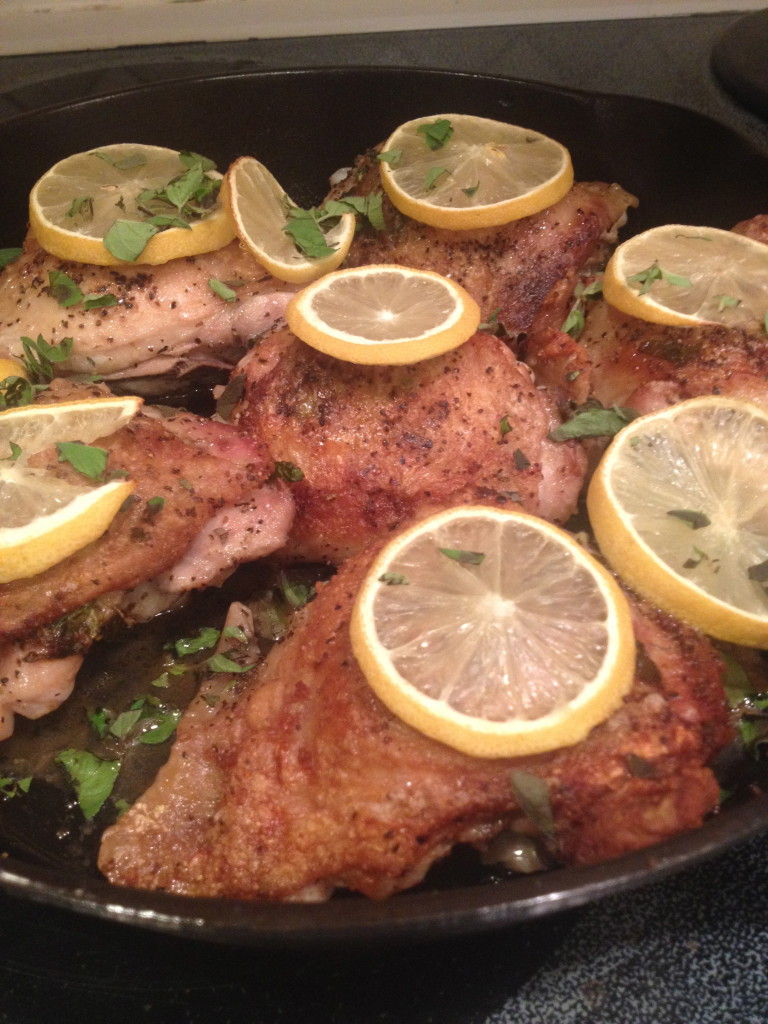
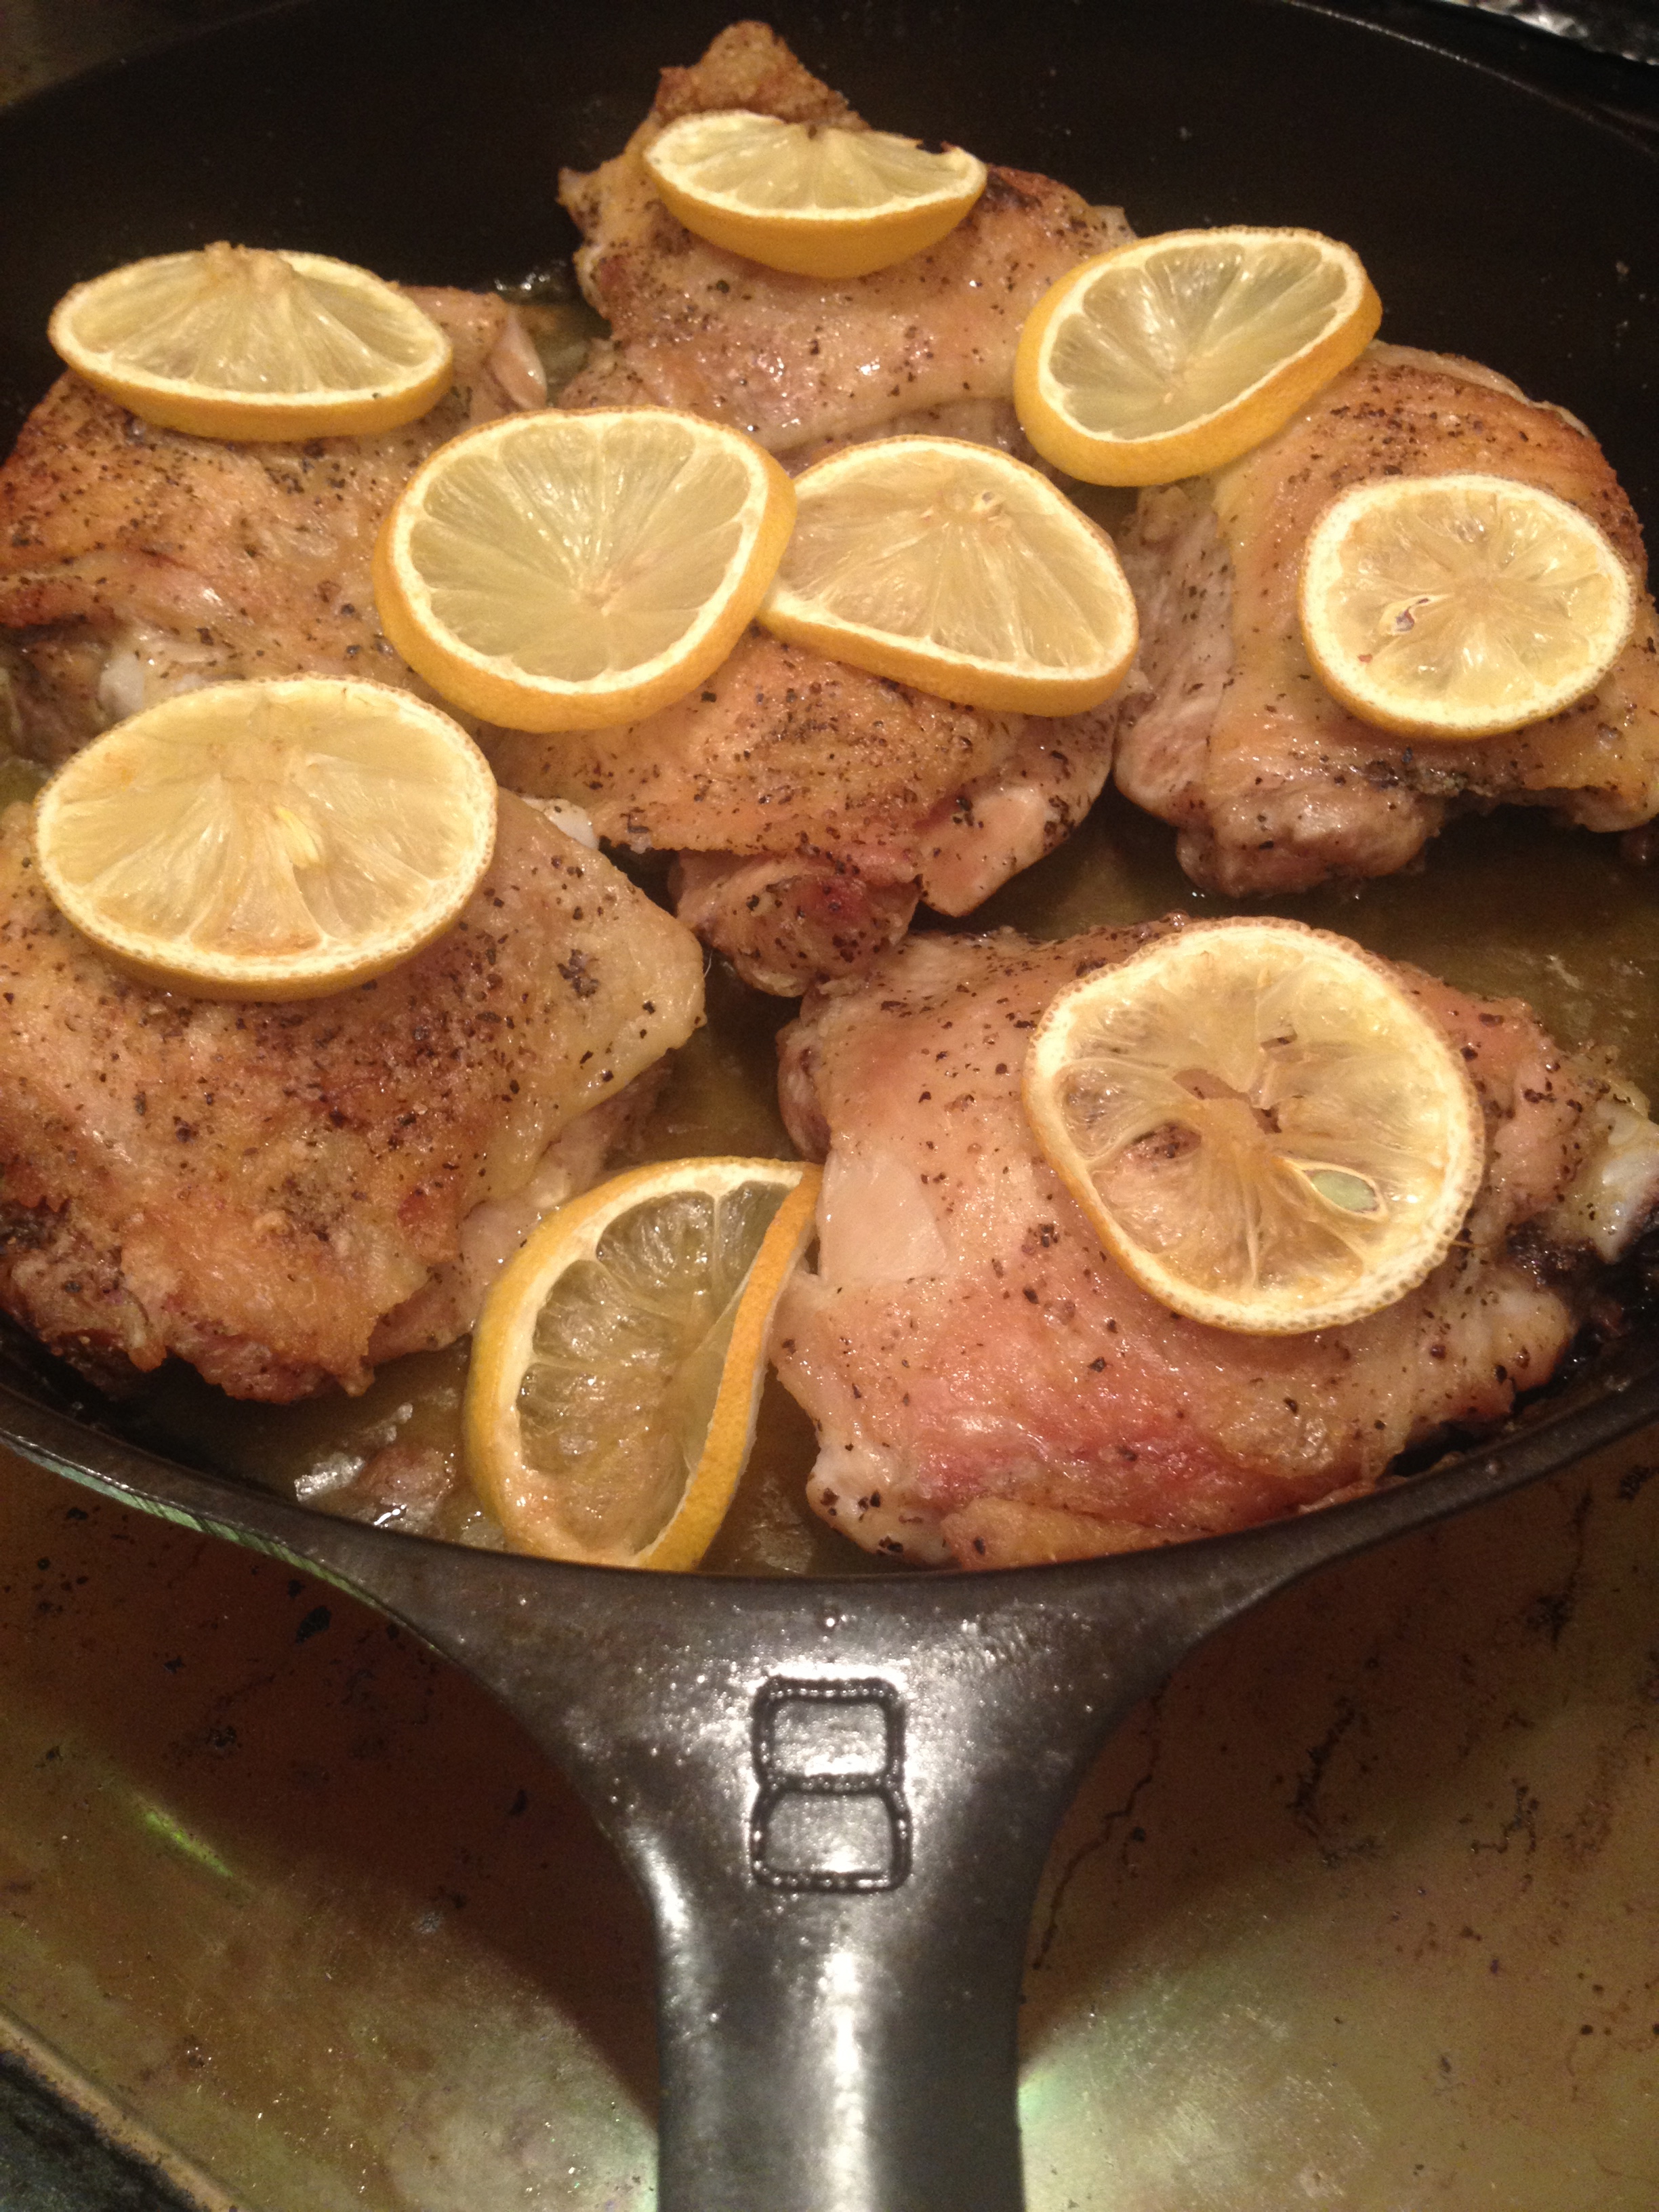
Off I went to grab my duck legs and the simple curing ingredients and put them up for 24-hours. The next day I took out my favorite cast-iron skillet and seared the fat side of the duck until a gorgeous golden brown crust appeared, I then added some of my trusted, reserved duck fat to the pan, to help create a little “poaching” during first hour of cooking, covered them, and put them in the oven.

Nothing goes better than potatoes with duck and I still had some of the precious liquid so, I “smashed” some little red potatoes and added them to a pan and fried away until golden on each side, what a beautiful site! All they needed was a little salt, pepper, and fresh parsley. This was going to be delicious!

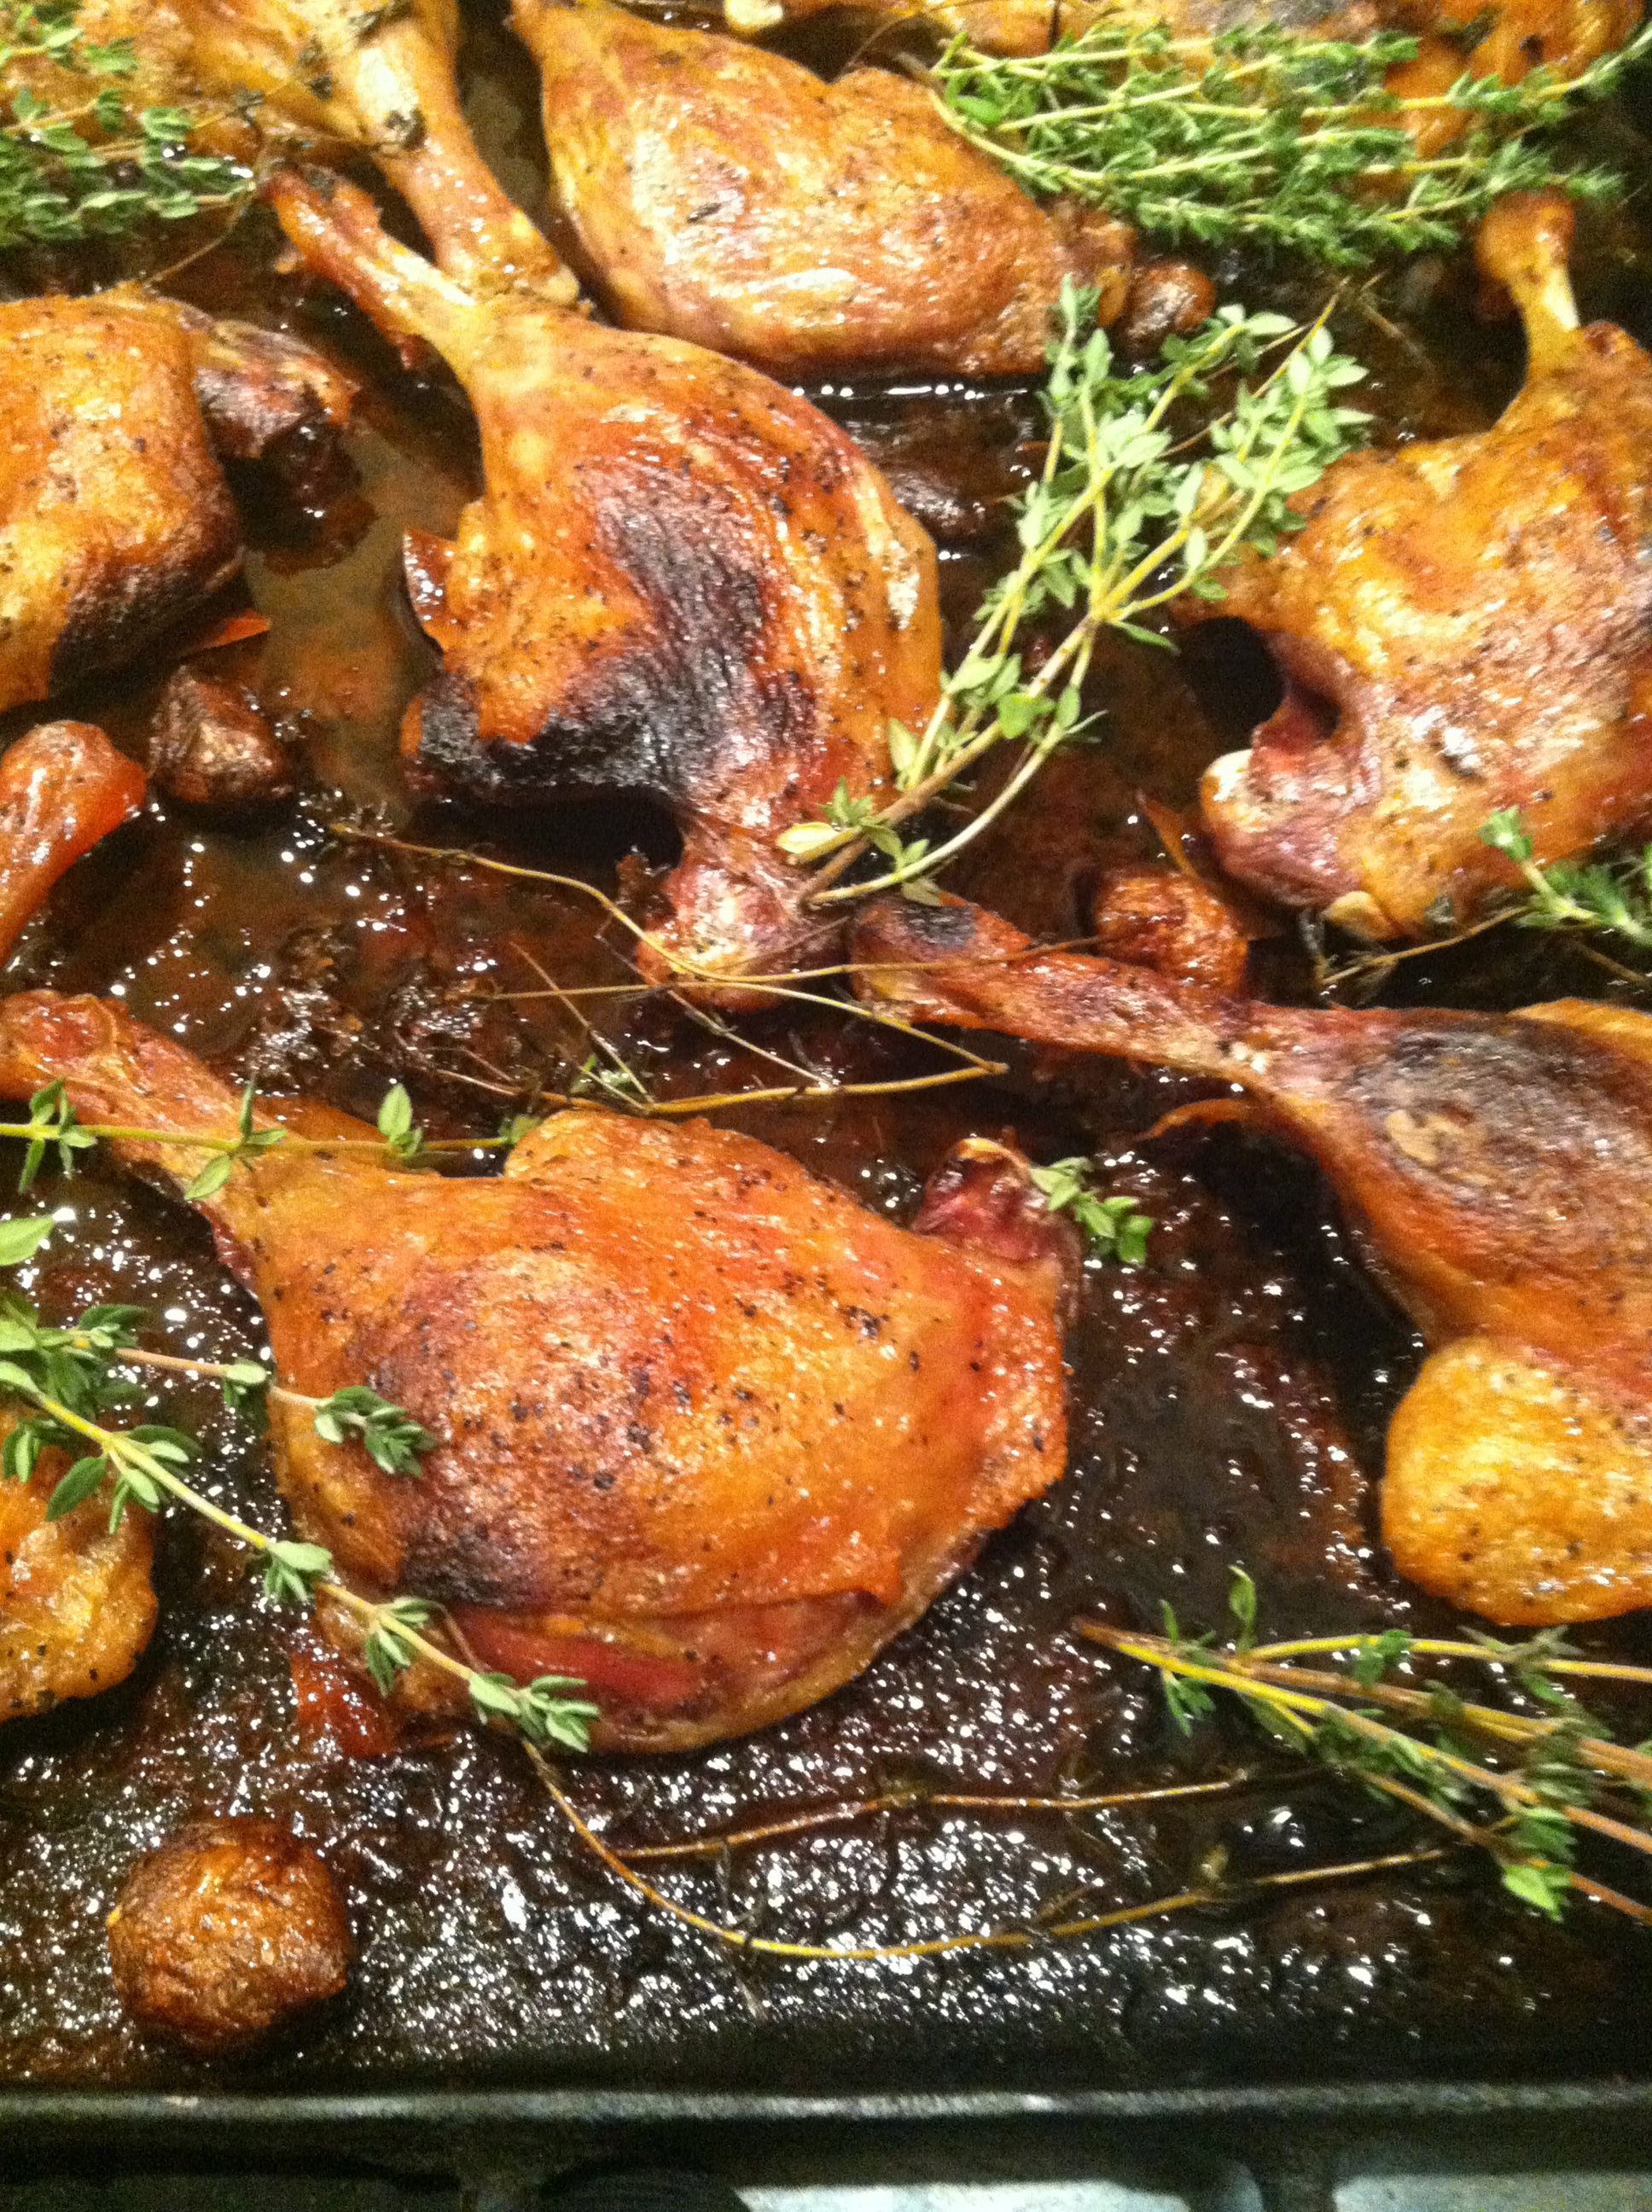
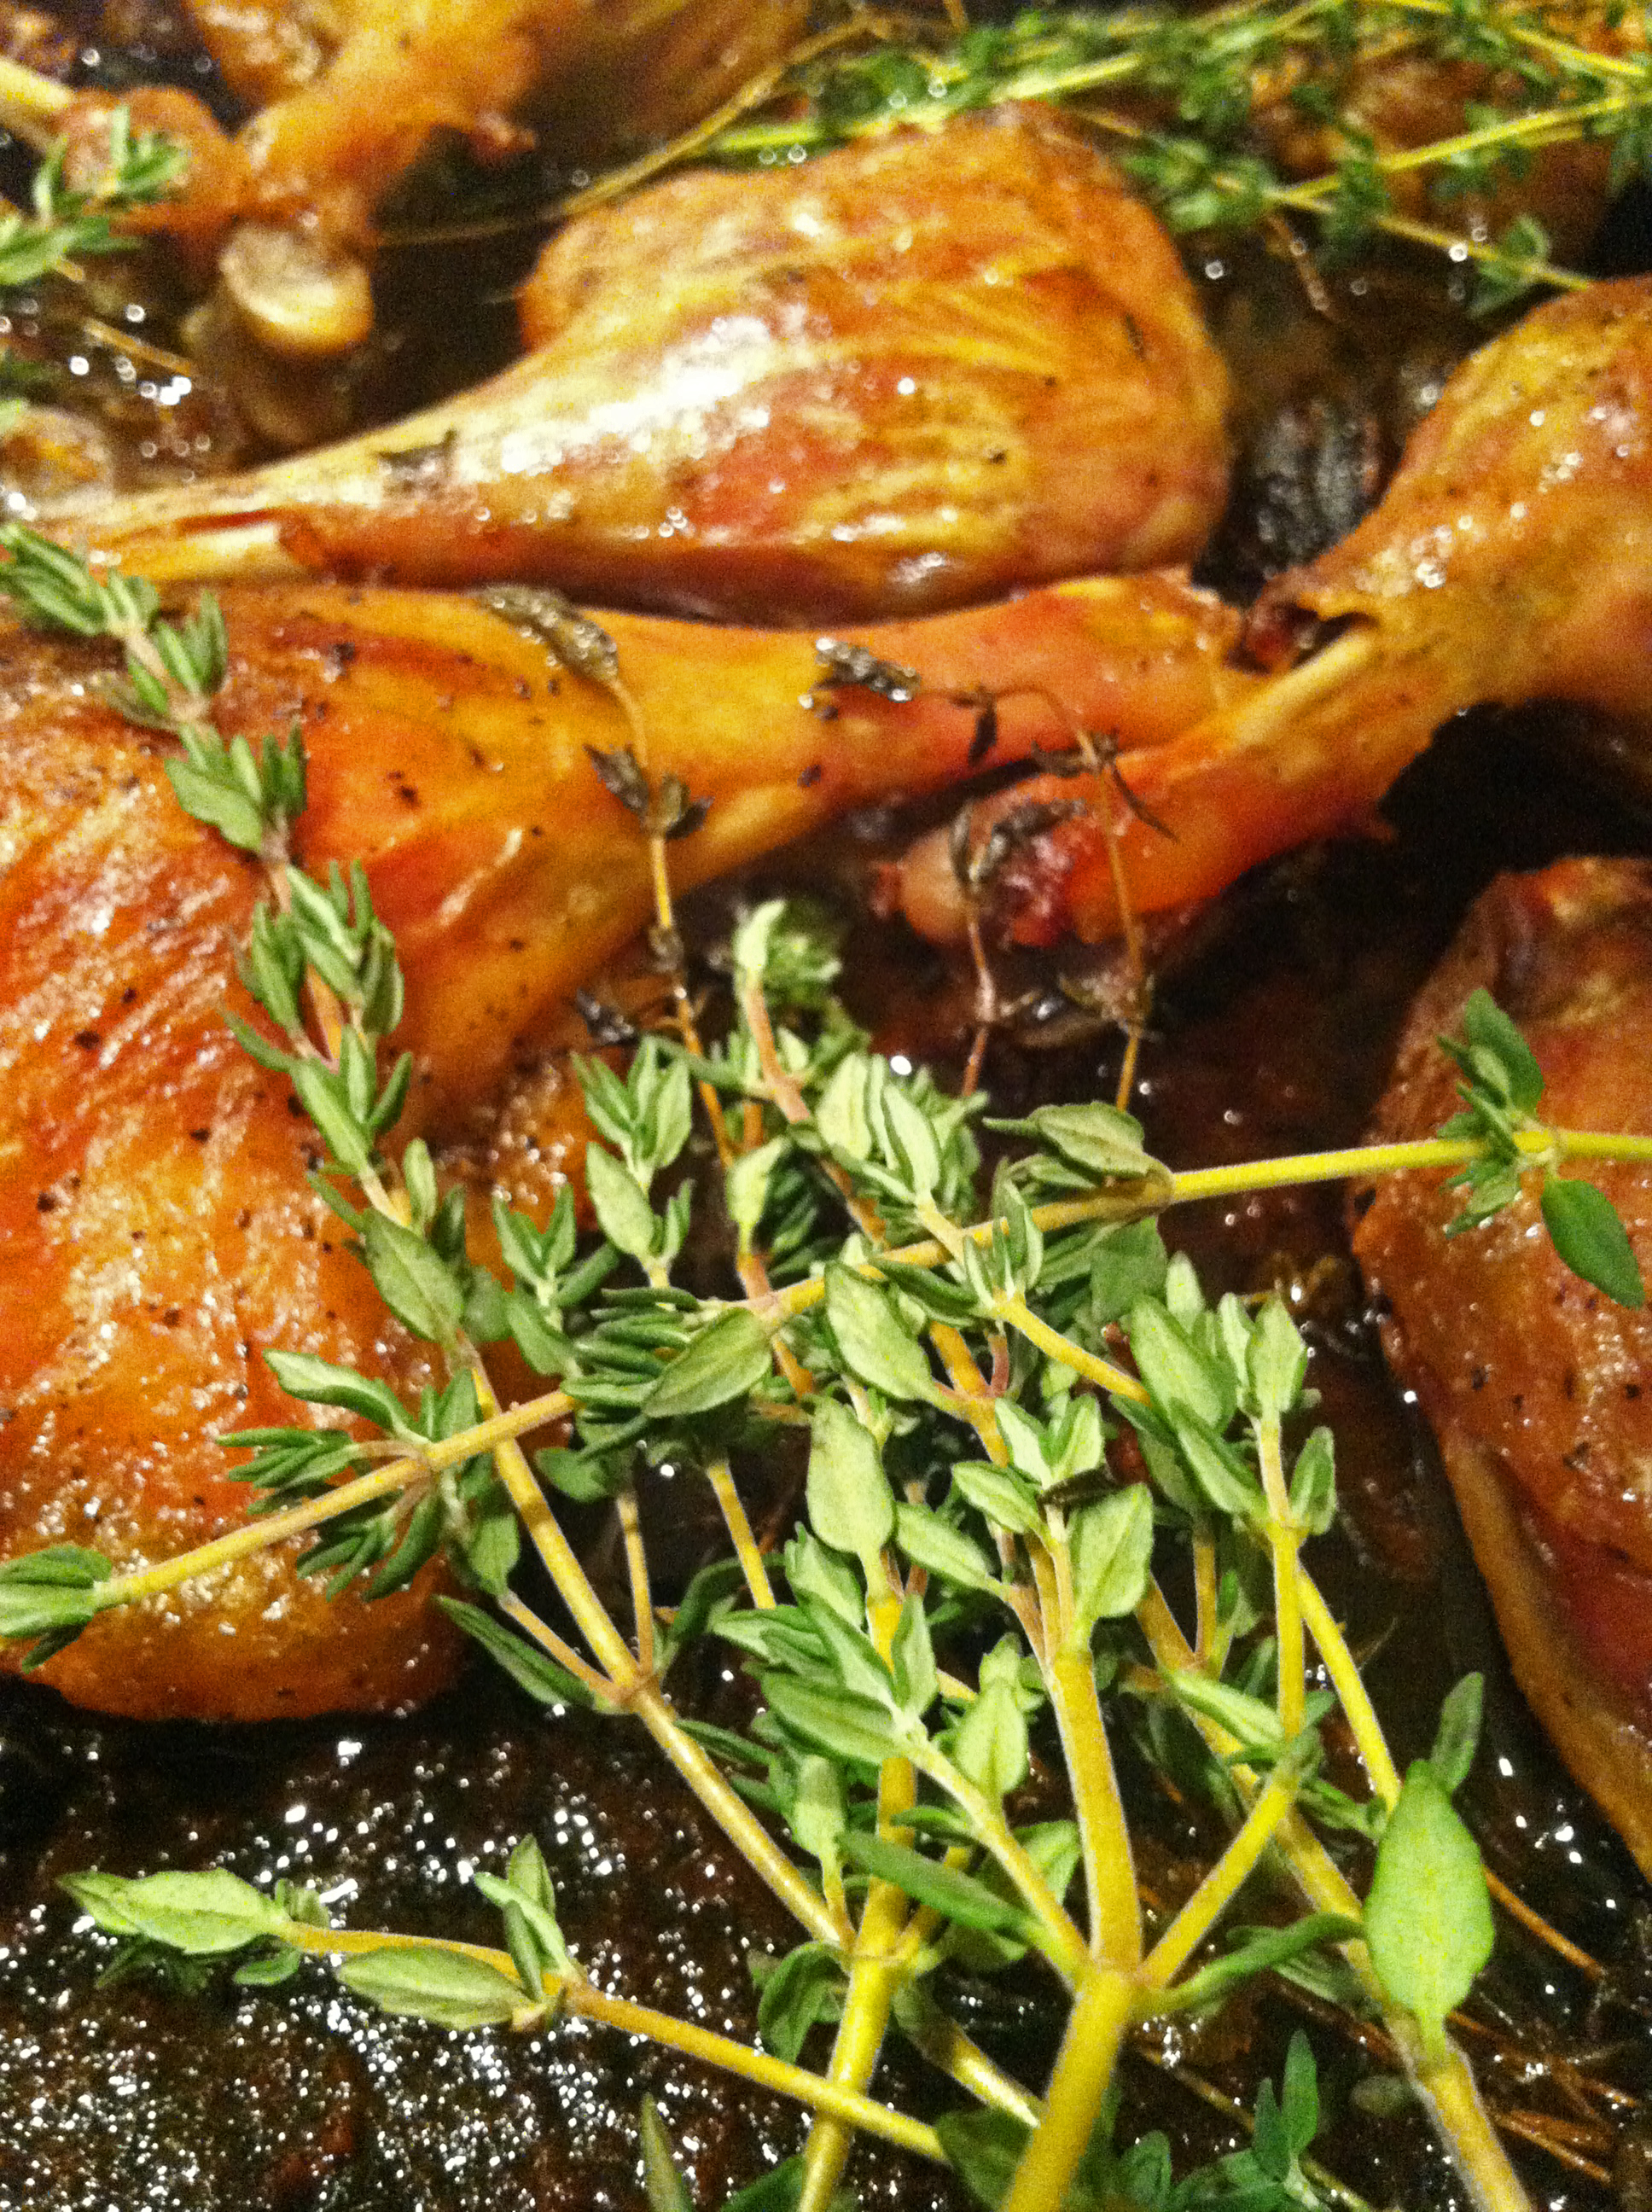
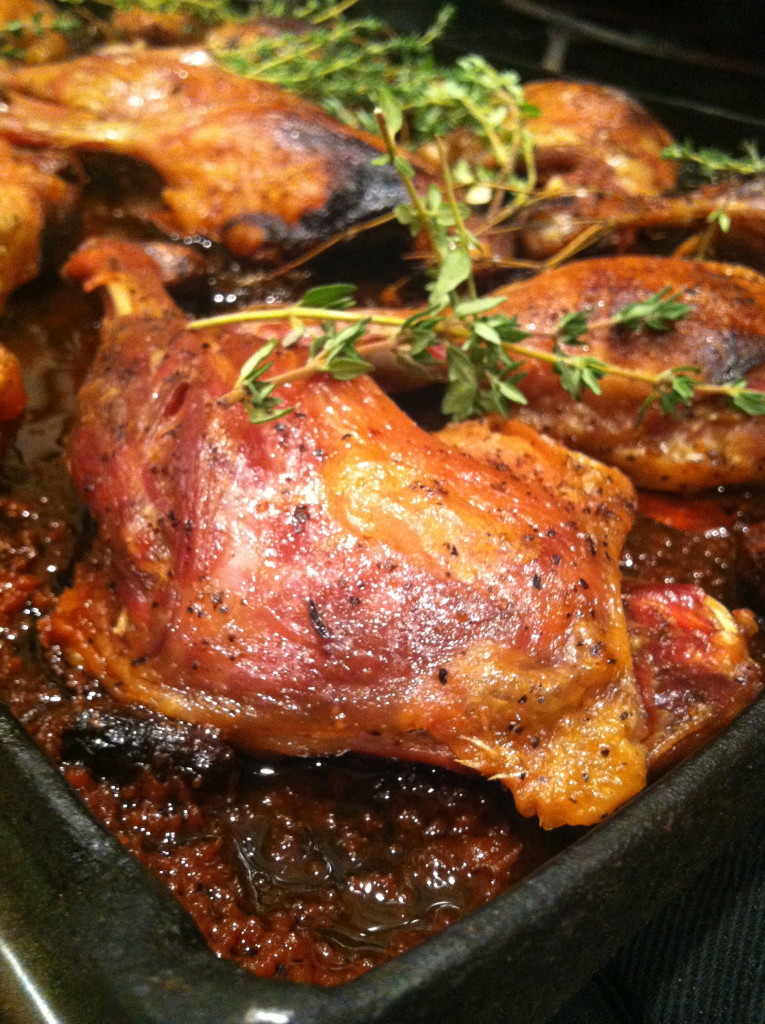
Off came the foil for the last 45 minutes of my crispy “duck confit” leg adventure and the smell that infiltrated the kitchen was heaven! I was so excited for Enrique to sample my latest adventure, I could hardly wait those last minutes.

I finished the plate off with some fresh green beans, quickly fried with sliced garlic. (Sounds like duck fat is the main course here but I promise it is simply for flavor and a little technique).

I didn’t even have to create a fancy plate, the colors and smells were enough to compensate for any amature styling. We dove into the duck legs first and didn’t speak for what seemed like eternity and then we looked up and over at each other and smiled with our lips glistening with the glorious liquid gold….

Duck-Confit

5.0 from 1 reviews
Crispy "Duck Confit" Legs
 
Print
Prep time
24 hours 30 mins
Cook time
1 hour 45 mins
Total time
26 hours 15 mins
 
This NOT a traditional duck confit so, I won't call it that and instead I will call it crispy duck confit legs! These can be done, anyway of the week and are simply delicious!
Author: Michelle Michelotti-Martinez adapted from Melissa Clark
Recipe type: Main
Serves: 6-8
Ingredients
  • ½ teaspoons kosher salt
  • 1 teaspoon freshly ground black pepper
  • ½ teaspoon dried thyme
  • 1 bay leaf, crumbled
  • 8 moulard duck legs (about 4 pounds total), rinsed and patted dry but not trimmed
Instructions
  1. In a small bowl, combine salt, pepper, thyme and bay leaf pieces. Sprinkle duck generously with mixture. Place duck legs in a pan in one layer. Cover tightly with plastic wrap and refrigerate for 24 hours. Note: Moulard duck legs can vary in size -- if yours are closer to 1 lb. each, instead of ½ lb., add an extra 6-12 hours to the curing time if possible, and increase the spice mix proportionally by weight. The next day, heat oven to 325 degrees. Place duck legs, fat side down, in a large ovenproof skillet, with legs fitting snugly in a single layer (you may have to use two skillets or cook them in batches). Heat duck legs over medium heat until fat starts to render. When there is about ¼ inch of rendered fat in pan, about 20 minutes, flip duck legs, add some olive oil to pan OR duck fat, if you have, cover pan with foil, and place it in oven. If you have used two pans, transfer duck and fat to a roasting pan, cover with foil and place in oven. Roast legs for 1 hours, then remove foil and continue roasting until duck is golden brown, about 40-45 minutes more. Remove duck from fat; reserve fat for other uses. Serve duck hot or warm, over roasted potatoes
3.2.2929


Filed Under: Meat and Poultry Tagged With: confit, crispy, duck, duck fat, fat

Pesto Pizza with Roasted Tomatoes, Homemade Ricotta, and Caramelized Onions

March 13, 2015 by Michelle Michelotti-Martinez

Pesto Pizza with Roasted Tomatoes and Caramelized Onions

Pesto Pizza with Roasted Tomatoes and Caramelized Onions in Pizza Oven

I simply adore Italian food and whether I like pasta or pizza better is so hard to say, in fact, it’s impossible. I love them both for many of the same reasons and for many different ones.

Both fill my comfort food addictions and needs! Both are creative, fun to make, and involve CARBS which I ADORE! Both seem simple but to perfect from scratch is not easy; it takes time, patience, knowledge, and a good “nonna” for a teacher.

As for the differences, I could make pasta everyday, period. I fantasize about the various recipes, shapes, sauces, and pairings. I ADORE making pasta. Pizza, I love to make just not everyday BUT when I want something and think about the two, chances are I will eat pizza more often than pasta. So, try to figure this one out……okay never mind, don’t…..

Honestly, at the end of the day, it’s not as complicated as I am making it sound. If you love Italian food, I really don’t know anyone who doesn’t and if I did, I probably wouldn’t associate with them, it’s a difference I couldn’t comprehend, but if you do love it as much as I then pizza or pasta, who cares, just MANGA!

On that note, everyone has a recipe for a margarita pizza so I wanted to post a recipe that is a little more unusual but incorporates ingredients that most everyone loves and this pesto pizza with roasted tomatoes, homemade ricotta, and caramelized onions just rocks! If you have a pizza oven or know someone who does (I happen to know someone, mille graze a caterina e giovanni:), use it….but if all you have access to is an oven, it does the trick. I would suggest investing in a pizza stone if you don’t have one, it’s the closest thing you can get to mimicking cooking in a pizza oven!

Now go and figure out your favorite…..pizza, pasta, or BOTH….. before you contemplate, pour a glass of vino!

5.0 from 1 reviews
Pesto Pizza with Roasted Tomatoes, Homemade Ricotta, and Caramelized Onions
 
Print
Prep time
25 hours
Cook time
30 mins
Total time
25 hours 30 mins
 
If you are a pizza addict like me, this version is scrumptious!
Author: Michelle Michelotti-Martinez
Recipe type: Main
Cuisine: Italian
Serves: 8
Ingredients
  • Pizza Dough:
  • 4 cups flour
  • 1½ cups warm water
  • 2¼ tsp fresh yeast
  • 2 T + 2 tsp olive oil
  • 1 tsp salt
  • 1 tsp sugar
  • Caramelized Onions:
  • 2 sweet onions, halved and thinly sliced
  • olive oil
  • marsala wine
  • salt
  • Pesto:
  • 2 cups fresh basil
  • 2 cloves of garlic
  • ¼ - ½ cup olive oil
  • ¼ c toasted pine nuts
  • parmigiano-reggiano cheese
  • salt and pepper
  • Roasted Tomatoes:
  • 1-2 lbs cherry tomatoes
  • olive oil
  • salt and pepper
  • sugar
  • Homemade Ricotta:
  • 6 cups organic whole milk
  • 2 cups organic heavy whip cream
  • 1 tsp salt
  • 3 T organic white wine vinegar
  • Toppings:
  • asiago cheese
  • fresh mozzarella cheese
  • basil
Instructions
  1. Pizza Dough:
  2. Day before making pizza:
  3. Combine the bread flour, sugar, yeast and kosher salt in the bowl of a stand mixer and combine. While the mixer is running, add the water and 2 tablespoons of the oil and beat until the dough forms into a ball. If the dough is sticky, add additional flour, 1 tablespoon at a time, until the dough comes together in a solid ball. If the dough is too dry, add additional water, 1 tablespoon at a time. Scrape the dough onto a lightly floured surface and gently knead into a smooth, firm ball.
  4. Grease a large bowl with the remaining 2 teaspoons olive oil, add the dough, cover the bowl with plastic wrap and put it in a warm area to let it double in size, about 1 hour. Turn the dough out onto a lightly floured surface and divide it into 2 equal pieces. Cover each with a clean kitchen towel or plastic wrap and let them rest for 24 hours. This allows the yeast to rise fully.
  5. Caramelized Onions
  6. On stove top in medium sized pan over medium heat, add a little olive oil and warm. Add onions and sauté. Add a little more olive oil as they cook and turn heat down a little bit to slow cooking. When starting to brown, add about ¼ cup marsala wine and a little salt. Let onion cook way down til golden brown.
  7. Roasted Tomatoes:
  8. Preheat oven to 350. Line a baking sheet with parchment paper and spread out tomatoes. Drizzle with olive oil, season with salt and pepper and a little sugar. Place in oven and cook until roasted, about 20-25 minutes.
  9. Homemade Ricotta:
  10. In a saucepan on stove over medium heat, put in the milk, cream, salt, and vinegar. Bring to a medium heat and boil where it starts to separate. Put in a mesh colander over a bowl until liquid is drained.
  11. To Make Pesto:
  12. In a food processor, add basil and garlic. Pulse until well blended and finally chopped. Add ½ pine nuts and ¼ cup olive oil and run until well blended. Add a little salt and pepper and pulse. Check consistency and flavor. Add oil and seasoning if necessary. Don't want pesto "runny" but spreadable.
  13. To assemble pizza:
  14. Preheat oven to 500. If you have a pizza stone, preheat in oven for 15-20 minutes but if using a baking sheet then don't preheat. Roll out 1 of the pizza balls in desired shape, rectangle or round, to desired thickness, I like really thin crust. Prick dough with fork as to not form bubbles.
  15. Spread basil on bottom to of dough. Add ricotta in small amount around pizza and same with mozzarella. Add ½ caramelized onion and ½ tomatoes and top with a little asiago and parmigiano-reggiano cheese. Remember, pizza is a balance of crust and toppings, don't "load up" with too much cheese. Repeat with other pizza ball.
  16. Bake for 10-15 minutes, until crust is browned well and toppings are melted. Pull out of oven and dot with fresh basil and drizzle with olive oil. Cut and serve immediately with roasted red pepper flakes and fresh grated parmigiano-reggiano cheese.
3.2.2929

Pizza Oven with Four Cheese Pizza and Pesto Pizza with Roasted Tomatoes and Caramelized Onions 2

Filed Under: Pasta, Pizza, and Polenta Tagged With: asiago, basil, basil pesto, caramelized onions, dough, homemade ricotta, Parmigiano-Reggiano, pizza, roasted tomatoes

Molka Cake with Penuche Frosting

February 27, 2015 by Michelle Michelotti-Martinez

Molka Cake with Penuche Frosting 3

Molka Cake with Penuche Frosting 9

Do you have that favorite childhood birthday cake recipe? Maybe it’s nothing more than a box cake with frosting out of a can but it brings back the BEST memories of days gone by? That time each year where for one day you feel special to the world…..and the birthday cake was the secret.

For me, I was blessed to get a homemade molka cake with penuche frosting. It came from my Dad’s side of the family, passed down several generations and still going. This is my ultimate cake fantasy ABOVE and BEYOND ANY other cake in the world. Not only is it dense, rich, moist, and delicious, it is jammed packed with memories of anticipation for each one of our birthdays as it was the ULTIMATE treat. I still have photos from all our birthdays with that molka cake as the centerpiece of the table. I don’t remember ONE gift I received but I remember that cake, perhaps that was my gift.

I have such fond memories of watching my mother, grandmother or great grandmother make this for each one of us children. We weren’t able to request it except on our birthdays so the anticipation almost exceeded everything. When I grew up and still got this as my cake of choice, it always met the expectation, always. Now, I make it for my nieces and nephews and it has become their favorite too.

As you read the ingredients, some of them might look peculiar….potato? Seriously? In a cake??? But because of this one ingredient, you will never worry about a dried out or overbaked cake, it keeps it moist and dense.

So, if you have someone special to bake a cake for whose recipe goes back over 100 years, this is a gem. Hopefully the memories you create will be as fond as the ones I remember…..

Molka Cake with Penuche Frosting 1

Molka Cake with Penuche Frosting 5


Molka Cake with Penuche Frosting 12

Molka Cake with Penuche Frosting 6

Molka Cake with Penuche Frosting
 
Print
Prep time
40 mins
Cook time
30 mins
Total time
1 hour 10 mins
 
Author: Michelle Michelotti-Martinez
Recipe type: Dessert
Serves: 8-10
Ingredients
  • Molka Cake:
  • 1½ cup sugar
  • 1 c butter or crisco (I prefer butter)
  • 4 T cocoa
  • 1½ cup mashed potato (russet) - boiled and pushed through a mesh strainer
  • 1 c buttermilk
  • 1 tsp. baking soda (in buttermilk)
  • 4 eggs, separated
  • 2 cups flour
  • 1 tsp. salt
  • 1 tsp. vanilla
  • ½ cup golden raisins
  • ½ cup chopped walnuts
  • Penuche Frosting: (recipe adapted to make 1½ quantity)
  • ¾ cup butter
  • 1½ cup brown sugar
  • ¼ cup + ⅛ cup whole milk
  • 2¾ - 3 cups powdered sugar
Instructions
  1. Molka Cake:
  2. In a sauce pan over medium heat, bring 2 russet potatoes to a boil and cook until very tender ( I cut in half and this will be a little more than you need for cake). Drain, cool, then put through mesh strainer and measure out 1½ cups.
  3. Turn oven onto 350 and grease and flour 2 cake pans.
  4. In a mixer, combine sugar and butter (or crisco) until light and fluffy, about 10 min.
  5. Add in the cocoa and potato and mix well.
  6. Add egg yolks and mix well.
  7. Pour milk into glass measuring cup and add soda and mix.
  8. Combine all dry ingredients in a bowl.
  9. Add the dry and wet ingredients, alternating between flour mixture and buttermilk mixture (start and finish with flour). Mix for 15 minutes or so.
  10. In a separate bowl, whip egg whites until stiff. Fold into batter.
  11. Add nuts and raisins and fold in.
  12. Pour mixture evenly between both cake pans.
  13. Cook for 30 minutes or until toothpick comes out clean.
  14. Penuche Frosting:
  15. Over medium heat on stove in a saucepan, melt butter.
  16. Stir in brown sugar and bring to boil and stir over heat for 2 minutes.
  17. Add milk and bring to boil stirring constantly.
  18. Cool to lukewarm and gradually mix in powdered sugar until spreadable frosting.
  19. *Note - Cake is easier to frost if it has been frozen and frosted frozen. Put in fridge til ready to serve.
3.2.2929


Filed Under: Delectable Desserts Tagged With: cake, chocolate, frosting, molka, penuche

Baked Crispy Chicken Thighs

February 19, 2015 by Michelle Michelotti-Martinez

Baked Crispy Chicken Thighs 1

You know those weekdays when it just seems daunting to THINK about cooking a meal much less actually doing it? Yep, I thought so…..

We cook a whole chicken almost weekly but it takes a while and some nights we aren’t home until later but I still find myself craving that roasted chicken….it’s such a great comfort food.

My solution on those late weeknights and cravings….baked crispy chicken thighs! They are my favorite part of the chicken because of the flavor and ANY time of year they sound delicious. They cook relatively quickly and if I just have time for a salad to accompany, that works out but if I can, I like to roast some baby potatoes along side……the cool thing about chicken is you can pair almost anything for a side that sounds yummy to you so, go big!

This baked crispy chicken thigh dish is adapted from my whole roasted chicken recipe but you can change up the herbs and use thyme, rosemary, or tarragon, they are ALL good.

I hope this recipe works for you on those weekdays when you feel daunted or even when you don’t, I promise, it’s delish!

Baked Crispy Chicken Thighs 3

Baked Crispy Chicken Thighs
 
Print
Prep time
5 mins
Cook time
40 mins
Total time
45 mins
 
This is a PERFECT quick, easy, and delicious weeknight dinner! Serve with potatoes and a salad!
Author: Michelle Michelotti-Martinez
Recipe type: Entree
Cuisine: American
Serves: 8
Ingredients
  • 8 bone-in, skin-on chicken thighs
  • Kosher salt and freshly ground pepper, to taste
  • Fresh parsley
  • 2 tablespoons butter
  • 1 lemon, cut into 8 rounds
Instructions
  1. Position a rack in the lower third of an oven and preheat to 400°F
  2. Season the chicken thighs on both sides with salt and pepper. Tuck a few leaves of parsley and a sliver of butter under the chicken skin.
  3. Heat the tablespoon of butter in a large ovenproof skillet or fry pan over medium-high heat. Add the chicken, skin side down, and cook until the fat has rendered and the skin is crisp and golden brown, about 10 minutes. Transfer, skin side up, to a plate.
  4. Pour off the excess fat from the pan. Return the chicken, skin side up, to the pan and scatter the lemon slices on top. Transfer to the oven and roast until an instant-read thermometer inserted into the thickest part of a thigh, away from the bone, registers 170°F (77°C), 25-30 minutes.
  5. Scatter an additional 2-3 tablespoons of fresh herbs on top. Let rest for 5 minutes before serving.
3.2.2929

IMG_5749

IMG_5753

Filed Under: Meat and Poultry, Uncategorized Tagged With: baked, Butter, chicken, chicken thighs, crispy, herbs, lemon, parsley, roast, rosemary, tarragon, thyme

  • « Previous Page
  • Page 1
  • …
  • Page 9
  • Page 10
  • Page 11
  • Page 12
  • Page 13
  • …
  • Page 18
  • Next Page »

Primary Sidebar

Meet Michelle and Enrique

Eatentions is a way of being with our food experience. It is a thought-filled process starting with connection to source all the way through the finished creation. We like to call it "from root to experience". Its the entire thing, its that conscious. Thank you for popping by and welcome to our life.

Let’s Connect!

Archives

Categories


My Favorites

Arancini|Eatentions

Arancini

Torta Caprese

Torta Caprese

Lemon Pasta with Broiled Salmon and Charred Lemon|eatentions

Lemon Pasta with Broiled Salmon and Charred Lemon

Footer

Instagram

Instagram has returned invalid data.

Follow Me!

Connect With Us

  • Email
  • Facebook
  • Instagram
  • Pinterest
  • RSS
  • Twitter

We believe in celebrating amazing people, delicious food, great conversation, sustainability and experience. For us,our lives have always been about love, family, friends and sharing all things together. Connecting with people through food, sharing stories and supporting one another to live our dreams and our purpose is what inspires us daily.

My Favorites

Arancini|Eatentions
Torta Caprese

Copyright © 2026 · Foodie Pro & The Genesis Framework